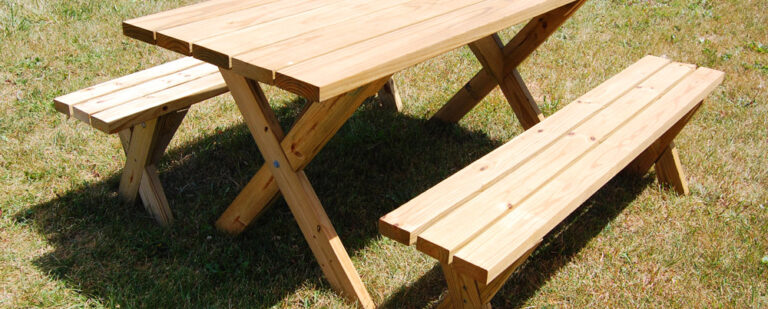
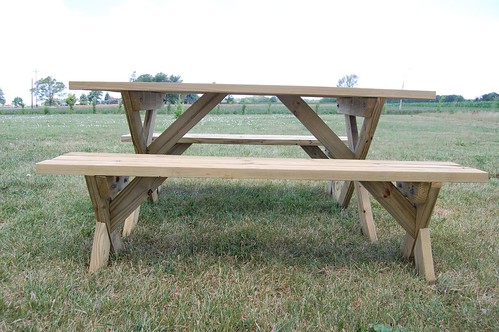
See this picnic table? I love eating at this thing almost as much as I loved building it. Detached benches, no visible screws on the top, and a whole lot of AWESOME. The plan took some thought, but not an unreasonable degree of skill, and the result? Well, see for yourself.

My favorite parts?
- No exposed screws on the top of the table and benches (have I mentioned this yet)
- Lap joints on the legs of the table and benches
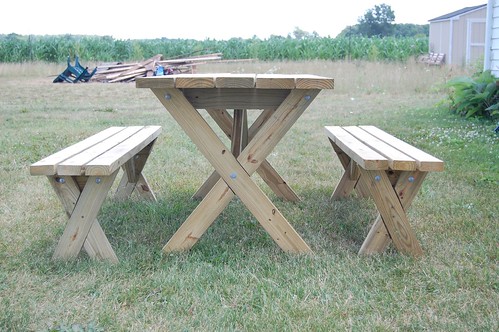
- The benches aren’t connected to the table, so it’s completely flexible
You can download the Popular Mechanics plan I used here. (At some point that link broke, but I hunted down the plan here on page 86 and 88.) It’s not a step-by-step plan, which is perfect for DIYers that like to, well, DIY a little bit of it. I made a couple of modifications, making the table and benches a few inches longer, and using a whole lot more powertools than they suggest.
Here’s my step-by-step look at the project.
Materials:
- 5 – 2x6x66″ boards for the top of the table
- 4 – 2x4x40ish” boards for the table legs
- 2 – 2x4x29ish” boards for the table cleats
- 2 – 2x4x29ish” boards for table braces
- 6 – 2x4x66″ boards for the top of the benches
- 4- 2x4x12ish” boards for the bench cleats
- 4- 2x4x12ish” boards for the bench braces
- 8- 2x4x20ish” boards for the bench legs
- 1 box 3-1/2″ deck screws (plus a couple of 2″ screws for the ends of the table cleats.
- 12 – 3/8″ lag bolts with washers and nuts (stainless steel if you can get them, but I can tell you you can’t get them at Lowes. I used hot-dipped.)
- 6 – 3/8″ Lag screws with washers. (Again with the stainless, again Lowe’s doesn’t carry them.)
Tools:
- Miter or circular saw (or both)
- Drill & bits
- Sockets and wrench for the lags
- Chisel & hammer for the laps
- Level and square
- Clamps
Step 1: Cuttin’
The table and bench tops are the easiest. 5 2×6’s and 6 2×4’s cut to 66″ in length. Then it gets a little bit trickier. One of the things I loved about the PS plan, was the suggestion to build a template.

Even though I used the miter saw and had the angles all set out for me on the saw, the template was still well worth it to help with visualization. Essentially it meant drawing (or getting an engineer to draw) a 27×28-1/2″ square on some plywood and then drawing in the legs. Made cutting the lap joints in the legs exceptionally accurate.
The table legs were cut with the saw set at 38-degrees.
The bench legs were cut with the saw set at 24-degrees.
The cleats were cut at the same angle so they would be flush with the angle of the legs, and the braces were all cut at 45-degrees.
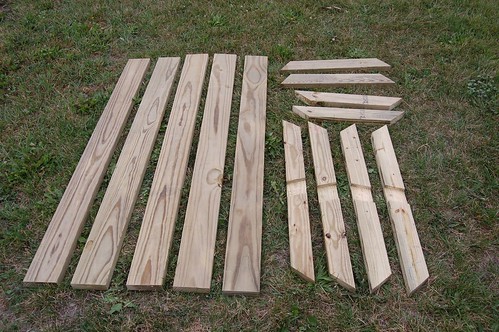
All of the table pieces: 4 leg pieces, 2 cleats, 2 braces, and 5 boards for the top.
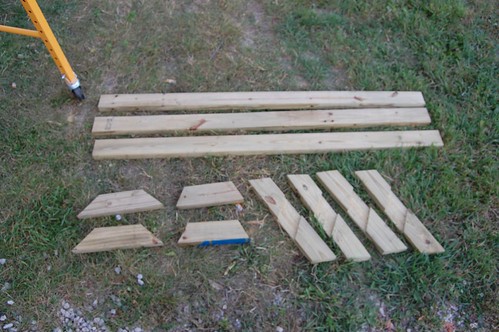
Same for the benches: 4 leg pieces, 2 cleats, 2 braces, and 3 boards for the top each.
Step 2: Lap it up
The lap joints were extra fun and definitely worth it when it came to the final product. I did them two ways.
First, I broke in MysteryMan’s hand saw. I actually don’t own one of these, probably because it doesn’t have a power cord. But still, it was fairly quick, and very easy. I used the template to lay out the joint, and then cut notches 3/4″ deep.
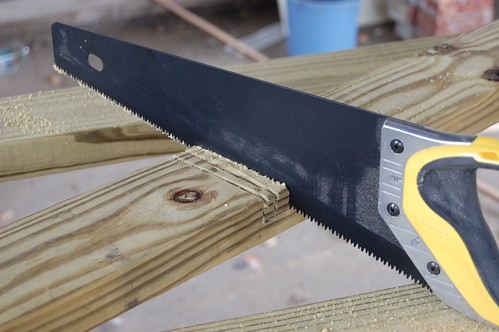
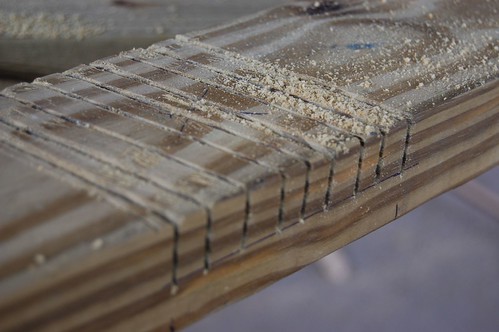
Then I popped them out with the chisel. This one worked because it was what I had, but a wider one would have been ideal.
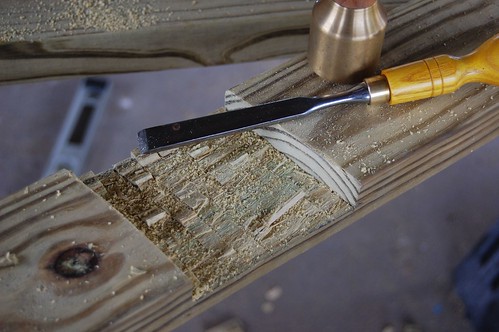
The other option is to set the depth of a circular saw to 3/4″ and cut the notches that way, which is faster to some degree, but you have to take enough time to be really accurate with the machinery… so really I think its whatever you’re most comfortable with.
Step 3: Assembly
Once all of the pieces are cut, assembly is pretty much a piece of cake. The boards should go right-side-down, and shim them out 1/4″ for the table. 1/2″ for the benches.
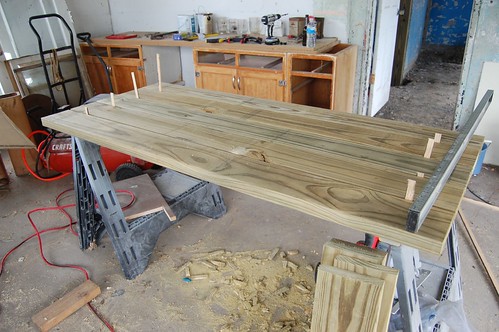
Then, lay out the holes to countersink the screws and attach the cleat to the top. Screws should be countersunk 1-1/4″ deep with a 3/8″bit. Use 3-1/2″ deck screws and don’t power drive them in! You’ll bust right through the top. Not that I would know from experience or anything. Hem.
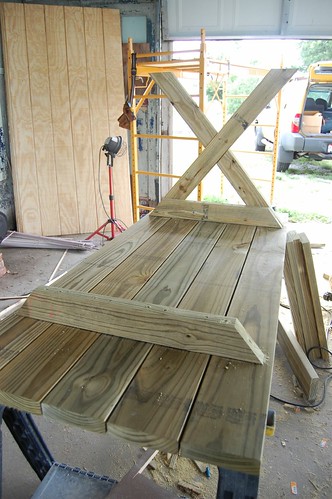
The legs are only a tiny bit trickier. Make sure the lap joints fit before you start assembling. Then attach them on the outside of the cleat by drilling a 3/8″ hole all the way through both leg and cleat (make sure you’re aware of where those deck screws are.)
Use a 3/8″ lag bolt, washer, and nut to attach them. Check for square 11 or 12 times. Then attach the brace with a lag screw through both legs and the brace, and a deck screw from brace to top of table.

Then it’s lather, rinse, and repeat for the benches, as you can see here (if you haven’t already):
DIYdiva: Building a Picnic Table Bench from kitliz on Vimeo.
Step 3: Add cold beer, good friends, and enjoy!
It really is that easy.

Comments are closed.