The easiest way to describe this is “like installing a wood floor, but upside-down.” Even if you’ve never done a wood floor before, the concept is pretty simple– take board, attach to ceiling. Rinse and repeat 400 times.
If you’re looking for a little more detail, this is what I can tell you.
Materials:
- Wood
- Stain/ polyurethane
Tools:
- Finish Nailer
- Hammer
- Hole saw and/or jigsaw
- Rasp
- Ladders or scaffolding
- Tape measure
- Miter saw, or hand-held circular saw (really, it’s 100 times easier with a miter saw)
- Table saw
1.) Finish first. Stain and polyurethane every single board, including the tongues of said boards, before even thinking about attaching it to the ceiling.
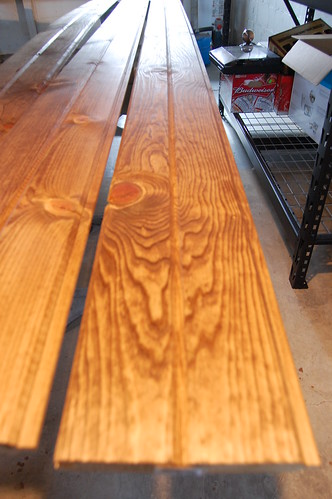
Try not to get too high from the fumes.
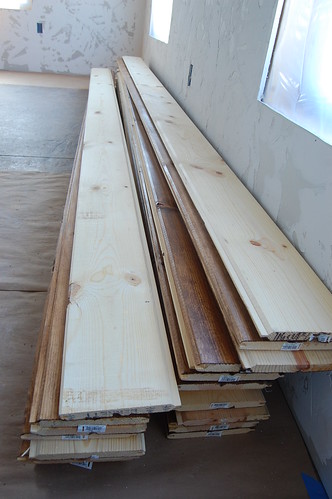
2.) Acclimate. Let the boards sit in the area you’ll be installing them for at least a couple of days.
3.) Prep. This is the part of “installing” the ceiling that requires a lot of standing around and head scratching. Here are a few pointers:
- There’s some debate whether or not you need to put drywall up before installing the wood (which is to say that my father told me I should, and I ignored him). We went with some visqueen and called it good. If you’re starting with drywall in place, find your studs and mark them by snapping a chalk line.
- Plan to start installing from the top and/or middle. You want the tongues to face down and out, so the “grooves” of your first two boards should butt up against each other.
- Measure to see if you should start a board or a seam in the very middle of the room. Best case scenario you have to do very little trimming down on your last pieces.
- Note the location of any electrical boxes or other obstacles.
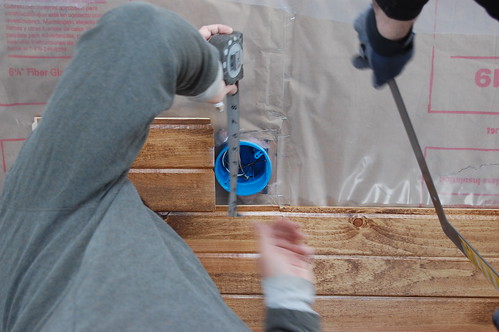
4.) Go for it. At some point you have to actually get up on the scaffolding and nail a board in. You’ll want to nail through the tongue of every board you install except these two. These first boards you will face nail.

You can hardly see that sucker, but you’ll still want to tongue-nail the rest of them to minimize visible holes.
5.) Cutting. To minimize waste you should start at one end and lay boards end-to-end. On the final board, cut it to fit and then use the “leftover” to start a new row. To make the seams less visible, cut the pieces at a 45-degree angle.
We’re getting fancy around here and I even made a diagram.
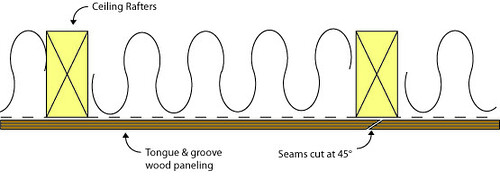
Notice the boards are perpendicular to the rafters. I have no idea how you would accomplish this otherwise, so I don’t think you’ll try… but I’m saying it just in case.
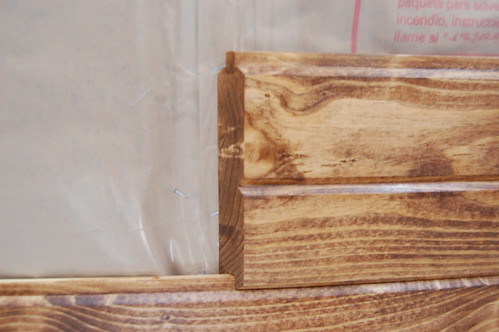
6.) Nailing. Boards should be nailed at a 45-degree angle through the tongue. (Have I mentioned this yet? One or two hundred times?)
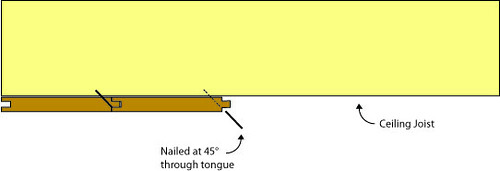
You can see, the 45-degree angle means the nail is hidden, but the tongues can still fit into the groove of the next board.
We practiced this on a scrap piece of wood before nailing the first one in.
Also, we tried this with both a brad nailer and a finish nailer. The brad nails were a little too small and would shoot through the board at times. The finish nailer- as you would expect- was just right.
7.) Tight fit. Do not bang on the tongue of a board to get it to fit better. Use a scrap piece of wood with a groove cut it in that fits over the tongue (or a scrap piece of ceiling material) and fit that over the board before tapping gently with a hammer.
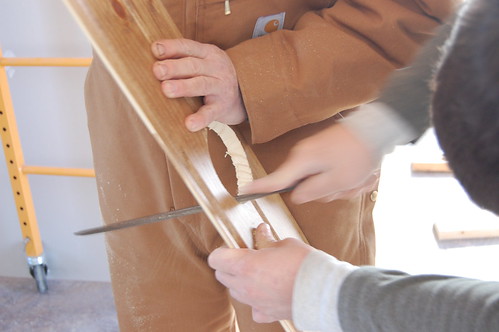
8.) Obstacles. We had a couple of electrical boxes to work around and I let the engineer handle the proper math for that. Temporarily nailing a piece of scrap up to help get the correct measurements proved invaluable.
We cut these out with a 3″ hole saw, and then used a rasp on the edges to adjust a little if necessary.
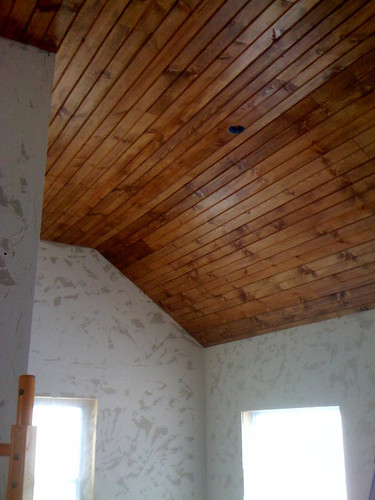
9.) Finish. The last boards will likely need to be ripped down to the right width (unless you really lucked out on the size of your ceiling). After that all that’s left is to lay down on the ground and admire your handy-work.
You may need to peel your eyes away from that gorgeousness some time in the next decade. But for now, enjoy!

84 Responses
What gauge of nails did you use? 18, 16, 15 or ?? I have an 18 gauge finish nailer, but wondering if 15 or 16 would be better??
hi, looks amazing. can you write the species of wood and stain info at the top or in response, please and thank you
Thank you so much for this wonderful blog you have here. I really learned a lot.
I’m here because I was looking for pictures to inspire my school bus t&g ceiling. I’m so grateful to have landed here. I’m a young, pseudo-farmer (on hiatus after my box truck conversion burned down on the farm I lived/worked on) pursuing a skoolie build to hopefully someday have a piece of land to start with something on the ground. I’ll be back here, for sure.
I’m here looking for answers for the issue we have with our tongue n groove ceilings. We primed our boards w oil base white after they were up, then Caulked, then Painted over w a latex white paint. After a couple of months we now have distinctive cracks down every place the tongue n groove met. We do not know what to do now. It looks bad. We live on a pier n beam home and this ceiling is in the new add on.
Absolutely gorgeous!
The ceiling turned out great, thanks for the article it was very informative.
Comments are closed.