I admit to being slightly stumped in the “unfinished cabinet aisle” at Lowe’s as I started counting out the sizes for sink bases. Thirty-six inch, thirty inch… um… twenty-four? Anyone? Anyone? Bueller?
Because we have exactly room for seventy-three linear inches of cabinetry in the station, and nary an inch to spare. That gives us room for two twenty-four inch cabinets and space for a mini-fridge, and no amount of creative measuring was going to make a thirty inch cabinet work.
Then, after a moment pondering the mysteries of the universe and cabinet measurements, I remembered I own a drill.

Therefore, the universe (and wonderful world of cabinetry) is my oyster.
Materials:
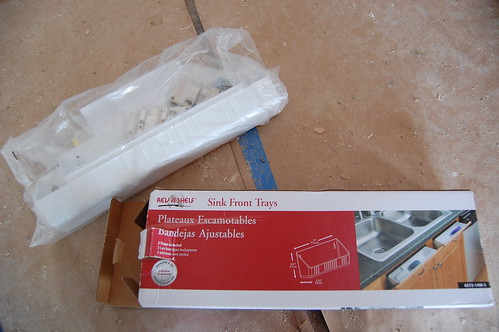
- 24″ unfinished base cabinet
- Sink-front tray kit
Tools:
- Drill (including 3/16″ bit)
- Pliers
- Pencil
This one was so easy, I’m not sure it even merits a post and yet, it almost didn’t occur to me that I could do this and I wouldn’t want anyone else to fall into that trap. Also, these trays can be installed on a regular sink base and are ultra-handy.
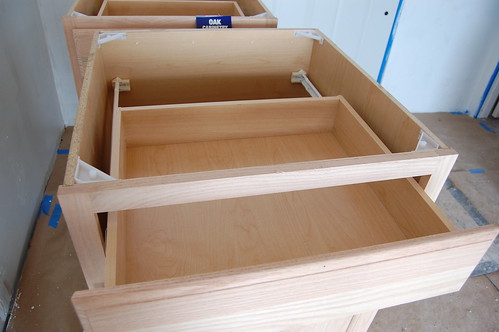
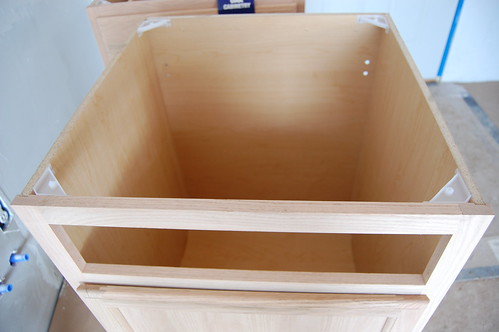
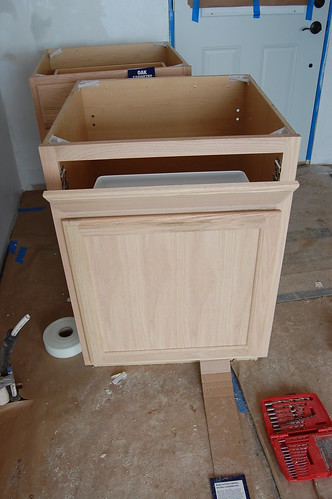
I started with this:
The reason a 24″ base will work for us, is because we’re using a small “bar” sink we salvaged from a demo-job in the Station kitchenette.
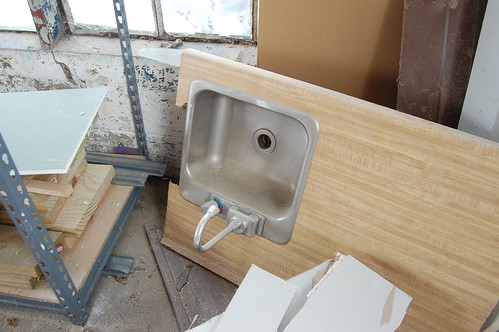
Yeah, it came with the counter top.
Step 1: Remove Drawer (and hardware)
It only takes 2 screws to remove the face of the drawer…
So that was easy.
Then the drawer track, which was held on by a screw…
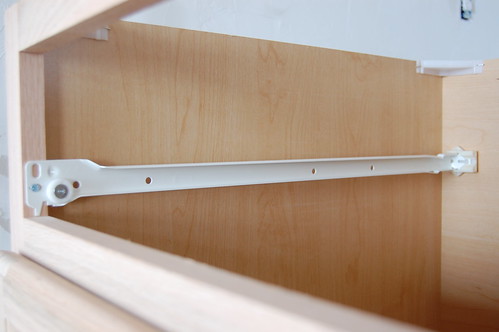
… and these.
Easy enough to pinch and remove them.
And at this point you could simply screw (or glue) the drawer face back on to the cabinet and be done with it. But having handy little sink-front trays is more exciting.
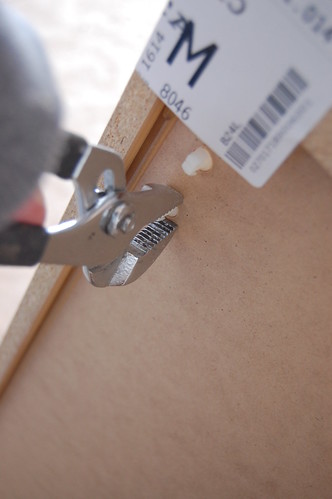
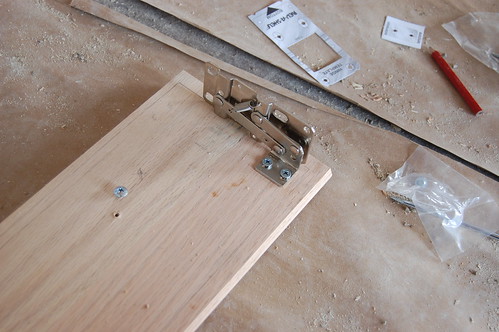
Step 2: Install Hinges
I bought this kit at Lowes for something like $15. When you will only have 72″ of cabinet space for a year, every little bit of storage counts.
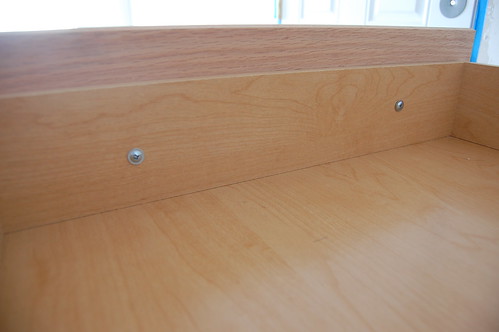
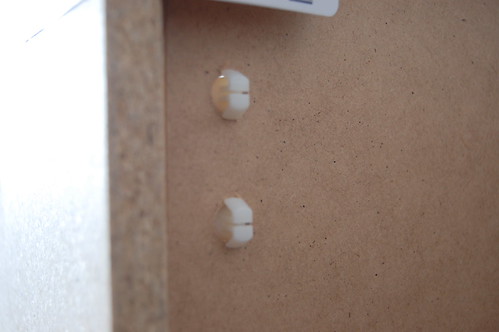
It came with a handy little template for marking everything out.
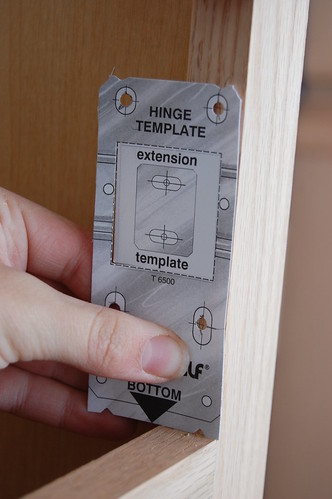
Which results in perfectly pre-drilled holes.
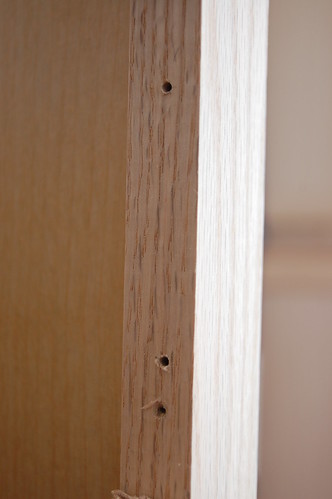
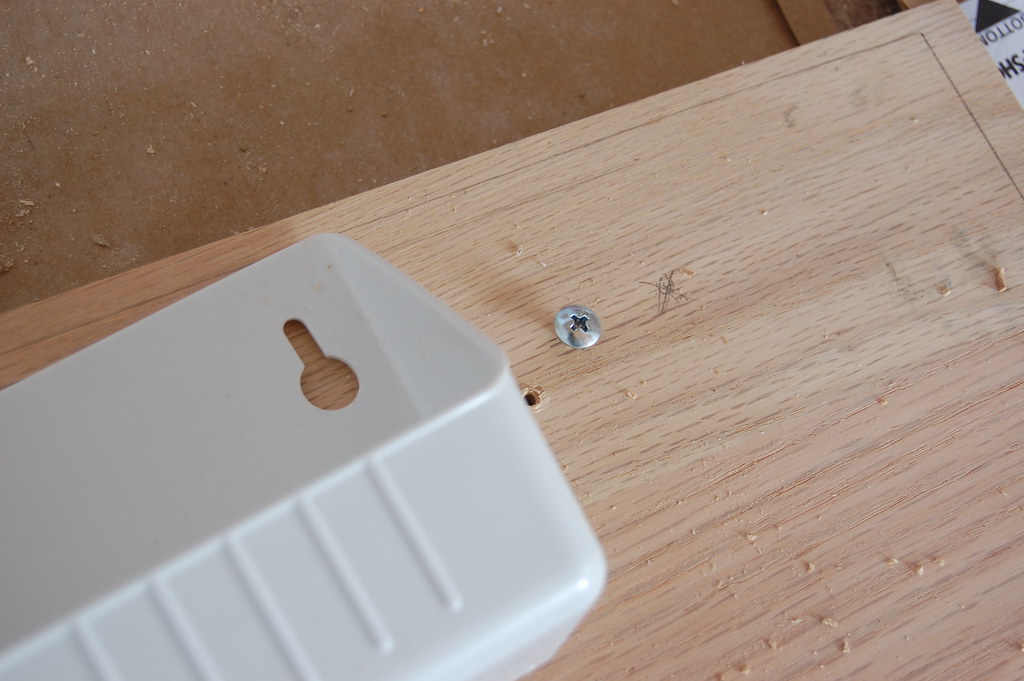
For hinge placement, I marked the opening of the cabinet frame on the back of the drawer face.
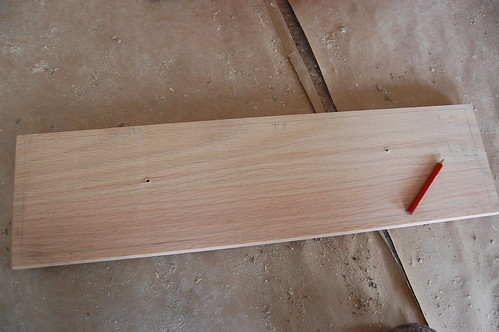
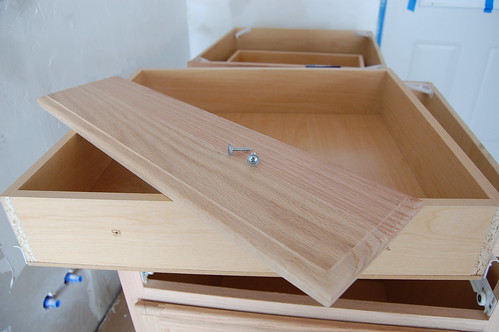
And while laying everything out, I also inserted the screws that would hold the sink-front tray.
The hinges themselves took a minute or seven to figure out, but after the mechanics of it made sense, it was pretty easy to install the hinges (again, based on the templated holes.)
And when both hinges were attached to the drawer-front, to fasten them to the cabinet frame.
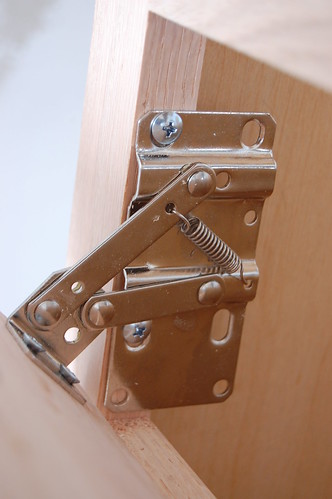
Fascinating stuff, isn’t it?
Step 3: Insert Tray & Enjoy
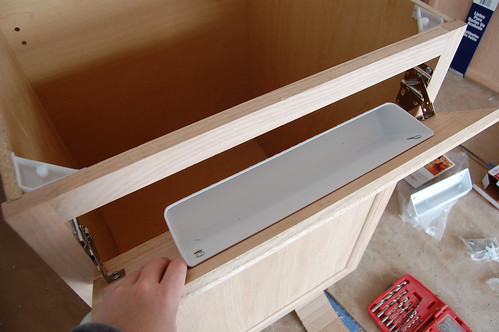
All in all, it took about 20 minutes (if you don’t count the eleven minutes it took me to find the drill bits.)
Here’s to not letting ourselves be limited by standard cabinetry sizes!

13 Responses
I grew up in a house that had those nifty sink front trays, and when I moved out I was amazed that no one else seemed to have ever heard of them! They are great for storing the dish brushes and scrubby pads out of sight. I wish I had some now, but I am renting and the landlady is less than interested in making any improvements… Sighhhhhhhhhhh…
Well, that is just awesome! Can you do a post next on how to remove soffits without destroying your existing cabinets? Because that is about where I’m at right now. UGH
Did you have any problems installing the sink? The sink in your pix looks like an over counter. Did you use any of the counter top? What did you do?
Thanks!
LOVE IT!!! I am remodeling on a budget OF COURSE! is there any other way! SOOOO this is so helpful because I insist on doing this ALL ON MY OWN!!
It’s a great sense of acomplishment & I LOVE the look on hubby’s face when it’s done!
🙂
WOW! I was so excited that I found a video that would help me build a simple sink cabinet. Once I got the end I was, Um huh? what? where’s the sink? where is the counter top? I was disappointed that I still don’t how to build one. Thanks, I guess?
Well, first of all, if you’re looking for a video, you’re on the wrong website. Also, this post does exactly what it says… shows you how to convert a cabinet with a drawer into something you can use as a “sink base cabinet.” That is an entirely different task than building/installing counters, or installing a sink or plumbing. I would suggest googling each of those projects separately. On this website you can find them here:
http://diydiva.net/2010/06/tile-101-how-to-build-tile-counters/
And here:
http://diydiva.net/2010/06/diy-home-basics-installing-a-new-sink-faucet-drain/
Thanks for clearing that up, Kit!! LOL I was wondering where the video was!!! Don’t let em get on your nerves sugar, I loved this post!! told me exactly what I needed to know. Thank you.
I was wondering about doing the same thing you did that is converting base cabinet to sink base cabinet. I hope structurally it can handle the weight, but either way if you did it I’ll have to give it a a shot.
Thanks again for the empowerment!
Thanks for posting! This is just what I want to do… use a drawer base cabinet for a sink base. Now, I just have to figure out how to shorten the bottom 2 drawers so the plumbing will fit “behind” the drawers.
How do I add support to use a base cabinet and turn it into a sink cabinet?
Love this! Thank you so much, Yours was the first post I came upon and it’s perfect. I was given cabinets by a client (lucky me) old but useable. And I needed to make a sink base out of a perfect-sized regular base with a drawer- so Great! Love what you did! I’m done looking. Thanks
I have what may be a stupid question. When installing the smaller bar sink (let’s say 15 inch), if it is an undermount sink, what is holding it up? The smallest sink base I can find is 24″ and I’d like a 12″ sink ideally. I’d prefer undermount. Any ideas?
You can typically install a smaller sink in a larger cabinet. There’s no existing internal structure to the cabinet itself that holds the sink in place, depending on the sink there may be some kind of clip or mount to the counter OR you may have to build a little framing in the cabinet if the sink calls for it.) For most sinks you can find the installation manual online and look up the recommended installation ahead of time… an undermount should work with a larger cabinet though.
Comments are closed.