Since it was ninety-seven degrees in my house last weekend, it seemed like building a clothesline so that I wouldn’t have to run the dryer in the house would be a logical project to undertake. Of course, that meant digging a couple of three-foot postholes in hundred-degree weather so it was probably a wash as far as “projects that will cool me down” went.
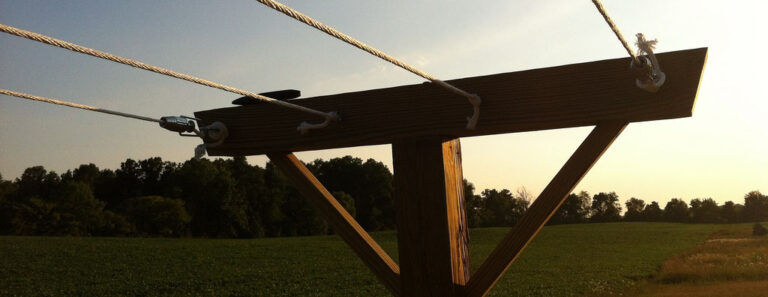
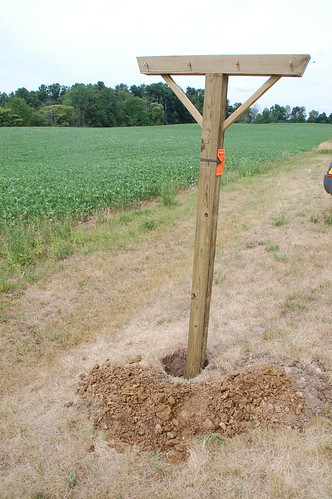
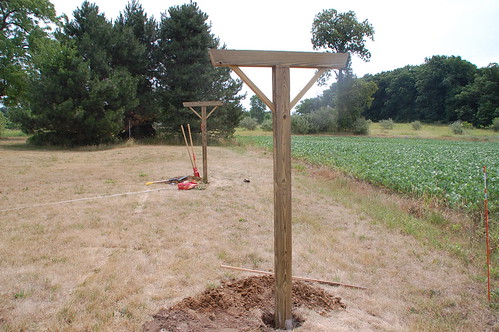
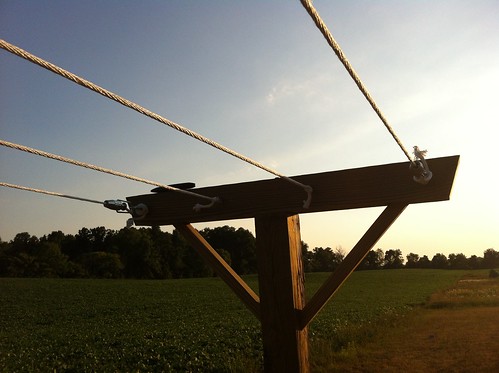
But I have this to show for it:

I mean, every country house has to have a clothesline, right? It’s not as if my neighbors get to see enough of my unmentionables when I’m forced to quickly and thoroughly strip down on my deck in broad daylight because a wasp flies up my shorts. Yes. That happened.
Note: I did manage to keep my pants on for the entire duration of this project.
So here’s how building the clothesline went down. I didn’t use a plan, but started with a general idea of how I wanted it to look. My materials list consisted of:
- 2- 4x4x10′ PT wood posts
- 1- 4x4x6′ PT wood post
- 1- 2x2x8′ PT wood
- 4- 1/4″x6″ hot dip galvanized lag screws (and washers)
- 8 – 2″ deck screws
- 8 – screw hooks
- 2 – clothesline tighteners
- 2 – quick links
- 100 ft clothesline
- 1 bag quickcrete (but you should probably use 2)
And of course I raided my tool collection for:
- Miter saw
- Drill
- Socket wrench
- Cordless nailer (optional)
- Clamps
- Post hole digger
I was figuring on the clothesline being approximately 6 feet tall with a 3 foot wide crosspiece at the top. I bought 10′ posts so that I could sink them 3-4′ in the ground, below the frost line.
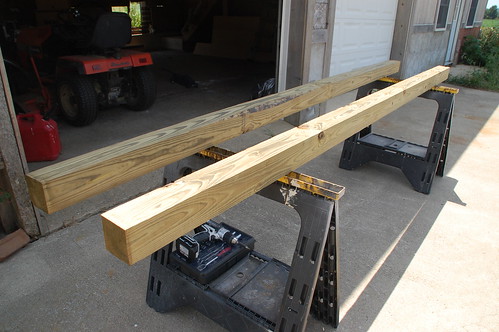
This isn’t necessary in every part of the country, but if you’re somewhere that goes into a deep freeze once a year and you try to sink a post a measly 18″ in the ground, next spring your fence or clothesline will be a straight as a hillbilly’s teeth. I’m just saying… put the extra effort in.
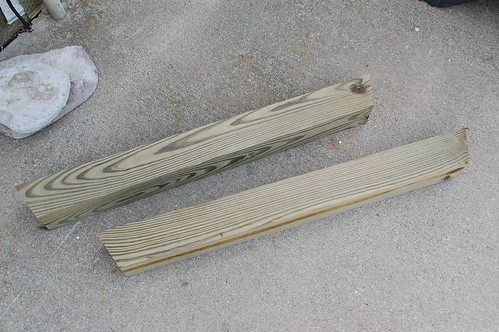
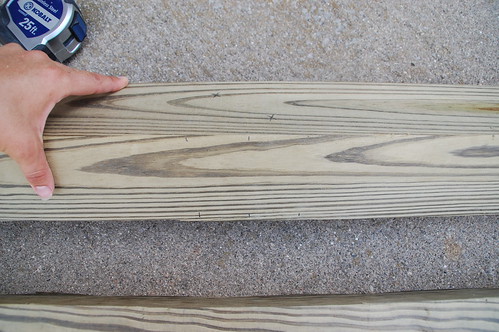
I started by cutting my crosspieces on a 20-degree angle (because you know how I like to fancy things up.)
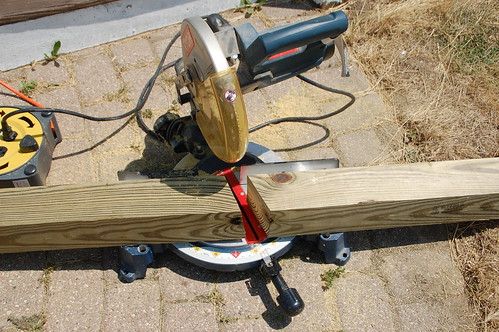
I think they ended up about 33-ish inches long.
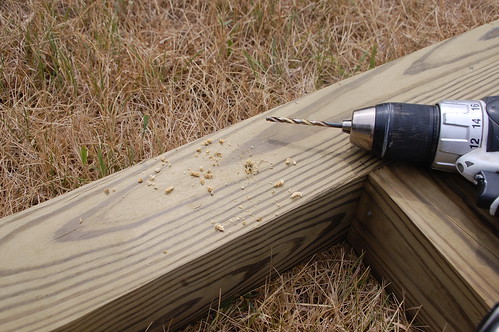
Then, to prep for attaching them to the posts, I marked the middle of each crosspiece and then marked the spot for each lag screw– two per post.
I pre-drilled the holes for these and then got the screws started. Turns out I don’t have– or, more likely, can’t find— a socket attachment for my drill so I had to do this by hand.
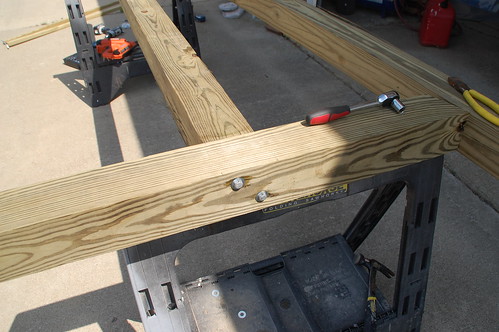
Also, does anyone notice anything wrong in this picture?
I got this screw all the way in before realizing I forgot the washer, and I’m blaming it on the heat instead of general absentmindedness. So. Don’t do that.
As for actually attaching this piece, first I tried tacking it in place with a couple of finish nails…
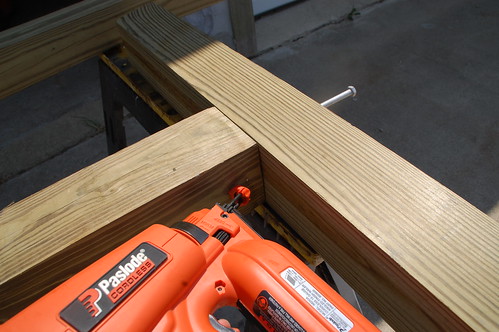
Which worked not at all.
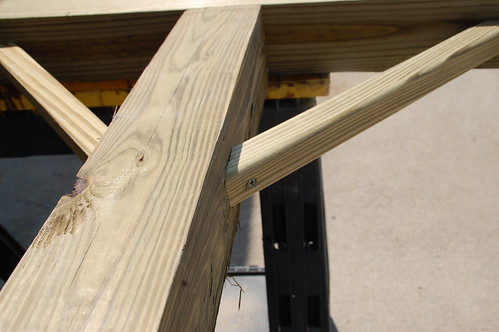
So I upped my game and tacked a couple of pieces of wood onto the post so I could hold the crosspiece in place with some wood clamps, which was a much better idea.
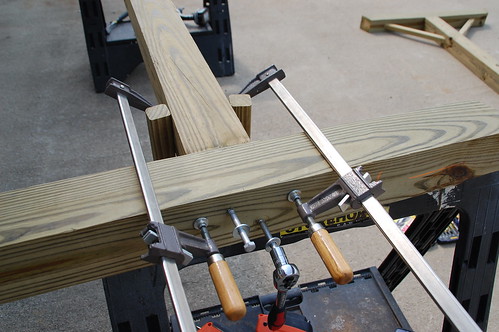
Everything tightened down…
Then I cut a couple of cross braces at a 45 out of the 2×2, and this time tacking them in place with finish nails did work, which made it easier to put in a couple of 2″ wood screws in to finish it off.
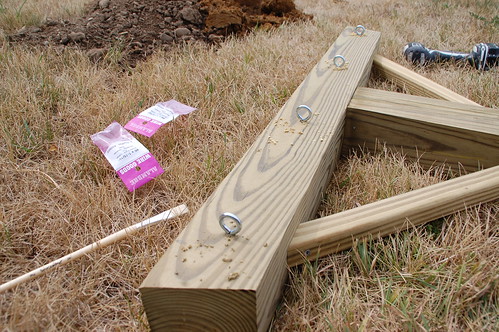
The final touch was pre-drilling for the screw hooks to hold the actual clothes line. I used 4 per side, spaced about 9-10″ apart.
I grabbed the first thing I saw to help give me a little leverage when screwing these in… a paintbrush.

What? It worked.
With the posts finished it was time for the hard labor portion of the program. I used a couple of stakes to plan out where I wanted the holes for the posts to go.
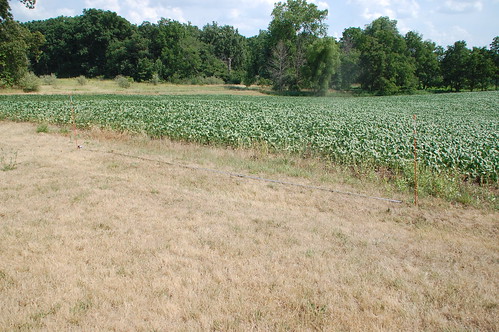
I set it a few feet farther in than this picture shows. The posts are spaced approximately 20 feet apart.
Then, there was a lot of digging…
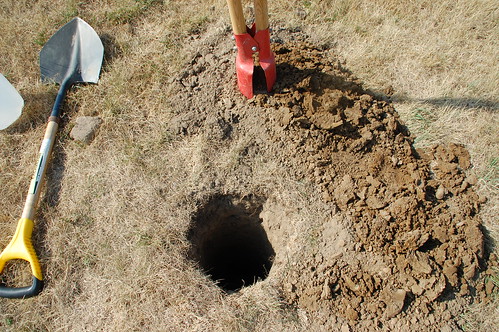
And a lot of sweating. And more than one instance of spraying myself down with the hose to keep cool.
My intention was to dig 4′ holes, but both the posthole digger and my arms stopped being effective around 38″, so I called it good.
Since I’m a one woman show these days,which makes holding a post level while simultaneously filling a hole in…um, difficult, I put a couple of inches of dirt back in the hole and tamped it down to help hold the post in place while I adjusted it.
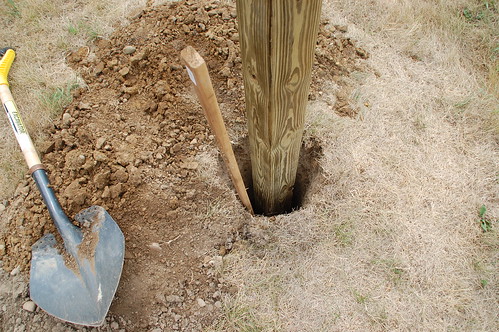
This worked surprisingly well. As did my post level, which I’ve had ever since installing my first fence back on Garrison Road many years, power tools, and one buzzed haircut ago.
When she was good to go poured half a bag of quickcrete in, mixed it with a little water from the hose, and let it set up for a few hours. I probably could have used a full bag in each hole, but considering how deep the holes are and the fact that my soil is mostly clay and gravel, it will probably be fine.
After a few hours I half-ass strung the line up because a.) I was excited to try it out, and b.) I wanted actual dry sheets to sleep on that night.
Unfortunately I didn’t have any clothespins so I had to make do…
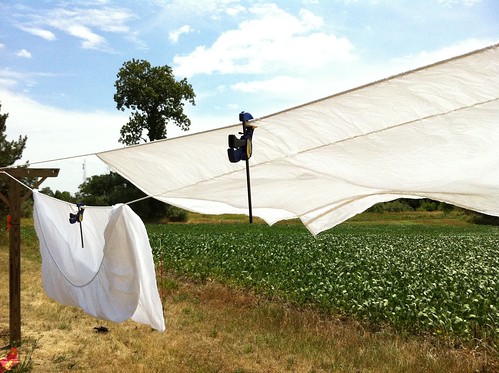
It may be touch-and-go around my house for laundry supplies, but I always have wood clamps.
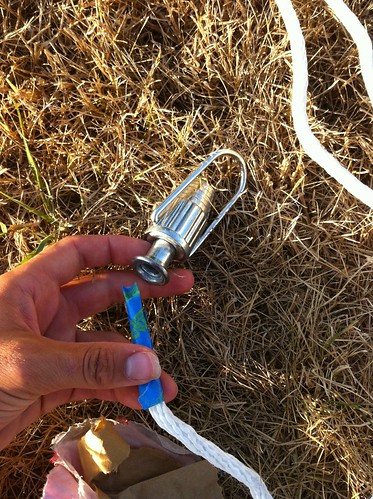
What became very clear at this point was that using brute strength wasn’t going to get the line as tight as it needed to be, so I bought a couple of $3 tighteners and some hooks at Lowe’s.
So. Here’s the part of the project where I roll my eyes so hard that I fall out of my chair.
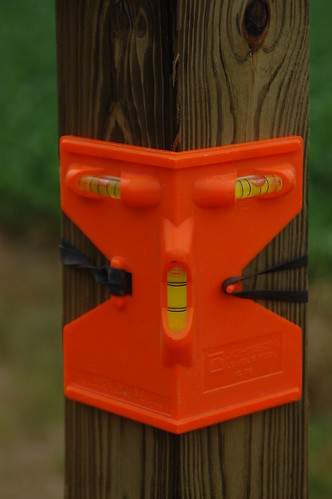
See this?
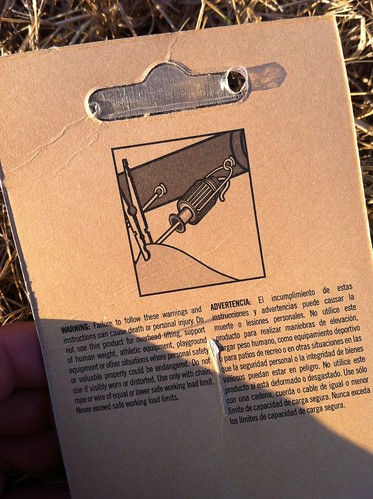
I made the poor assumption that the diagram on the back of the package was indicative of how the product actually worked. Silly me.
I taped the end of the line, threaded it through the tightener as shown on the picture, and it. did. not. work. for. shit.
I made my not-amused face at it for a good minute before it occurred to me that things would make much more sense if I threaded it backwards.
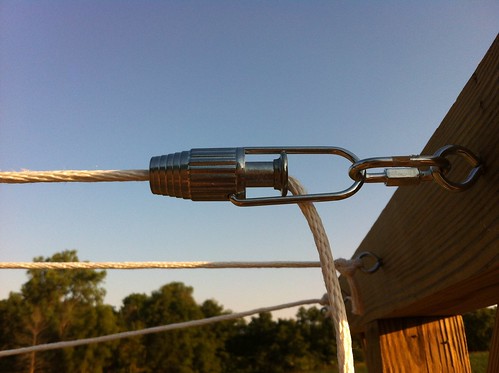
Yup. When you pull the line the barrel moves out of position, freeing up the bearings so the line can move through the tightener. When you release the barrel is pulled back “inwards” and the bearings clamp down on the line.
Ingenious product, asinine packaging.
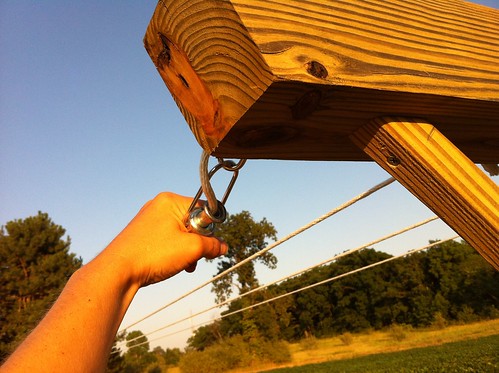
I used a small hook to attach the tightener to the post which was useful in allowing the line to drop below the level on the post when I pull on it to tighten.
There are two separate lines here that are tied off on one hook, run down to the other post and back, and are then run through the tightener.
And that’s it.
Let me tell you something… I can’t believe I’ve gone thirty-one years without line-dried sheets, which are exactly what I imagine it’s like to fall asleep in heaven. Fresh country breeze scented heaven. Sorry Downy, but you’ve got nothing on the smell of the great outdoors.
God, I love living in the country.

91 Responses
Great information, really informative & humorous. My husband erected a set-up almost the same, but we used round poles. Yesterday, one post busted off at ground level after 15 years. Was going to rebuild the same thing, but you had some better ideas (line tighteners!!). One question: How does your design stop the whole top crosspiece unit from twisting?
My dryer died and with no $$ to buy a new one right now, due to medical bills, I was looking for good ideas to put in an indoor clothes line in my laundry/bathroom. I dry outside all summer but with sub 20 degree temps, snow and ice in Spokane, WA during the winter it would take a week to dry outside! The clothesline tightener/ screw eye/ linky things are perfect for altering my space into 25′ of line [ (3) 8+ footers 6″ apart]. Thanks
I’ve always had clothes lines in my yard, love to hang my clothes. I enjoyed reading about your weekend project. We’re moving and I wanted my clothes line poles moved, so I found some one who could move them for me. My poles have a sentimental value for me, my Father put them up for me. He has passed for a few years and since I’m moving next door to my parents home I wanted them close to where I grew up. Your project is what I would have done if I couldn’t move my poles. I will keep this as a reference just in case. Happy Hanging!!!
You’ve done an excellent job at building your clothesline and I’m going to build using your plans tomorrow! For my wife for Mother’s Day. Thank you for your help!
Jim
Thank for you thorough directions. I havent used a dryer for 12 years. When i lost my 2 big trees last year i lost my homemade clothes line. Been hanging on the patio furniture since. Lol. Now I’m going to get a real clothesline. Thanks again.
SUCH a good read even if I wasn’t researching clothes lines
Thanks for your personal marvelous posting! I definitely enjoyed reading it,
you happen to be a great author.I will make certain to bookmark your blog
and may come back later in life. I want to encourage you to definitely continue
your great posts, have a nice day!
OUTSTANDING!!!!!! I want one, there is no way I could do that myself, but I do have a hubbie! It will be on my want list.
Have you ever had a problem with the tops pulling together from the weight of the wet clothes, if so what did you do about.
Where did you find the clothes line tighteners? Thanks Dave
I think I got them at Lowes.
I use a “truck knot” adapted for clothesline use… that is to say, I leave enough slack to make the knot first (a double knot that leaves a loop that won’t close when you pull against it) and run the free end through the eye on the post, back through the knot, and back through the eye again, one more through the knot… in other words, so you can cinch the knot but take the tension off the free end so you can untie it and adjust as needed.
Love this! So many people will never experience the joy of fresh dried laundry especially sheets! Thanks for sharing!
Loved this post! I am wanting to add a clothesline in our backyard, but would also like to make it strong enough to do a dog tie out occasionally on it that the dog could go up and down the length of the clothesline. We have rabbits that tempt my dog (80# lab) to leave the yard and chase. Do you think this could be adapted to this use? Any suggestions. I would use it as a clothesline on dry summer days.
Thank you so much for sharing this project. I am a woman on my own. Your great instructions gave me the courage to try this project. I completed it yesterday! I have not sunk the posts yet, but a friend suggested leaning the post outward a bit to help with the line slack.
Awesome Building my wife one very similar this weekend 11/25/2017
thx for the share
I love this “design” – it’s perfect for my new home in the country. And I love your humor.
Great DIY info. We have put our posts in and we put them in a Sonotube for the concrete and put a 4/4 sleeve from Lowes in the Sonotube so we can easily take the posts out during the winter. We did the same thing with our 12 foot lighting poles for the back yard. We’ll see how that works.
Oh, interesting. Would love to know how this works!
I do believe all the ideas you have presented to your post.
They are very convincing and can definitely work.
Nonetheless, the posts are too brief for novices. May just you please lengthen them a
little from subsequent time? Thanks for the post.
So what kind of line did you use with your tightener? I installed some recently & someone said to you parachute cord. It’s weather resistant but when I put about 4-5 articles of clothing on the line the tightener drops the cord several inches. When I try to pull the cord to tighten it back up it just keeps slipping
I made my clothes line by this forum and my wife loves it. The best project ive done im a long time
Comments are closed.