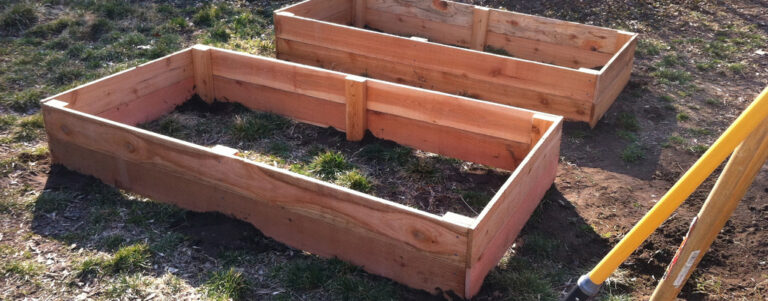
Well, well, look what magically appeared in my yard this weekend…
By “magically appeared” I mean “were brought into existence by the blood, sweat, and tears of yours truly” obv.
Here’s why this is exciting: It means that one day this will be an actual farm with an actual vegetable garden. Something I’ve been dreaming about for years. In fact four years ago I built some massively sturdy beds at the Memorial House for $150 apiece. $150 you guys. (You can read more about the construction of those behemoths here.)
You want to talk about a sturdy piece of landscaping? MysteryMan’s grandpa almost ran over one of these things with the tractor and the tractor bounced off of it. BUT the garden I’m planning at the Liberty house is going to have 20 raised beds. That’s $2500 just for garden boxes. Just no.
I knew there had to be a cheaper way to do this and I was determined to figure it out because, hello, I have a dozen mouths to feed on this property all of the sudden. It was when I was at the lumber yard looking at fencing for yet another project, when the skies parted and the angels started to sing because there–right in front of my face–were 6′ long 1×6 cedar fence boards for $2.25 apiece.
Not nearly as indestructible as the 2×6’s I built my first beds out of, but for less than three bucks I figured it was worth knocking a couple of boxes together to see how they held up. And by “a couple” I mean six. (For $25 each. Have I mentioned that part yet?)
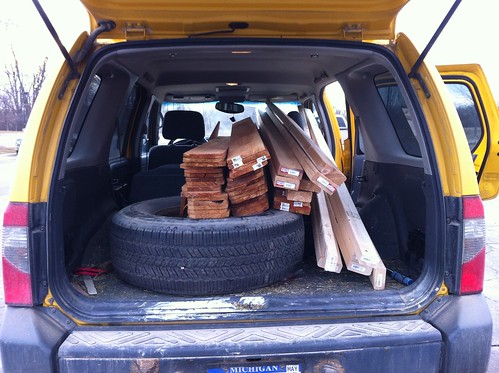
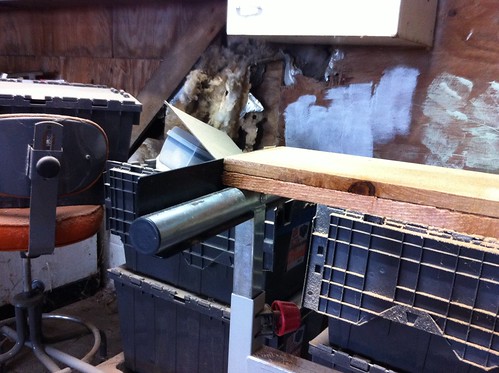
This is what six boxes worth of lumber (plus a few 2x4s for my in-progress chicken coop) look like stacked in the back of my vehicle. Along with a spare tire (don’t ask.)
Here’s the breakdown of what I used per-bed:
- 6 -6″ cedar fence pickets (5/8″ thick, 6′ long)
- 1+ cedar 2×4 (6 19″ sections per bed)
- 1-5/8″ deck screws
- Bigass miter saw
- Drill
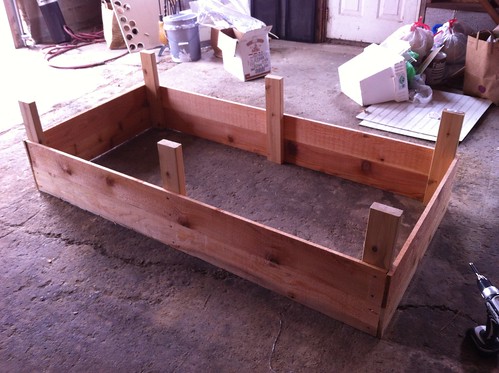
They measure just under 3’x6′, are about 11″ deep, and are light enough that I could pick them up and haul them around the property on my own, which is not an insignificant feature when you live in the middle of nowhere by yourself.
So, here’s how assembly went down…
These fence boards were dog-eared at one end, so I stacked them 3 at-a-time on the miter saw and cut the last inch of the boards off.
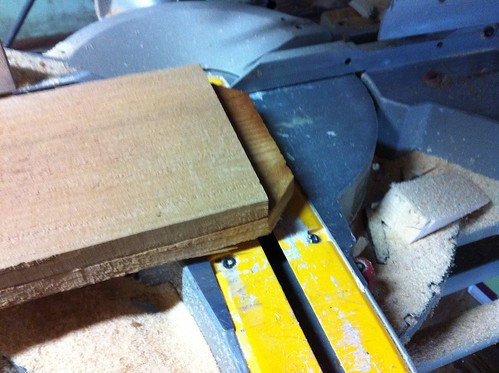
For each bed, I’d leave 4 of the boards just like that, and the other two boards I cut in half.
I made this job easier on myself by setting the stops on my miter stand at the right length so that I could just throw the boards up on the saw and cut them without measuring.
(If you have room for a proper miter saw stand, it’s worth it for this alone.)
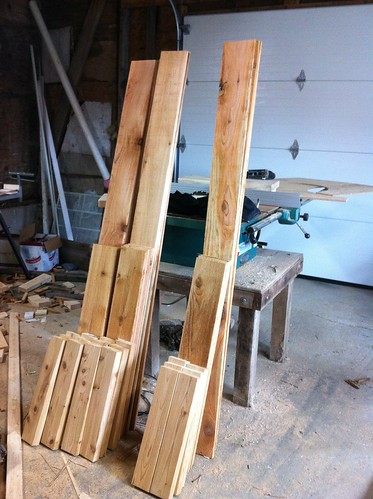
I used the same trick to cut the 2×4’s for the posts down to 19″ (five to a board) and at the end of thirty minutes had six piles of lumber ready to be assembled into boxes.
Then came the pre-drilling portion of our program. I hate pre-drilling but with a 5/8″ thick board I didn’t want to risk any splitting, so the Makita and I spent some quality time together…
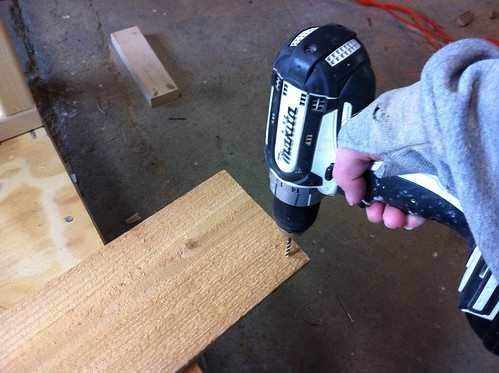
I heart this drill.
Next up, assembly. Much easier if you have a concrete pad or some other flat surface to put everything together on.
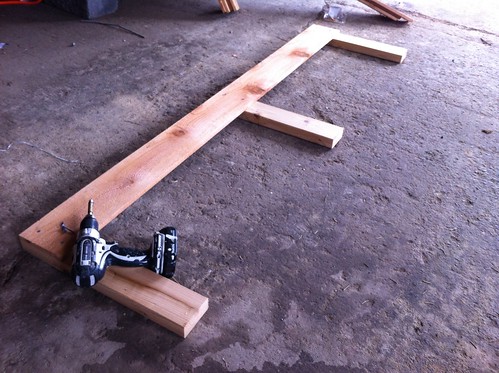
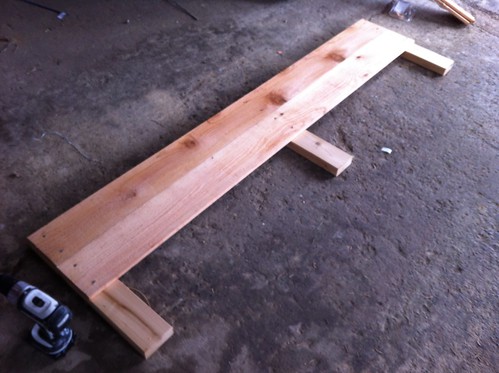
Once the long sides were done I flipped them up on end and attached the short sides…

Just like that.
If you’re looking for a beginner woodworking or outdoor project, I would highly recommend this one. It’s cheap and there’s almost no way to mess it up. There is a way to get a centimeter long splinter in your finger though so, you know, run your hands lovingly over rough-cut cedar at your own risk.
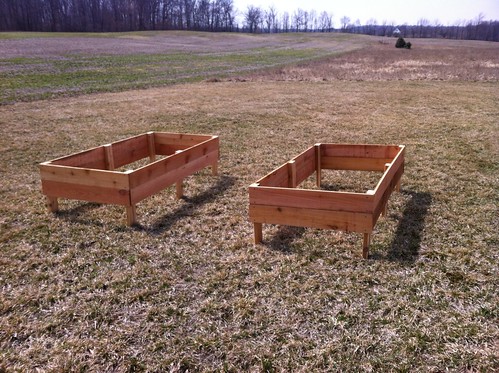
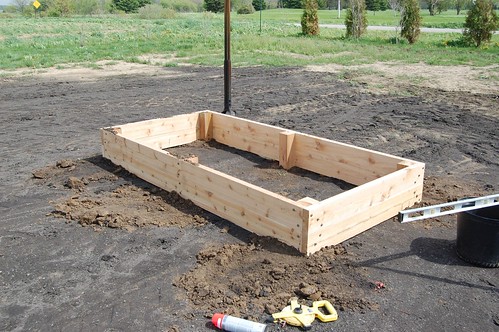
On Sunday I assembled four of the six boxes. I haven’t installed any at Liberty yet because I’m still finalizing plans for the garden and chicken coop, but two of the boxes were for some friends, and we did get those in the ground…
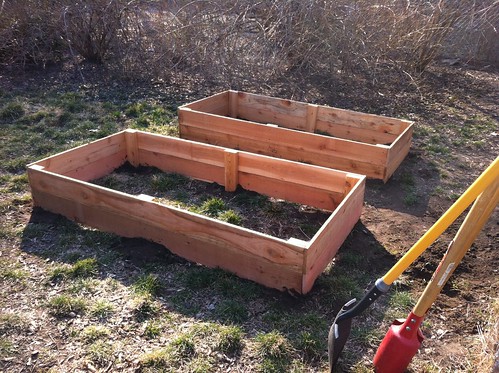
They were actually much sturdier than I expected once they were set in the ground. To finish them off we’ll install some weed barrier fabric (or cardboard) in the bottom of the boxes, fill them with topsoil, and farm away.
I’m also planning to install a weed barrier around the boxes and fill the “walking paths” with some pea gravel. A ridiculously large pile of which was conveniently deposited in my driveway this weekend.
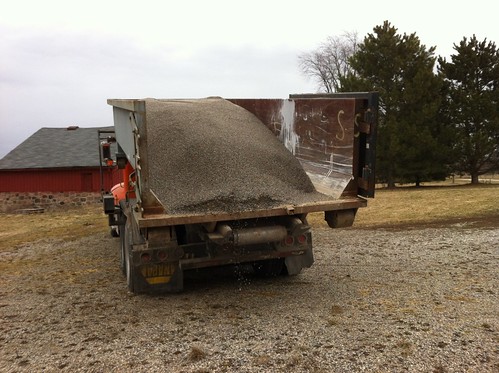
That’s going to be a not insignificant amount of time spent with a shovel and wheelbarrow this spring.
***
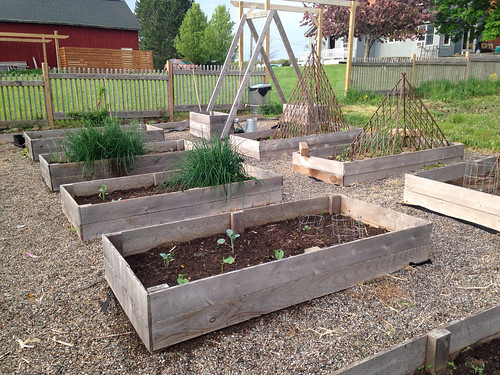
2015 Update: Three years later I’m still building and installing the beds for my garden. This is how it’s shaping up:

59 Responses
You are my HERO! I have been looking for an affordable way to build cedar raised beds, and I never once thought about fence pickets. I just checked my local Menards, and they are only $2.35 each! And since I’m planning on at least six of these…well, you get the picture!
Can’t wait to see how your coop turns out! We are “remodeling” ours this summer, since our MN winter did a number on their run, and the chickens are completely free-range at this point (my neighbors love me, by the way).
Hey everyone. I found used cedar pickets at a local fence company here. Only a dollar each. A bunch even looked new, others hand simply faded some so couldn’t be used. Just give a few local places a call and check it out!
Great looking beds! Seems easy enough for anyone to build.
I think Freddy Mercury had it wrong, it’s actually “big ass miter saws” that make the rockin’ world go ’round.
Very cool project, but the BAMS reference is what got me chuckling. I may want to use that in the future.
You do love giving yourself lots to do, don’t you. Haha. What are you thinking of planting?
I just can’t stop! I’ll definitely have tomatoes, snap peas and green beans, and then zucchini and summer squash, some cucumbers, pickles, herbs, and lettuces. That should keep me busy!
I did zucchini last year, make sure to leave lots of room for them, they took over my garden and produced zucchini larger than my head!
Alright. Straight dope. Is that 5/8″ going to stand up to the wet-weight-dirt-and-growing-things stresses?? I am ridiculously attracted to shit I can cart around easily and am very very tempted to have a go, but I wonder…… The scientist in me wants you to set up an experiment. The girl in me just likes the pretty.
Props for 6 boxes worth of ‘stuff’ in one car load.
Cheers,
Kat
It’s a good question and I won’t know until they go through a full season. I’m more worried about how quickly the cedar will rot/degrade more than if it will bow or break. (ie, I’m wondering if they’ll only last 2-3 seasons). Only one way to find out, and I’d still be happy to get a few seasons out of them.
My mom has always wanted raised beds….hmmmm….maybe a chance to build something and knock out a Mother’s Day gift?
I love the raised beds. I just dread the weeding that comes with all gardens. Recently, I found the neighbor’s kid playing in an admittedly poorly defined flower bed. Then I figured out that my cat was using the bed as a giant outdoor litter box. That’s some bad neighbor karma.
Raised beds solve a lot of the typical garden problems. Weeding is kept at a minimum and if you keep at it for one year so the weeds don’t go to seed, following years will be almost weed free.
That sounds fantastic, but I have never had that happen. Weeds seem to always trying to hang out with my irises.
Oh hey. I think I really like these. I really want raised garden beds. So, I’ll probably have to put my big girl panties on and just do it. I am feeling extra lazy though. So maybe next year. I think that’s what I said last year. Damn.
Give some serious consideration to installing a brace across the middle of the box to tie the two long sides together. The weight if the soil will bow out the middle even with the 2×4 posts sunk into the ground. I know from experience. And trying to install that brace after its full of dirt is a pain.
I actually don’t think it will, given the middle posts. The ones I installed at my friends house were much sturdier than I anticipated (there’s less than 3 feet unsupported and the depth of the posts is really what will hold the weight). Only way to really tell is to test them out though.
I want to help with the gravel!
damn that is a lot of gravel. We had half that size delivered and it felt like we might never finish wheeling it in. I love the look it gives to the garden though.
Have fun gardening!
Is the weed barrier necessary? I hate weeding as much as anyone, but is it really effective? (I’ve never done raised beds before and read the comments that they have fewer weeds with interest).
Oh, and good luck with the wheelbarrow. We too have an alarmingly large gravel pile. Except ours is a gift from previous owners and is waaaay out behind the barn stranded part way between two hay fields. It looks like perhaps two dump trucks worth. I don’t think a wheelbarrow is going to cut it. But our muddy driveway could really use some fresh gravel dammit!
Brilliant idea.
And I’m with you, I HATE pre-drilling. Gets on my nerves. Sometimes I’ll just hammer in a nail instead and then yank it out. Stupid, but it isn’t as annoying as changing the drill bit for the millionth time.
Just use 2 screw guns
One with the drill and the other with the driver
Get one that’s a 3/8s drill and one that’s a 1/2″ drill. That way you will have versatility when drilling or screwing. And if a hubby is present, it will be an easy sell to convince him of the need for 2 guns instead of 1
Lol… I love it! Great job for making these for just $25!
I too have been trying to figure out an inexpensive way to make a fenced in gardens. Way too many critters here to leave any veggie unfenced. I have a question about the fence boards. Are they left untreated and safe to use in the veggie gardens? I’ve been having a tough time figuring out what wood to use without spending a small fortune.
Your beds are amazingly beautiful! This is exactly what I needed. Thank you!!!
Thank you so much for this post. We made the raised beds using your formula and a several months later are feasting on the best cucumbers ever 🙂
Thank you for the instructions! I was at Lowes a few months back looking at lumber and the fence posts had me thinking. I’m wondering if you had any bowing in the middle? How did they hold up through the winter? My building project begins next weekend. Wood is in the garage now. 🙂
Thanks so much for this tutorial!! Planing on starting my first garden with my 2 and 5 year old and this is the perfect price and size 🙂 I was just wondering if you have any updates on how they are holding up and if you would recommend any changes.
Thanks again!!
So far, so good! I plan to make more the same way this year.
Hello Kit,
Can you post a picture of what the beds look like today so I can show my wife? I’m trying to convince my wife to build her beds using these instead of the heavier, more expensive 2 x 6 but she’s not convinced they will hold up.
Have you notice any bowing issues after a year? And do you think I could get by without burying the legs 2-3 inches into the ground instead of 8″ like you did?
See this post for how the beds look a year later:
There is a little bowing but not much, if you use 4×4’s instead of 2x’s that would probably take care of it, OR use 2x’s and sink them two feed into the ground. 2-3″ will make the bowing a lot worse, since those posts provide the structural support for the beds.
Wonderful job… For those worrying about bowing… just change the 2x4s to the outside.
Excellent! And I agree, making the beds shorter – but more of them – should help the soil weight bowing problem. Creating some sort of below the soil barrier around the edge of the beds is essential to keeping grass and weeds out too. (Found that out the hard way.) I staple gunned that cheap plastic edging to the bottom outside edge of my bed, then dug an equal depth trench before I laid out my bed. No more invading grass. Also leave out the landscaping fabric off the bottom of the bed – if you’ve done your homework and dug out most of the grass and weeds – they will be minimal and easily pulled. Your plants will be much happier without the fabric because earthworms will soon invade your bed and set up camp there. With the fabric in place? No naturally-occurring earthworms and if it rains they may not be able to burrow to the depth they need in the soil to survive.
I used cardboard in the bottoms of my beds. It should decompose in a year or two, but kill off any grass in the process without digging, etc. Everything has been great in my 2nd-year beds so far!
I was wondering if you knew about how much soil you used to fill each bed. Just curious. Thanks
I just happen to see this. I never thought I’d have a use for my left over fence posts. I have a lot if anybody wants them, been kept in my garage since I bought them. If your in or near Louisville ky email me @ asylme@aim.com I only plan on making a few for myself and have about 70 or so boards left over.
So, now that a few years have passed, how well did the beds hold up? Have you had to replace any boards?
I have not had to replace any boards and they’re all holding up fine!
Hello Kit,
Amazing project and details.
Its quite a few years you have done this project, so Can you tell, how do your beds, made of cedar fence posts, doing now? I recently did 8 6*3 beds, 22inch tall and a friend who visited says they may not last even few years. I am really worried. My hope is for atleast 5 to 7 years, am i expecting too much?. Also what do we do when they start to decompose and fall down. I have spent nearly $400 plus labor for beds alone and $600 to fill them with good stuff. i dont want to see them go waste. Please respond. Thanks in advance.
They’re holding up well! I built my first beds this way in 2013 and those are still holding up fine after 4 years (this is in Michigan– Zone 5– if that gives you an idea of weather.) What will likely happen is that the boards will start to split and at that point I think you can just replace individual boards. I think you’ll get 5-7 out of them if you’re in a similar climate.
I just wanted to say thank you for this, and for your website. I just bought my first house with 10+ acres and you inspire me to tackle all of the projects my place is going to need. I made the raised beds today and can’t wait to take on more projects.
That’s awesome Katie! Good luck with your new place, and all your new projects!
KIt, I am a 75 year old widow, built raised beds from kits for a veggie/berry/cut flower garden. My question: how do you keep weeds out of the paths? I put down heavy duty landscape cloth between the beds, then made mistake of putting down bark mulch–which of course broke down and made a happy growing medium for weeds. I spend all my time weeding the paths! Is pea gravel the answer? Also I put up a deer fence of netting, keeps the deer out, but smaller varmints getting in. Is hardware cloth around the beds the answer? Thanks for your help.
Love it. Good job.
Hi Kit, I am a 75 year old widow, built raised beds from kits for a veggie/berry/cut flower garden. My question: how do you keep weeds out of the paths? I put down heavy duty landscape cloth between the beds, then made mistake of putting down bark mulch–which of course broke down and made a happy growing medium for weeds. I spend all my time weeding the paths! Is pea gravel the answer? Also I put up a deer fence of netting, keeps the deer out, but smaller varmints getting in. Is hardware cloth around the beds the answer? Thanks for your help.
Kristin
Hi Kristin! I also used landscape cloths between the beds (with the gravel on top) and I still get weeds… mostly thistles, with some grass. My solution is to spray the paths twice a year with a year-long weedkiller. (I make sure not to get any in the raised beds, and I only spray after the bees are back in for the night, and before any of the weeds have “flowered”.) I’ve found it’s almost impossible to keep up with the weeds otherwise.
As for varmints, I have a fence around the garden now, which keeps out bigger animals. I still get a few rabbits, but I often put smaller wire cages around really suceeptable plants, and I haven’t had that big of an issue with it.
Hope that helps!
Kit,
So how long did the cedar boards last in a cold climate? I live in northwest Illinois and have to build new raised beds in my side yard. Last fall the yard was dug for a replacement sewer line…need I say more.
Linda G.
Would you still use 1″ wide cedar boards today if you were building or replacing beds?
Yep! All those beds are still holding up in my garden 5 years later, and I’ve added a few dozen more. I haven’t had to replace any boards from wear yet, but may need to in the next year or two.
Hi Kit!
This post was wonderful! (And relevant so many years later!)
Regarding 5/8 thick pickets… For added support against bowing, what do you think about putting the support 2×4’s on the outside of the box instead? And/or maybe doubling up the 5/8 thick planks?? Ive been going back and forth with those two options… and then trying to weigh the ideas against just building as you did. —I won’t have as much support underground with the lengths I’ve cut my 2×4’s though. Maybe 3 inches tops… So I’m worried a little about sturdiness and want to compensate if I need to…
Hey Tiffany – So the thing that gives these beds their rigidity is actually the 2×4 posts being set deep into the ground. The 5/8 boards themselves will definitely warp with the weight of soil and general weathering (whether or not the 2x4s are on the inside or the outside.) You could try double-thickness boards, but at that point I might just use a 1x or 2x cedar board instead of the pickets. Hope this helps!
I need these beds. Can tell how would I buy them?
Comments are closed.