Creating this rustic wood wall art was a simple project when it came to building the panels and thinking up designs, but when it came to pulling the trigger and actually arting them up I spent a few days doing the deer-in-the-headlight routine. Side note: I’m not sure what compelled me to type the phrase “arting them up” but I’m going to use it for everything now. “Why do you have paint on your face?” “I’m arting it up.” I think I may have had a linguistical stroke of genius here.
Continuing on the theme of my genius– particularly as it relates to managing my project ADD– I was smart enough to leave the wood panels on the floor directly between the kitchen and the computer, and since I only pick up unfinished projects under penalty of death, I couldn’t exactly ignore them while they were in art-limbo if I was stubbing my toe on them every day. See how that works?
Of the designs mentioned here, I actually was going to go with one of the bridge images, and to get started I worked on a little pencil sketch…
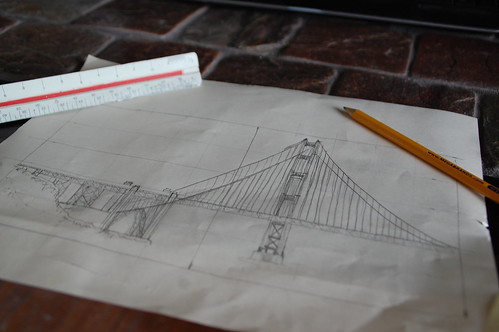
Which I was actually really enjoying, but I decided the bridge was going to be too detailed for the character of the rustic wood. I may do a larger pencil sketch of the bridge and frame it someday, but for the wood panels I reverted back to the idea of using some sort of text. I tried a couple of variations of using some of my favorite music lyrics.
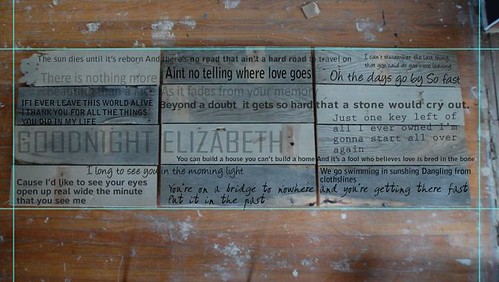
What I really loved about this was that as I was arranging the quotes, each panel started to tell its own story…
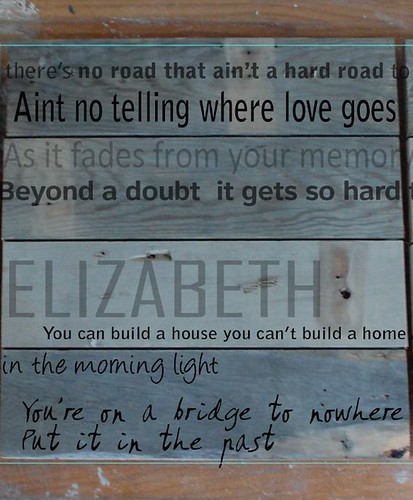
However this wasn’t getting me a “less busy” design, so I might need to save it for some canvases. (Do you see how I collect projects like old ladies collect cats? I can’t help myself. Also, there’s nothing wrong with collecting cats, mine is super helpful.)
I was almost ready to give up, then I was searching for one of my favorite summer pictures to use as the image for Friday’s DIY wrap-up…

And the little *idea* lightbulb flashed on over my head. This could be the perfect silhouette for my wood panels. I used a couple of comps from iStock to help me get the size and shape of the dandelion and seeds right.
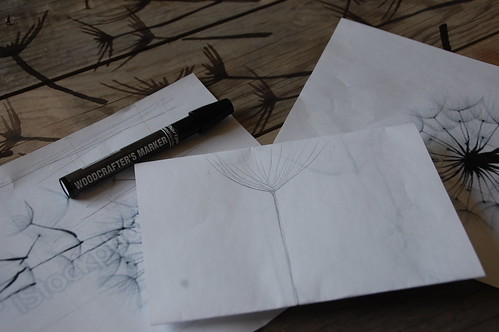
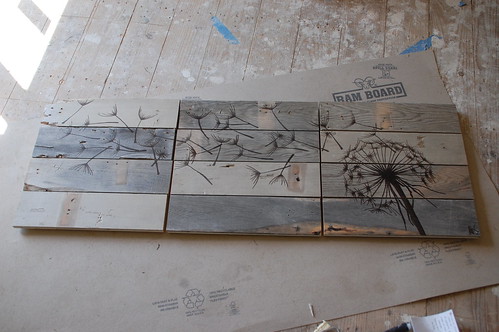
There was a lot of measuring and pre-drawing before I even started with the wood. Then I did light pencil sketches on the panels and traced over them with a Woodcrafters Marker (which is basically wood stain in marker form.) I actually did a few tests on the back of one of the panels so I knew how much pressure to use with the marker.

I also considered using watered down acrylic paint, but in the end the marker had the look I wanted so I didn’t see any reason to make my life more difficult with things like cleaning up paint and brushes.
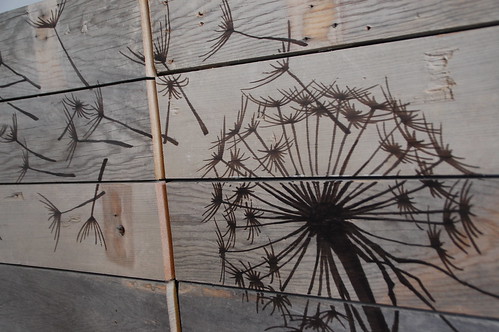
I had just a few “bleeding” issues in between boards, but for the most part it was pretty easy to get the dandelion onto the wood. It took about an hour. Of course it isn’t perfect, but I’m not a master artisan either. I’m just a girl with some old wood and a glorified sharpie.
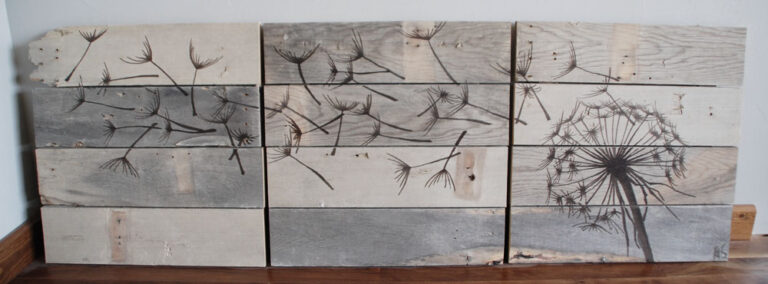
And there she is… all arted up and ready for hanging.
Incidentally, I have no idea where I’m going to put it at the moment so “Part 4” will be hanging the final pieces. I was thinking possibly over the bed, but I’m not sure I love it on the gray wall.
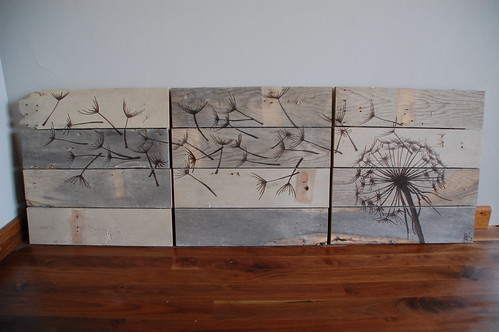
No matter where it ends up, I’m happy just to be able to cross it off the unfinished list. In the end it was incredibly easy to create (once I knew what I wanted to to look like) and only cost $3 for the Woodcrafters marker.
What do you think, is this a project you would do? Would you have gone a different direction with the art?

61 Responses
Beautiful. I love how rustic this looks.
That is a super idea on how to put the text on the different panels, so each one is its own entity too. Sweet!
Super job drawing the dandelion! A fun idea.
Comments are closed.