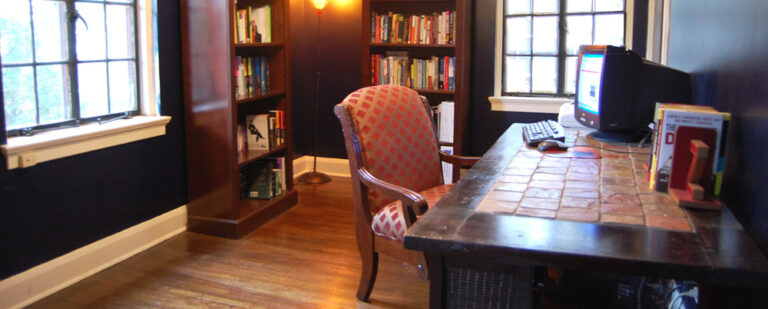
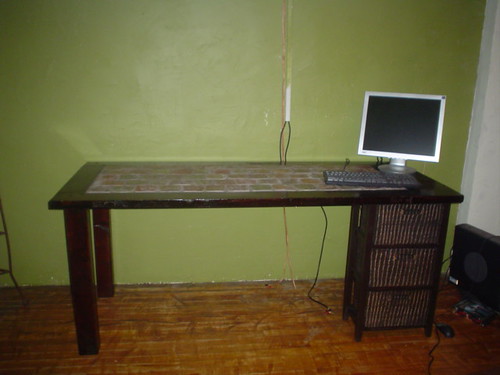
When I decided to turn my basement room into an office, there was one key piece of furniture I was missing: A desk.
And while dropping a couple grand on a solid wood desk sounded appealing, my compulsion for using tools kicked in, and I thought I might be able to do better using… an old door?
Like this one, for example:
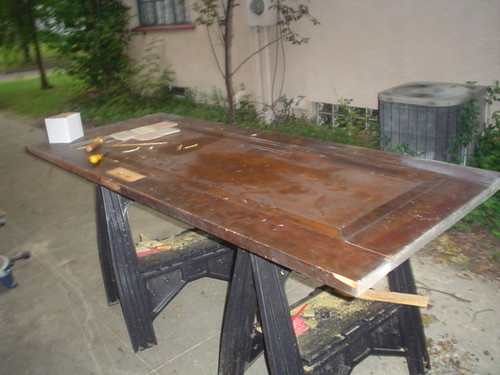
So, first, find a suitable door. In this case I had to remove a half-inch lip on the inside of what you see above so that I could fit in a piece of hardibacker board without too much of a gap.
What I used:
Supplies:
- Door
- 4×4’s for legs
- cabinet with drawers (if you want drawers in your desk)
- hardibacker board
- tile
- tile spacers
- tile adhesive
- grout
- stain
- 4″ wood screws
- wood plugs
- wood glue
Tools
- Drill
- Saw of some kind, I prefer a sawzall for 4×4’s (or pre-cut legs)
- Sanding-sponges
- tile adhesive trowel
- plastic baggies
- bucket
- sponges
Step One: Prep
Clean and sand down your door if you need to, and remove the hardware. Make sure you have measured the thickness of your tile (slate and natural tiles are thicker than ceramic) and the depth of the “frame” around the outside edge of the door. In my case the tile stuck up a little, but I wasn’t concerned with it. I used 1/4″ hardibacker board.
Step Two: Cut Stuff
Measure your “legs” I used three for mine and made them even to the set or drawers I had picked out. Standard desk height is around 30″.
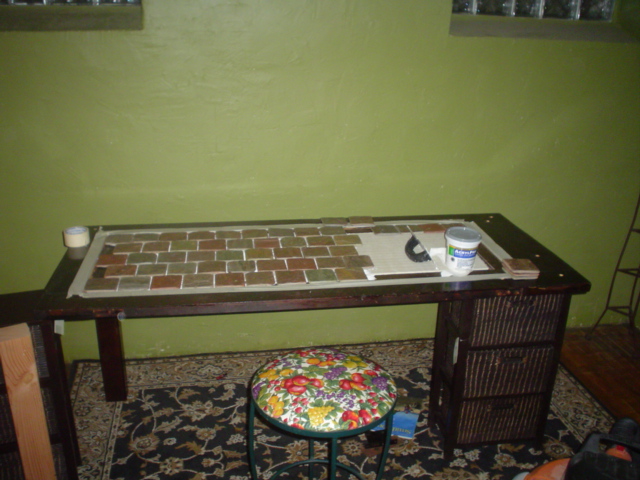
Step Three: Layout
This is the hardibacker board glued to the door, and set on my $30 drawers from target and a couple of 4×4’s

Step Four: Stain & Attach
Stain your door and legs to match. Countersink your screw holes. (For DIY novices, you can buy wood plugs at home depot or lowes… I use half-inch. Use a half inch bit to drill down to a depth equal to the thickness of the plug 1/8″ to 1/4″ approximately. Then use your woodscrews to attach the legs/drawers. When the screw is in place, you should be able to set the wood plug right into the hole)
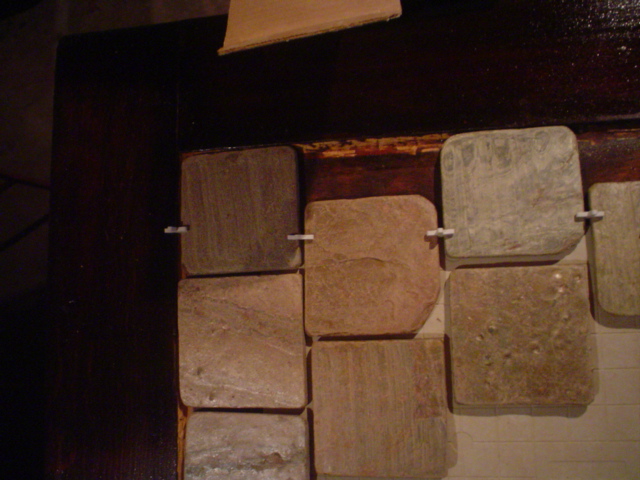
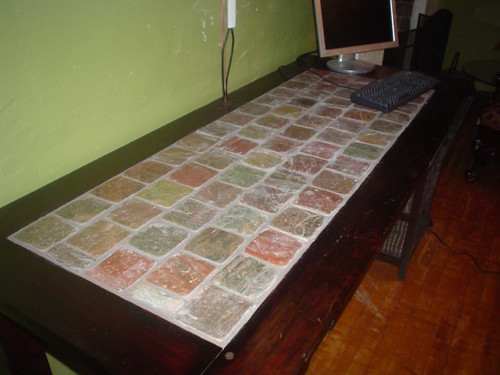
Step Five: Lay out tile & prep
Lay out your tile pattern first. I chose a brick like pattern for this desk, which means a couple of tiles on each end needed to be cut in half.
Also before you start putting the adhesive down, I recommend taping off your “lip” so you don’t get glue all over everything.
Step Six: Glue & Tile
Spread tile adhesive with adhesive trowel so you have “rows” of glue. Enough to do 4 or 5 tile at a time. You have to kind of push the tile into the glue and wiggle it around a little to make sure it’s good and in there.
In this case I laid all the whole tiles and then went back and measured the pieces that needed to be cut… however it was kind of a pain to get the adhesive down for these… I recommend cutting all your tile before you start gluing anything down.

Step Seven: Wait
Once all the tile is down remove the tape, and then you need to wait 24 hours while everything sets before grouting.
Step Eight: Grout
You can purchase pre-mixed or dry grout, however the pre-mixed is generally more expensive. To mix your grout, add just enough water to make a thick paste… there should be specific mixing quantities on the package. (Make sure you stir it up all of the way before you start adding more water.)
My trick is to put the grout in a plastic baggie and then snip a little bit of the corner off and use it kind of like a frosting bag to squeeze the grout out right where it goes. When it’s a little bit dry… 5-10 minutes later, go over with a damp sponge to smooth out… repeat about a half hour or hour after that and you should be good. Make sure to clean all excess off the tile.
Step Nine: Clean it again.
The only bad thing about slate tile is that it requires several cleanings to get the dry grout off of the tile. If you are using ceramic, generally after the grout dries you can use a dry cloth to polish any foggy spots off of the tile.
Step Ten: Finish it.
Touch up any spots. Put plugs in screw holes. Admire your hard work and talent.

21 Responses
That’s beautiful! I’m so inspired I can’t wait for my desk to fall apart so I can tackle a project like this.
nice project. Love the addition of tile, especially the slate (I’m “slightly'”partial to slate). If I may make a suggestion. The richness of the slate would show with an enhancing sealer. Make sure not to saturate it too much for it might stay oily. It would look great with that dark stain! I just found your blog and am loving the style of macro photos with detailed project directions and material list…wonderful!
It’s beautiful!!!!!!
I am so amazed you made this!!
You are so incredibly talented! I LOVE it!!
I am glad to be one of the visitants on this great site (:, appreciate it for posting .
Wow! Your desk is beautiful! You are so creative!!
interesting concept! though i’m not sure if the tiled surface of the countertop is suitable for a desk. in rest it looks ok, natural and a bit rustic. personally i would have sandpaper the mahogany finish of the door, so that the contrast between the tiles and the wood would be more soft. or at least in the same chromatic scheme as the tiles. just an idea. nice concept once again. good luck!
[…]we prefer to honor several other world-wide-web web-sites on the internet, even if they aren?t linked to us, by linking to them. Under are some webpages worth checking out[…]
This gave me a “well duh” moment. I could never quite come up with how to handle the inset area of the door, short of a peice of glass. I love the tile!
You gave me a great idea. I have a door I was going to trash but not anymore- it is my future counter for the kitchen.
Question about using terra cotta for wall tiling- do I still need the hardibacker for floor to ceiling job
The DIY.SITE WAS GREAT IT WAS AN EDUCATION WITHIN ITS SELF.
I WILL DOWN LOAD THIS PAGE.and send it to my favorites for future reference.
Thank you great stuff
Really nice, and if in the future you want a smoother surface, you could top it with a piece of tempered glass or plastic.
Hi there Dear, are you really visiting this web page daily,
if so afterward you will definitely take pleasant know-how.
Thanks for sharing your thoughts about commodity future option trading.
Regards
Hi there are using WordPress for your blog platform? I’m new to the blog world but I’m trying to
get started and set up my own. Do you require any html coding expertise to make your own blog?
Any help would be greatly appreciated!nep uggs kopenOn the other hand,
if you’ve got good, straightforward 10×12 shed plans, celebrate all of the
Purple Bailey Button process easier plus more enjoyable.
I’m certainly writing to also urge a person to take rapid and immediate action on creating additional Tiers for any Emergency Unemployment Compensation program, comprising the Emergency Unemployment Compensation program and
full Red-Black Half Waterproofing federal funding of Extended
Benefits, as well as the $25 per week Federal
Additional Compensation supplementuitverkoop uggs
Good day! Do you know if they make any plugins to safeguard against hackers?
I’m kinda paranoid about losing everything I’ve worked
hard on. Any recommendations?
Wow! In the end I got a web site from where I can actually get helpful information concerning my study and knowledge.
Hello, just wanted to say, I loved this article. It was funny.
Keep on posting!
Thiss site was… how do yoou say it? Relevant!! Finally I have found something which helped me.
Kudos!
Accounting ratios are mathematical tools which help in performing the comparative financial analysis for two
financial variables.. Dentists. Miami, FL.
My partner and I stumbled over here different page and thought I
should check things out. I like what I see so now i am following you.
Look forward to exploring your web page repeatedly.
Very nice DIY project. Do you mind if I ad it to my list of projects?
Comments are closed.