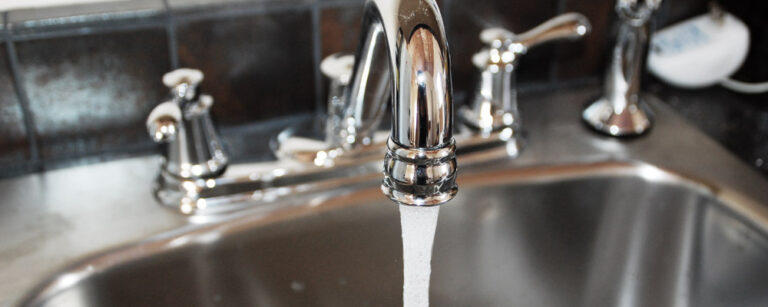
Ah, the miracles of running water. You don’t fully appreciate it until you have to wash your dishes in a bucket with the garden hose for a few weeks. The utilities– plumbing, electric, HVAC — have always been my second choice for DIY projects. There’s part of me that still thinks there is some big trick to plumbing or wiring something that only the professionals know. But the truth is, with the Internet and a little common sense these basic around-the-house tasks make good little DIY projects. (Though it is hard to say if spending a considerable amount of time wedged under a cabinet is actually less hassle than calling a plumber.)
Let’s have some plumbing fun.
What I used:
- Sink drain
- Plumbers putty
- Faucet
- Adjustable wrenches
What I Did:
Drain Installation
A drain is a fairly straightforward thing to install. I was working on a new sink, but if you’re working on an existing one, you’d essentially do this process in reverse to get the old one out first. (And make sure you have a bucket handy for water when disconnecting the P-trap.)

The drain should come with everything you need for installing, except for plumbers putty.

I rolled a long snake of putty and put it around the drain opening:
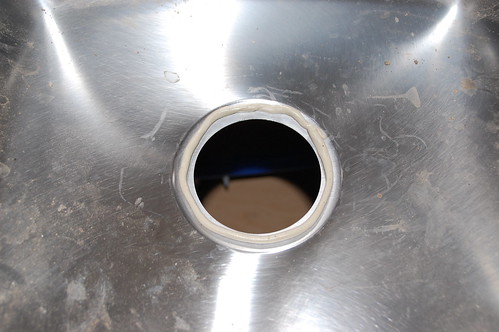
Then put the top part of the drain on and tightened it down using the rubber washer, fiber washer, and nut (in that order).
When it’s good and tight, the putty will have smushed out of the top a bit.

I used a utility knife to trim away the excess.
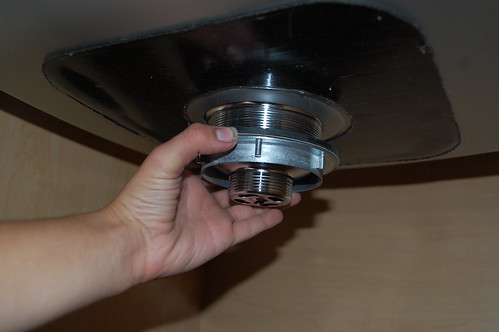
Then connected the P-trap to the bottom of the drain. Both the drain and the P-trap came with compression nuts for this part, and the P-trap came with a small plastic washer.
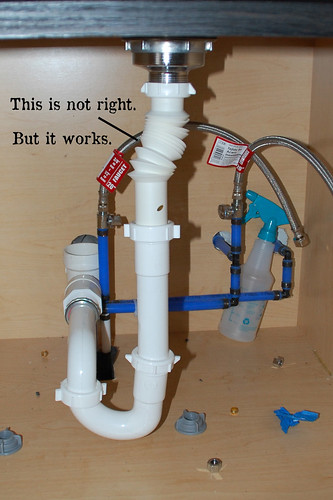
I used the plastic nut that came with the P-trap because it didn’t require a wrench. There were plastic “tabs” I could use to hand tighten. And that’s all there was to putting in a new drain. Also, this is not a picture of the way your under-sink plumbing should look. After the rough plumbing was in we decided to keep a door opening next to the sink and that changed all of our cabinet widths, resulting in some, er, creative plumbing on my end to get the drain attached. Plumbers, I’m sure you all just cringed at that, but talk to me after you’ve spent weeks washing dishes at the water pump. It works, and that’s what I was most concerned with.
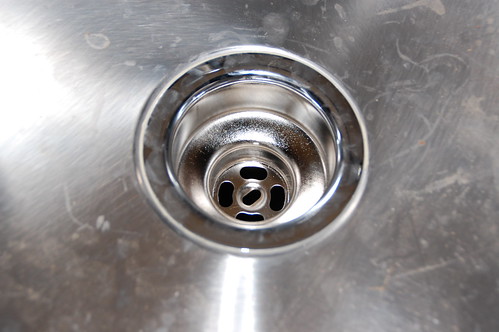
A more appropriate example of under-sink plumbing would look like this:

Note the lack of accordion-pipes.
Faucet Installation
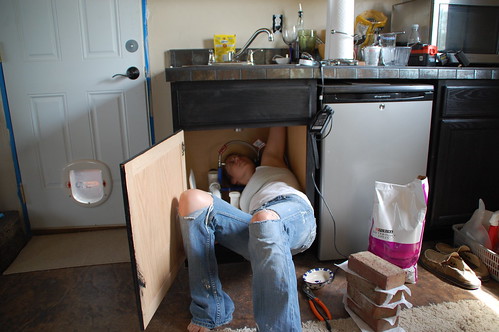
Drains are easy. Faucets require more tools and more time contorted under the sink in back-breaking positions. If you need to remove the old faucet, shut off the water supply (there should be two knobs– one on each pipe that leads up to the faucet) then there’s probably some investigative work to do on how to detach those pipes– usually a nut at the top, connected to the faucet– and then how to disconnect the faucet itself. It will likely be held in place with nuts under the sink, or covered bolts on top of the sink.
Sinks come with two, three, or four pre-drilled holes.
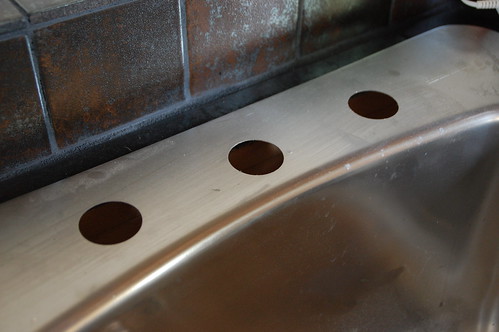
Buy your faucet appropriately. (I didn’t, which meant drilling an extra hole in the stainless steel sink. That was fun on the drill bits.)
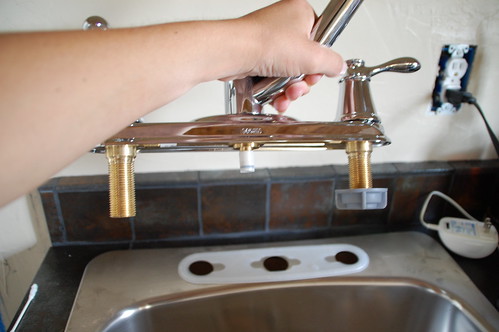
Most faucets come with a plastic gasket that goes between the sink and the faucet. If it doesn’t here’s another place you can use a snake of plumbers putty. This faucet is held under the sink with a couple of nuts. Here are all the components.
There are also faucets that mount with bolts on the top, which is something you may want to consider, because otherwise everything that happens from here on out is going to require wedging yourself into tiny little spaces and working with no blood left in your fingers. Much respect to plumbers who do this day in and day out. I don’t know how.
The nuts are attached and hand tightened.

Then, if you have flexible piping from the hard line, it’s fairly easy to bend and attach.
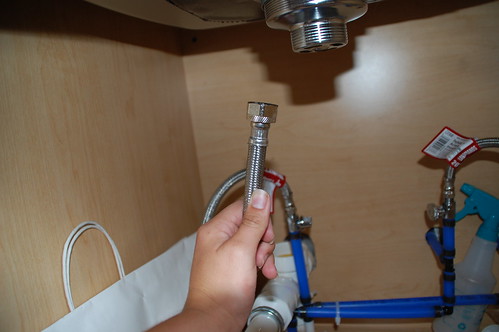

Plumbers, feel free to disagree, because I had a serious internal debate about whether or not to use plumbers tape on these threads. I went with not, and tightened them down real well with an adjustable wrench, which was no small feat. After a couple of tests where I determined there wasn’t the littlest bit of leakage, I decided “not” was the correct answer.
This faucet came with a hand sprayer, which went in a fourth hole…

…and attached to the middle part of the faucet (directly under the spigot).
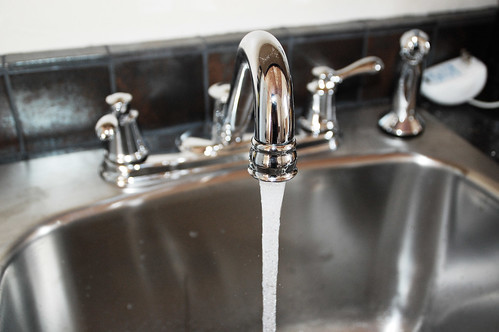
All in all, a simple DIY project.
Got any tips for changing faucets, drains, or fitting into that tiny little space under the sink? I’d love to hear ’em.

27 Responses
What was the pile of bricks on the floor for?
Haha. I KNEW someone was going to ask me that and I was trying to think up a good lie. It was actually a rigged-up way I was holding the sink in place while the grout dried after I installed it. The sink clips were missing at the time. Goes with the theme of the garage in which half of the stuff we did was rigged – we’re trying to minimize that behavior on the house. 😉
You did a great job explaining it! We always do our own faucet, shower, stuff. Luckily it’s usually my husband who does it, so I get to just help. Having two people seems to make the job a whole bunch easier.
Having replaced an s-load of sinks, drains and faucets I have faced a lot of roadblocks- one being the prev. fixture being so tight I can’t physically remove it. Creative removal techniques include sawing, drilling and once just throwing out the entire sink b/c the leaky drain would NOT come out (even w/professional help). I also cannot recommnd wearing some sort of eye protection enough- in my experience there was a lot of rust and particle board flying in my face while sprawled in the cabinet base up under the sink… Oh and, the adjustible wrench? A wannabe plumber’s Best Friend;)
G – Those are great tips, I can tell you I needed to have my safety glasses on while tightening down the new faucet more than once. (I think the “trying to fit the wrench over the nut with my head turned and eyes shut” maneuver also worked well. Took a long time though.)
you could have installed the faucet in the sink before you set the sink in place, thus eleminating the tight area to tighten it down in under the sink.
What do you think would have happened if you had used plumber’s tape on the threads?
I’m groaning as I see that nice plastic gasket under the escutcheon and consider the existence of plumber’s putty. We didn’t have either when we (meaning a friend of mine) installed my new sink faucet two years ago. I tried a bead of clear caulk, but it looks like hell and it’s coming up, besides.
Live and learn.
Kate – I’ve since checked with some plumber friends and they sort of gave me the “Meh, you can or you cant.” They always do, of course, and I think you get a better seal that way, but I didn’t and I haven’t had any leaks (but it will be a sonofabitch to unscrew if that ever becomes necessary.)
Get a socket wrench, long extension and deep socket–that’s what I use instead of the plumber’s wrench.
long extensions are a lifesaver to any undersink plumbing work!
In the graphic that shows everything under the sink, it appears the horizontal pipe before the trap is lower than the pipe after the trap. Would that cause any draining problems? Thanks.
I was surprised that plumbers tape was not used. I will be installing a replacement faucet and had planned on using the tape. any thoughts? Also, should I use putty or silicone caulk up top to secure the faucet onto a Granite counter top? I had heard that plumbers putty would adversely react to Granite. Any suggestions?
Do you need to use caulk or putty around or sorrounding the sink when you put it in to stop water from seeping in the side of it?
I don’t know if she did, but I will say from living in an apartment where all things had been done on the cheap end, my sink leaked badly around the edges of the cabinet it was installed in and I could put little in it for fear of things getting wet. I would side with plumbers putty, from what I understand it is underneath, so I would think it would be less noticeable. Caulk will peel up eventually, leak and need to be replaced. Though I don’t know how long the putty lasts. (I am so sick of renting.)
Its good as your other content : D, regards for posting . “To be able to look back upon ones life in satisfaction, is to live twice.” by Kahlil Gibran.
Thanks, but could you send me a photo of an old sink..replacing the drain thing…we live in a cottage that’s 90 y o…..v b g doubt the pipes are that old tho
Just desire to say your article is as surprising.
The clarity on your submit is simply excellent and i could think
you are an expert on this subject. Well with your permission let me to grasp your feed to keep updated with drawing close post.
Thanks one million and please continue the enjoyable work.
This is certainly super cool. I’ve been looking via a bunch
on-line and really liked this excellent variation.
I go to school in Canada and we just now are learning about this in our
class. Thanks for helping me with the conclusion of my report.
Like the way you have lined up the pictures to illustrate the repair
What’s up Dear, are you really visiting this site regularly, if so after
that you will definitely obtain pleasant experience.
For organization you might change this unique style for a thread rack.
Seems to help in artistry and also craft rooms.
You were capable to save money when using the free install that Home Depot special offers on purchases about $1500.
In plumbing, there are two types of threaded connections: those that require a seal such as teflon tape or paste; and those that don’t. The latter has become much more common. They have some sort of ring or gasket that makes the actual seal, and the thread connection merely provides the force to clamp that together. Examples are garden hoses, washer hookup hoses, copper flare connections, and toilet or sink flexible hookup lines (between the shutoff valve and the sink or toilet tank). A little bit of lubrication is helpful on the threads to aid in a tighter connection. Vaseline is good, white lithium grease is best.
The types that do need a thread seal are any NPT threads – National Pipe Thread fittings, found in galvanized water pipe, black iron gas pipe, and many brass, copper, or PVC fittings. These are becoming much less popular in favor of PEX tubing and threadless connectors.
Thank you for explaining everything in detail and for posting pictures of every step. I actually feel like I can do this.
Thanks for sharing! I always enjoy reading your blog, you are full of useful ideas, and you are incredibly handy. Your tutorials have saved me hours of trying to fix various things around the house, so thank you!
Comments are closed.