You know I never shy away from a tiling challenge, so I jumped in hammer first when it came to building the walk-in shower for our new master bathroom. MysteryMan only balked for a minute or two, because hey– his man-cave bathroom turned out fairly awesome– and you can’t argue with results.
I’ve been picking the collective brain of our plumbers, the internet, and anyone who seems mildly interested in how to build a shower bench, and I’d call the rough framing portion of this project a success. Here’s how it went down.
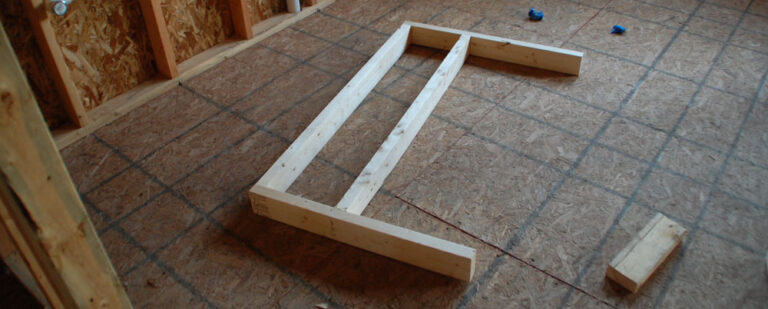
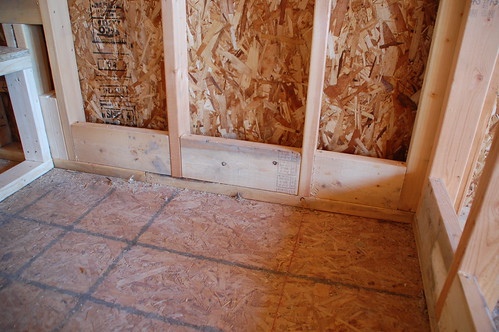
This is possibly the most uninteresting image I’ve posted to this website in the last four years, but it shows what our plan was.
 This is what we started out with:
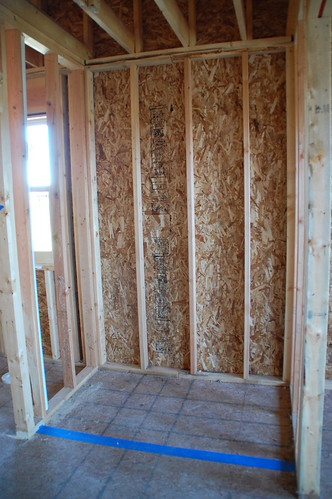
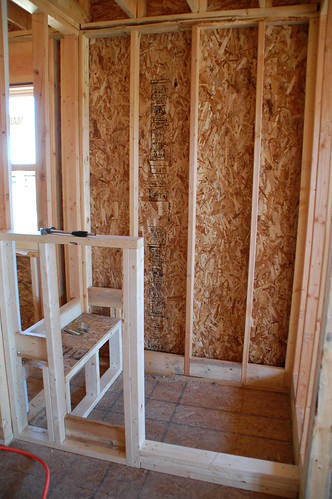
We taped the wall off first to help us visualize. Then it was time to get out a couple of saws and the framing nailer. To start, because the half wall would only be attached at the floor and on one side, I cut a hole through the subfloor to attach a “post” to the floor joists below. This gave the wall some added stability.
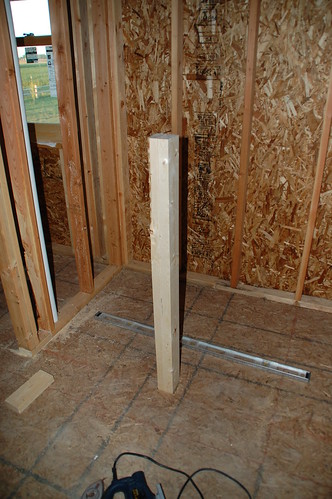
These are two 2×4’s sunk about 8″ into the floor and nailed to the joist. I built the frame of the wall to fit around these.

The spacing of the one stud is 12″ off the back of the wall. Traditionally you’d make this 16″, however we decided to put a bench 12″ off of the back of the shower so it made sense to put the stud in this position for nailing. See?
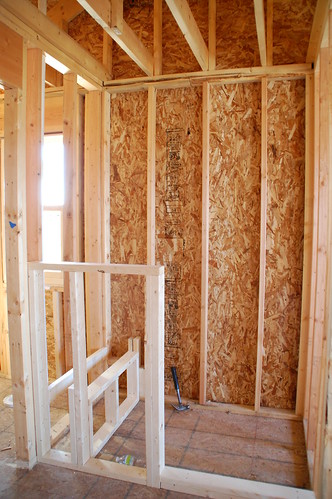
Framing in the shower bench consisted of building one itty-bitty wall and then nailing a 2×4 into the back of the shower wall to support the plywood top.
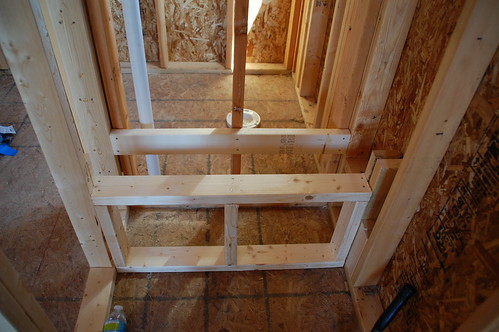
The bench is 12″ deep. Standard seat height is around 17-1/2″, so I subtracted 1/2″ for the tile board and 3/4″ for the plywood, and built the frame to 16-1/4″ in the back, and 16″ in the front so that it slopes forward for drainage.
In order to get everything attached correctly, there was a lot of blocking added to the existing walls. For the bench, blocking was added here…
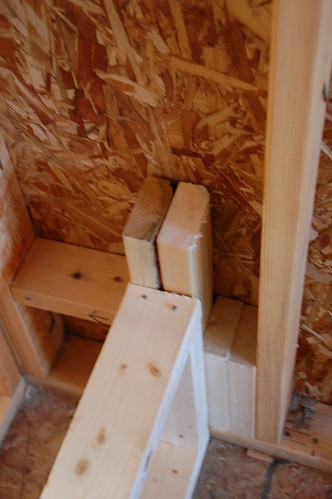
And here…
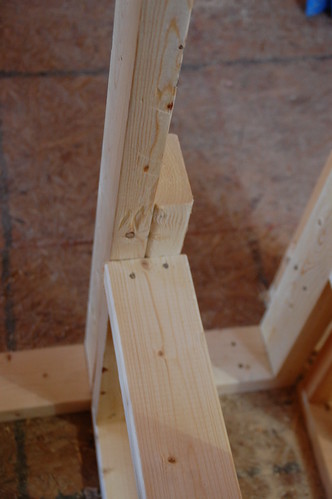
For the half-wall, blocking was added here…
It’s not pretty, but it works. (I’m pretty sure that’s a metaphor for how I look most days.)
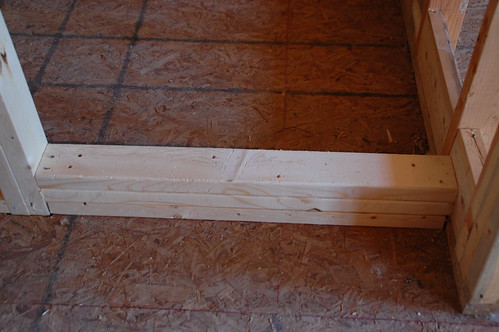
To finish everything off, we added 6″ pieces of blocking around the bottom of the shower, and around the bench. Rubber will be attached to this to waterproof everything.
The bench also got 3/4″ plywood attached to the top…
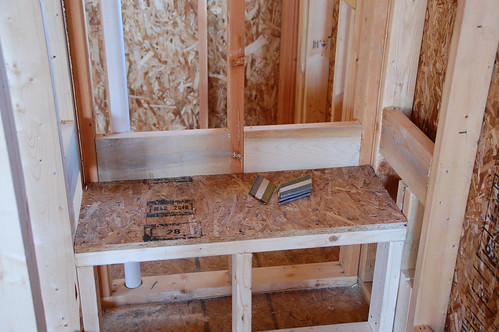
And to the front.
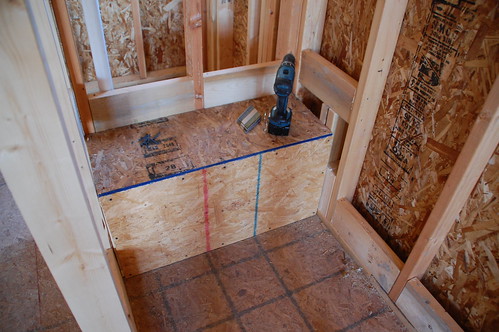
I have plans to finish this with tile on the front, and a slab of granite or marble on the top.
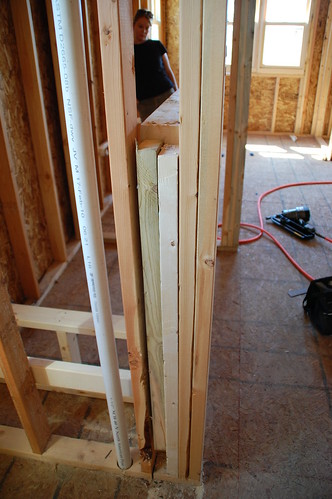
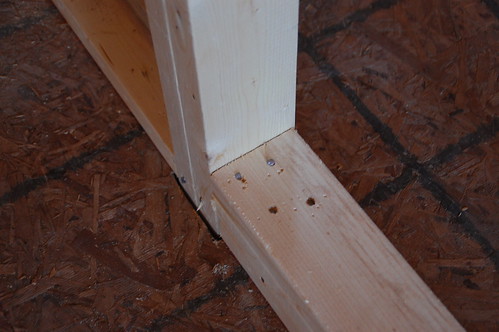
To finish everything off, we put a 4.5″ sill in, and nailed it into the post for the half wall as well, adding additional support.
So, not bad for a little weekend work…
Up next is the rough plumbing, then waterproofing and getting the backerboard on for tile.

29 Responses
If you end up using the adhesive for the rubber shower membrane (I had to attach a second piece to cover the front step), be very careful. It’s the nastiest stuff I’ve ever smelled — and what convinced me to finally get a heavy-duty cartridge filter mask.
Hey… looks just like my shower! BTW, you said this:
“Standard seat height is around 17-1/2″, so I subtracted 1/2″ for the tile board and 3/4″ for the plywood, and built the frame to 16-1/4″ in the back, and 16″ in the front so that it slopes forward for drainage.”
Are you going to pour a mud bed for the base? Cuz if you are, wouldn’t you need to consider that thickness in your bench height? Maybe you’ve got this all figured out, but I’d hate to go away not saying anything and find out you’re kicking yourself later.
Keep up the good work!
Unless he is going to use the schluter kerdi system, but even then, there is a foam base… Looks like my shower as well. I figured 19″ to accommodate the schluter pan.
good luck with this project! we did a custom walk-in shower and LOVED it. the hardest thing with ours was getting the floor to slope {and drain} properly and then building a niche into the wall for shampoo bottles.
we used the Schluter®-KERDI membrane and had to reinforce the floor (from underneath) to support the extra weight of everything.
Hi
Really enjoy your website.
My sister and her husband are building a cottage and they found the John Bridge website and forum (www.johnbridge.com) really useful. They have a disabled son and the shower has to be curb-less so they are going with the Schluter-Kerdi membrane system mentioned above.
we have done dozens of walk in, curb less, barrier free showers he in Tampa, Florida and surrounding area’s.
I agree with Catherine, the JB Tile Forum is a good place for someone to go for info. I help out on the site and there are plenty of tile pros offering advice.
http://ceramictec.com/florida-curb-less-walk-in-shower
http://ceramictec.com/accessible-handicap-barrier-free-shower-tampa
http://ceramictec.com/barrier-free-accessible-curbless-roll-in-shower
Hi, I really enoyed diy-walk-in-shower step 1. I would love to see the rest of the steps, plumbing and tiling, but I couln’t find them anywhere on your site. could you please send the link to the remaining steps.
What are the overall dimensions for this shower?
Hi,
I liked the post idea and how you secured. Did you cut a half lap joint in the post to secure to the side of the joist?
OSB in a shower would make me nervous. In theory it should never get wet…but if it did for some reason the OSB would swell and tiles would buckle. Too late now…this sucker is sealed up and done. Should be fine, would just make my rear pucker.
I agree. OSB used only for firewood, concrete board wherever possible or treated wood. Water will find a way, leveling a house or settling. Never trust that it won’t get wet someplace, plan on it instead.
I watched your video on your shower and found it very informative. Do you have videos for the other steps beyond step one? especially for the shower bence. If so would you consider emailing them to me. I want to try a project like that. Thanks Steveh
why are you not using treated wood??
because you waterproof everything in the rest of the steps so you do not have to
May I simply just say what a relief to uncover someone
that really understands what they’re talking about on the internet.
You actually realize how to bring a problem to light and make it important.
More and more people have to read this and understand this
side of your story. It’s surprising you are not more popular because you
certainly have the gift.
I love the idea of building something from scratch, much more satisfying when you see the end result.
I am currently in the process of remodelling my bathroom so your tips will come in very handy.
We are remodeling an old house to and you done what i want to do but i just can’t figure out the size i want would you please share you’re dimentions with me. It is so hard for me sometimes to see what it is going to look like and yours is showing me walls and that helps. thanks, becky
What are the actual measurements inside the shower area? Width and Length.
#Ryan It’s not a good Idea (illegal some places) to use alot of treated in side of the homes envelope (the inclosed living areas of a home). If there were to be a fire the smoke from treated wood is extremely toxic. Way more so than non treated wood.
Two things….
1) How tall did you make the half wall?
2) I can’t seem to see any of the other parts to this build. There’s no link.
3) Ok…there’s three…great job!
Anthony
Timely comments – I learned a lot from the specifics – Does someone know if my assistant might locate a sample CA BOF 119 version to fill in ?
What are the shower dimensions of the shower?
Nice work but I’ll never understand why one would use wood instead of a block bench and especially a poured curb in their own home. This is how they build trac-homes and the first thing that rots is the 2×4 curb. If you use cement board on the walls and waterproof 100%, you might get away with just repairing the bench,curb and floor in 5-10 years.Of course the mold issue with wet wood is another issue. Good luck. 🙂
Where is part 2 ?
http://diydiva.net/2010/08/diy-walk-in-shower-step-1-rough-framing/
Hi,I read your new stuff named “DIY Walk-In Shower: Step 1 – Rough Framing – DIYdiva” on a regular basis.Your story-telling style is awesome, keep doing what you’re doing! And you can look our website about free proxy.
Could you please email your remaining steps. I am very interested in the finished product…..and it would aid in our project.
Thanks.
The better option for the seat would be hollow concrete blocks
Just an option. But like the 4×4 idea
Walk in shower DIY rough framing phase 1. I’m in the middle of redoing my bathroom and would love to see how to tear out in my bathtub and DIY my own walk-in shower. Thank you for your time DIY diva
Comments are closed.