I’m working my way through several projects for my home office with the hope that, after a year of living in a garage, they might help me get a handle on my life again. Hold on… I need a minute to recover from the fit of hysterical laughter brought on by that sentence. Because let’s be honest, nothing is going to stop me from leaving a trail of sawdust wherever I go, but this pinboard just might keep me from getting crushed under the growing mountain of papers on my desk.
(My inspiration was a Pottery Barn version, priced at $129.)
This was a fairly simple weekend project, if you have the right tools. (And if you don’t have the right tools, consider this yet another fabulous reason to visit the tool aisle at your local Big Box.)
Things You Need To Build a Pinboard
The materials for the pinboard are pretty simple and I’ve drawn up a fancy little build-it-yourself plan that you can view in a PDF and download here.

Here’s the list of materials:
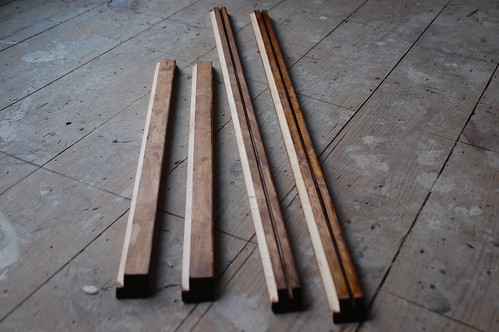
- 2 pieces of 1×2 pine, 36-3/4″ long (from outside of miter)
- 2 pieces of 1×2 pine, 24-3/4″ long (from outside of miter)
- 24×36 piece of 1/8″ chip board
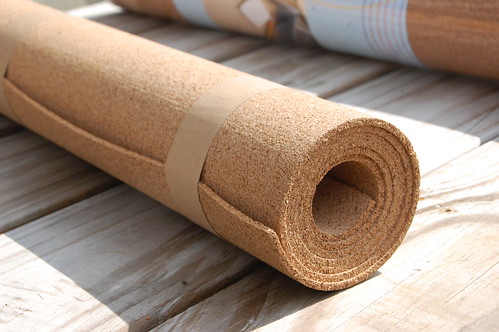
- 24×36 piece of 1/8″ cork board
- 23-7/8×12″ piece of 1/8″ chip board for chalkboard
- burlap
- chalkboard paint
- spray adhesive
- stain/poly for wood frame
Tools:
- Table saw or circular saw for cutting chipboard to size and putting grove in frame
- Miter saw for cutting frame pieces to size (alternatively a hand saw and miter box)
- Router for notching frame (can also be done with dado blade on table saw)
- Finish nailer/pneumatic stapler for joining corners and attaching board to frame
These are the tools I recommend, but I realize not everyone has a tool-buying compulsion like I do. This isn’t the end-all be-all list of things you have to have to put this project together– some of the pieces you could have cut to size at your local big box, or substitute other tools or joinery methods for. This is just how I did it.
Putting It All Together
Step 1: The Board
Whenever I’m building something with a frame, I like to start with the “inside” first. I mean, my cuts are always perfectly accurate because I would never cut without measuring twice, right? But just in case.

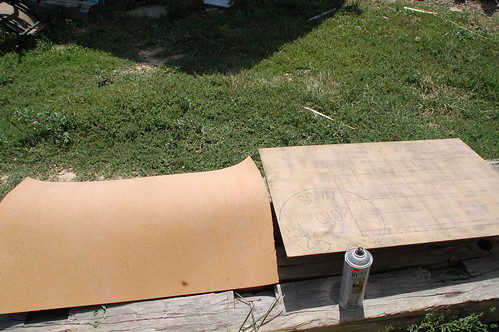
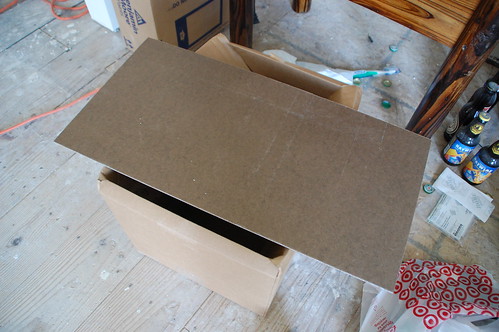
This 1/8″ chip board can definitely be found at Lowe’s in the same spot where they keep the smaller sections of peg board and bead board. It comes in 3×4′ sheets and will need to be cut down. The table saw is a simple way to do this. I used the scrap for the 12″ wide chalk board.
You could also use an existing cork board and just build a new frame, but since I didn’t have any cork board on hand it was cheaper to buy it in a roll and use the chip board as a backing.
I did lay the cork flat with a couple of books on the corner overnight to make it easier to attach to the backing. It was easy to trim to size using a utility knife:
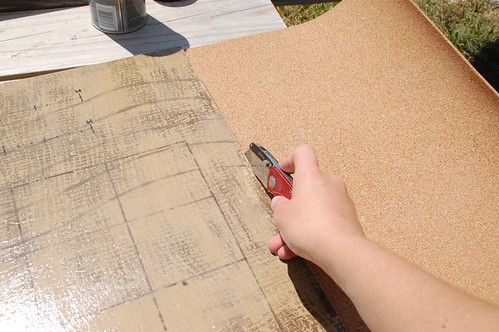
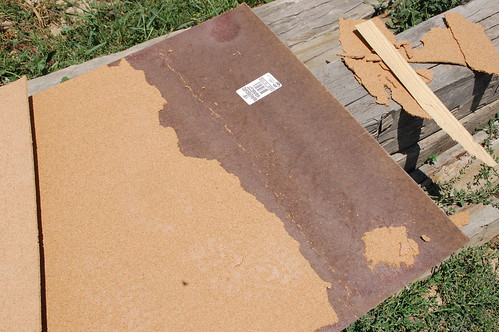
(The chip board pictured is from an old failed project that I recycled for this one.)
Then both the board and the cork were sprayed with a spray adhesive:
After it dries for a minute, the cork can be placed on the board. This may be a good time to have a helper because if you don’t get it right the first time, it’s hard to reposition.
And by “hard” I mean “there is no way you’re getting that cork off in one piece”. But you know what, things don’t always go as planned. Luckily I had some extra so I just cut off the problem area, resprayed, and patched her up.
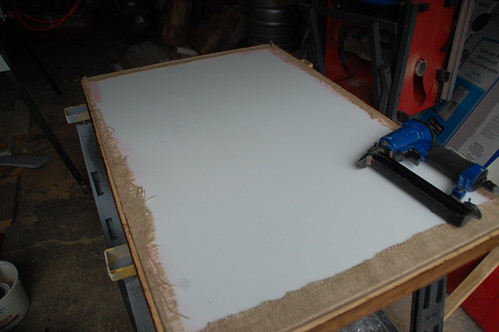
Next comes the burlap. Trimmed to size:
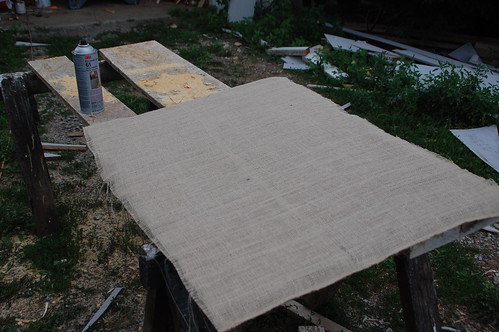
Then I sprayed a light coat of spray adhesive just on the front of the cork. I wanted it tacky enough that the burlap would be held in place but not super sticky. I also sprayed a thin line around the back of the board to hold the extra burlap as I folded it over.
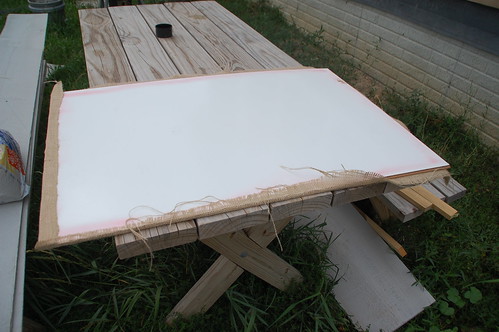
I thought I was going to get all fancy with this and cut a piece of brown contractors paper to cover the ugly seams. Contractors paper ranks right up there with bread crumbs and jigsaw blades as one of the things I compulsively buy every time I see it thinking I’ve run out. Which is ironic because this time I really did run out. So the back of the board is still ugly, but luckily it faces the wall and no one sees it.
The smaller piece of chip board to be used as the chalk board needs to be finished with a couple of coats of chalkboard paint, which I forgot to take a picture of but was very exciting, let me tell you.
And that wraps up the “inside” pieces of this project. Now we just need a frame.
(Note: You could always simply use this board in an existing frame, but the sliding chalkboard piece probably won’t work. If you’re going to do that I recommend measuring the size and depth of your frame before starting.)
Step 2: Framing It
The frame starts with 1×2 pine, which actually measures 3/4×1-1/2″. This is the same size of wood that I used for the mirror frames for my master bath, but I turned it up on end so there would be plenty of room for the chalkboard to move around.
The first step was to cut it roughly to size (two 26″ lengths and two 38″ lengths) and then put the notch for the coark board to set in.
I like to use the router set up in the router table for this. The notch was 1/4″ deep and 3/8″ wide. All four pieces were run through this.
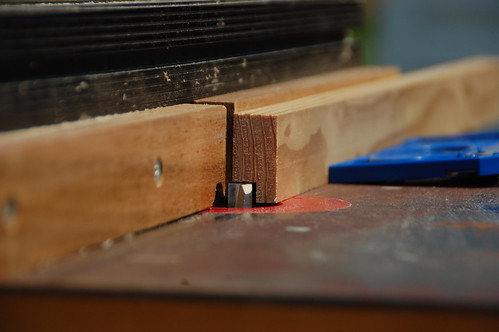
That’s all you would need to do for a simple frame, but this piece needed another channel on the top and bottom parts of the frame for the chalkboard to slide in. Since the chalkboard is only 1/8″ thick, I set up the table saw (whose blade is also 1/8″ thick) to only cut 3/8″ into the wood.
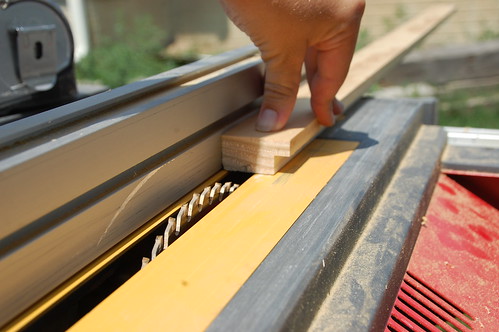
I’m always very careful when using the table saw to make a blind cut where the blade can’t be seen, and I also use a push stick to make sure all of my fathers dire predictions about my fingers don’t come true.
So that the chalkboard would slide freely I moved the guide 1/16″ or so out and ran both pieces through a second time. In the end I had this:

Remember, you only have to do this for the to and bottom pieces of the frame. Once all the proper notches and channels are in the frame piece, then I cut the mitered corners at a 45.
After that it’s a quick sand, couple of coats of stain (I used Minwax Early American), and a satin poly finish.
Step 3: Assembly
Everybody still got all of their fingers? Great! Now it’s time to not shoot yourself with a nail gun. DIY- it’s not only productive, it’s exciting.
Because I like to live dangerously (and it was the only flat surface in the house large enough) I clamped the frame pieces together one corner at a time on my kitchen table.
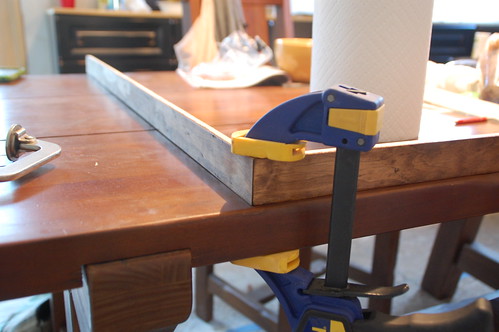
Then I shot two finish nails through the end of each corner, using my cordless air nailer. You could also use a pneumatic stapler or a pocket screw to accomplish this. You might also consider putting a little wood glue on the joints before nailing them, but I wanted to keep things a little more flexible if the chalkboard part didn’t work out.
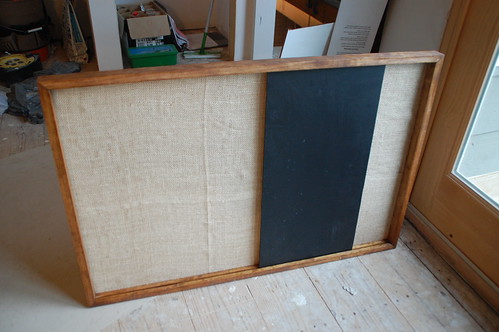
With three of the sides nailed together I slid in the chalkboard before attaching the final piece.
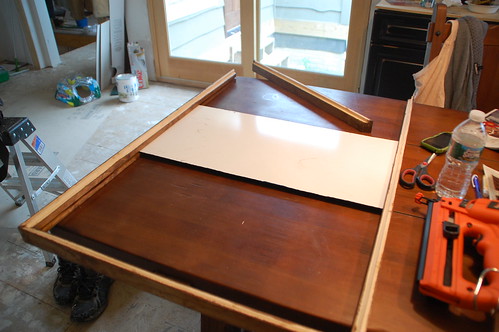
And here it is, ready for the cork board:
I did use 1″ staples for this part, and I only tacked it on the short sides of the frame, because if you shoot staples through the top and bottom pieces the chalkboard won’t be able to move.
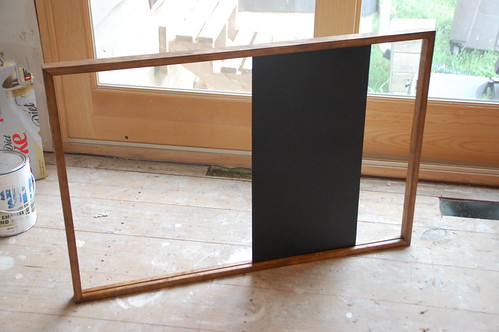
And….
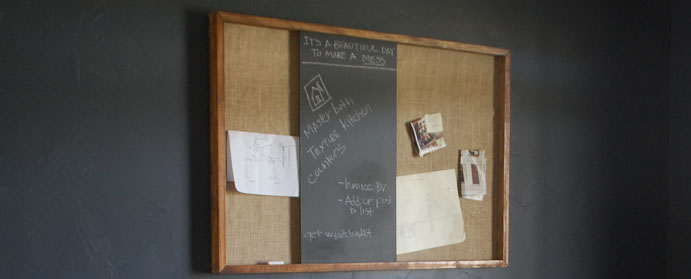
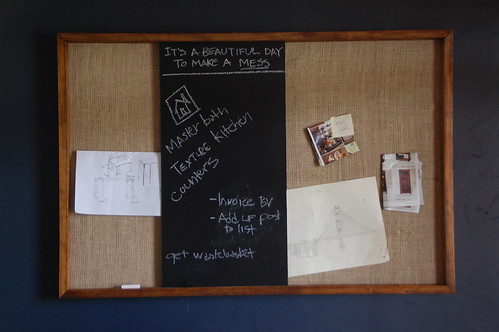
Like magic, you have a pinboard. Or, more accurately, a pinboard with a huge freaking crease down the middle of it that I only noticed while taking this picture. I even busted out the iron to make sure the burlap was nice and flat when I attached it, and I don’t even turn the iron on for the clothes I wear in public.
However, with a sliding chalkboard, this was a super easy problem to solve.
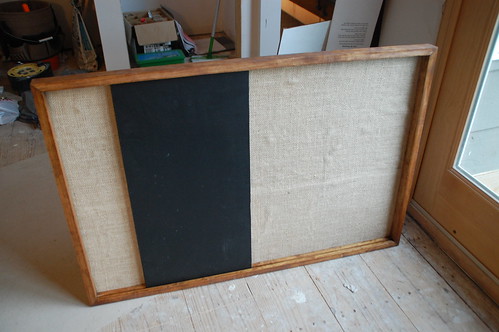
And, we’re good!
No reason to make life more difficult than it needs to be.
Step 4: Hanging
The only thing left is getting the board up on the wall. I chose to use a couple of little picture hooks fastened onto the back with small screws. If you go this route make sure you pre-drill.
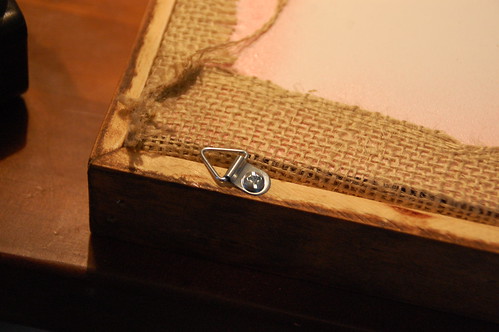
The whole board including the frame is pretty light, and your favorite picture hangars will probably do for getting it on the wall. I used these.

And here is my home office in it’s current state:
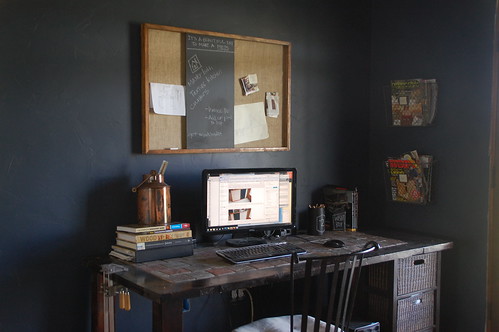
A couple of things to note: Yes, those are wood clamps on the side of my desk, and no I’m not doing that to be trendy. Also the look of the wood from the pinboard on the blue walls was exactly the look I was going for, and just reinforces that I need to get working on building a new computer desk. (One of the plans pinned to my board, in fact.) You can also see that I’m making use of my chalkboard storage containers and magazine bins, and I have one or two more organizational projects up my sleeve before I get back on the “tiling the bathroom” train.
So I bought the materials to make two of these and the cost for all materials per pinboard (not including the chalkboard paint, which I already had) was $30.
What do you guys think? Is this pinboard something you’d DIY?
<em>This project is linked up to my favorite party, The Lettered Cottage’s How-To’s Day: </em>
<div align=”center”><a href=”http://theletteredcottage.net/how-to-paint-a-table-sort-of” title=”The Lettered Cottage”><img src=”http://i268.photobucket.com/albums/jj29/LaylaPalmer/How%20To/How_To_Linky_Button.jpg” alt=”The Lettered Cottage” style=”border:none;” /></a></div>

13 Responses
Looks fantastic!
Thanks for such a great tutorial!
xoxo
Love the bulletin board/ chalkboard combo! This looks like a great project.
Love it! Of course, I love almost everything Pottery Barn, so it’s always a win to see how to make it yourself. Well done!
I think it’s a slick project. The one suggestion I would make is on the glue-up of the cork to its backing. I was taught to always make things too thick, too long, and too wide when doing a glue-up, as it tends to want to move around. Or, with contact cement, once it goes down, that’s the news! I would have made the backing a couple of inches too wide and too long. I would have then glued down the cork, making sure that I had a clean edge on one long side and one short side. It is then very simple to take it to the table saw and trim it to the correct width and length.
LOVE it. Really great project, and your office is totally shaping up.
That is soooo awesome. I’m going to give it a whirl. Love your blog. I’m gonna look around a little I think.
You’ve got really good photos! That saw is downright handsome. Just yesterday I was looking @ a PB catalogue, getting mad at the cost of what do they call it .. “dayplanning system” or something? Now the mystery is solved – $30 and a sunny afternoon!
i have been trying to decide what kind of a pinboard to do.. i love the chalkboard on this one. beauty and function… thank you! 🙂
Oh wow, your version is much bigger. I think you did a fabulous job on it. Thanks for sharing your project with me.
Brittany
As someone that is opposed to mass produced/manufactured things like this I really like your version.
One thing about cutting grooves, if you switch that combo blade for a dedicated ripping blade you will avoid that funky angled bottom on your grooves. A thin rip blade works well for direct drive table saws such as the one pictured.
Comments are closed.