I’m going to start this post out with a disclaimer: If you’ve eaten recently, or are thinking about eating in the next, oh, eternity, you might want to skip this one. The following pictures may result in a loss of appetite, spontaneous vomiting, and/or the desire to scrub your entire body down with bleach. Or maybe that’s just me. So read on, but only if you have a poorly draining sink and a strong constitution.
Don’t say I didn’t warn you.
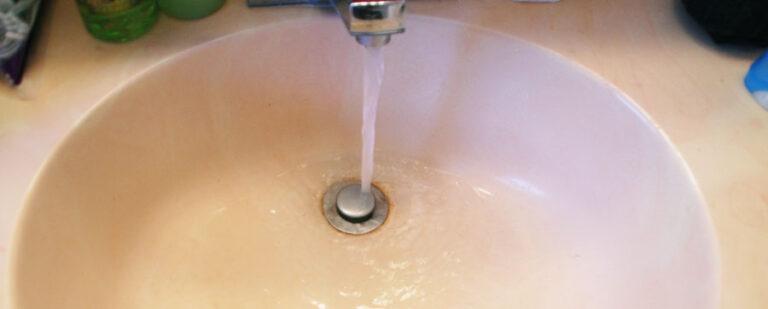
The poorly draining bathroom sink in the Farm House Rental is one of those pesky little issues that I’ve been meaning to deal with since I moved in. It makes things like brushing my teeth and washing my face a huge chore, and let’s be honest here… I don’t need another reason to be going out in public with paint all over my face, right?
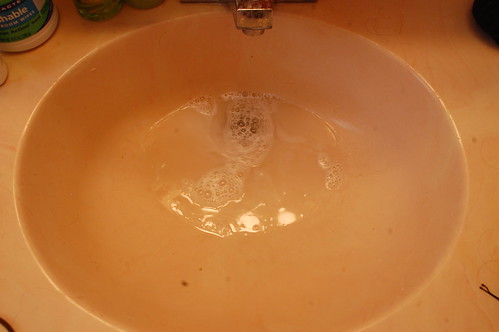
It needed fixin.
And yet, it still took me two months to work up the courage to tackle this one. Not because I wasn’t sure how, but because I was terrified of what I would find. Plus, you know, I had to dig out my full body haz-mat suit in order to spend any length of time wedged into this space.
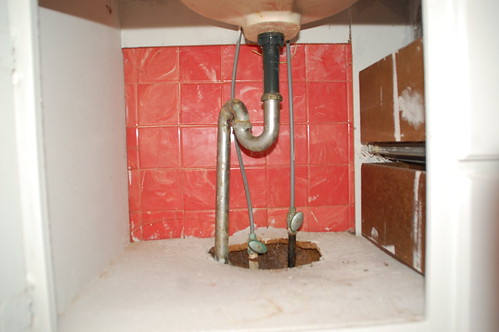
Here’s what we’re actually looking at in the picture above, but with more labels and less pink plastic tiles:

This will give you a pretty good idea of what goes on under the usual bathroom sink. I’m by no means a plumber or plumbing expert, but I’ve installed enough bathroom sinks to guess that either somewhere in the bend of the P-trap, or possibly where the stopper and pivot rod connect, something was keeping the water from going down.
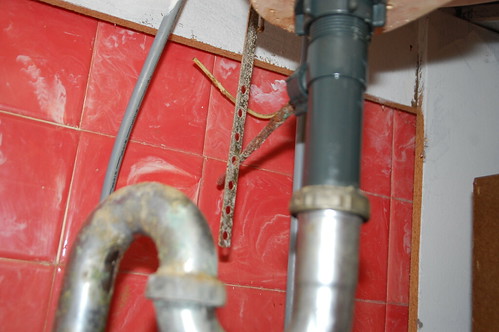
I tried removing the actual P-trap, but, like many things in this house, the damn thing was rusted on so tight that no amount of leverage and swearing from my 5’3″ frame was going to get it off. Well, I mean, I own a hammer, I could have gotten it off, but I have a feeling there might be a clause in my rental contract about not smashing the bathroom to pieces.
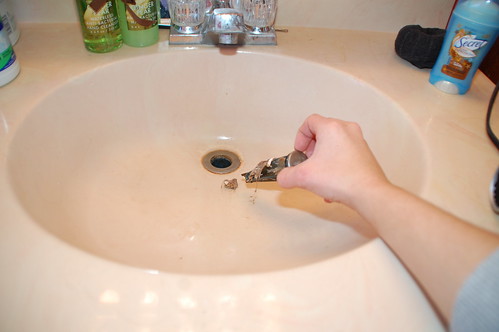
Instead I focused on this little problem area. In a proper setup, the pivot rod there goes through one of the holes in the clevis, which is what makes the stopper open and close when you pull on the rod behind the faucet. Clearly that’s not what I had going on here…
In order to remove the stopper I had to remove the pivot rod by unscrewing the little plastic nut that holds it in place.
Then, brace yourself, I got this…

Ugh. Ugh. I can’t even…
That’s a mixture of hair, mystery substances, and pure evil.
Then I pulled the stopper out of the sink and I really think the only thing that kept me from vomiting was that I knew I was going to write this post and have to admit it if I did.
It would have been better (for cleaning purposes, but worse for curbing my desire to take a bath in straight bleach) if I could have pulled the trap and drain apart and cleaned everything that way, but instead I settled for digging out the clog with a long screwdriver.
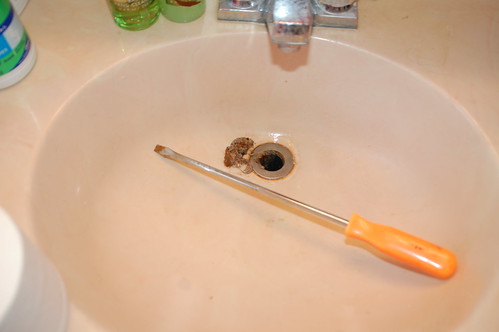
There was about three times this much gunk when it was all said and done, but I seriously couldn’t bring myself to look at or take pictures of it. I’m that traumatized.
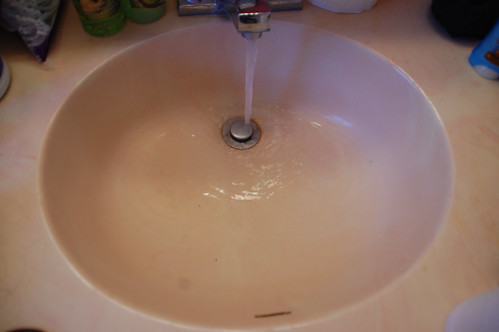
After I cleared most of the clog I shoved a paper towel in the hole where the pivot rod was and then ran the water for a minute to make sure it was draining fine without the stopper in place. (It was, thankfully.) Then I soaked all of the sink parts in bleach for 30 minutes before reassembly.
In the meantime, I literally cleaned every square inch of the bathroom first with bleach, then with a swiffer, then with my steam mop. That right there should tell you how grossed out I was by this, because half the time it’s a battle for me just to pick my clothes up off the floor, and here I was channeling Mr. Clean.
Once everything was clean and ready to be reassembled, I started by putting the stopper back in the drain, with the hole at the bottom of the stopper lined up with the hole for the pivot rod. Then the pivot rod went back in (through the clevis, this time), and I tested everything out to make sure it worked.
Would you look at that…
And, no water left standing in the sink.
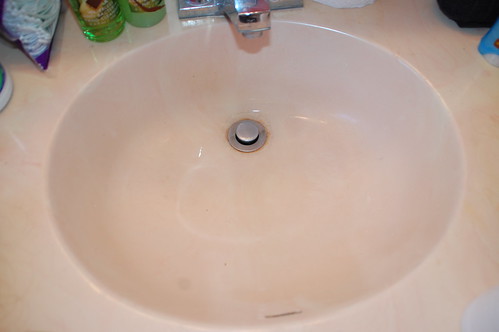
Once I was sure everything was working I tightened everything up, checked for any leaks under the sink, then took a steaming hot shower and huddled in a dark corner for a while to try and get the horrifying images of this experience out of my head.
But, I was able to brush my teeth before going to bed, so all in all, it was worth it.
Anyone else have tips for tackling a clogged drain?

18 Responses
I’ve been told that this cheap tool works like magic! You can get them about anywhere but here is a link online:
http://www.amazon.com/Cobra-Products-400-Drain-Cleaning/dp/B000BO9204
Of course, you may have til needed to remove the pivot rod…
Haha nice job! Gross as it is, I think the mechanical method you used to clean out the drain is by far the best way. It’s too bad the P trap didn’t have a clean out built into it; that would’ve made your life much easier! Glad you got it working!
Ugh. We have to do this every few months in all of our bathrooms — we must drop a lot of hair. I did the one upstairs last week (the bathroom my two girls use) and my husband did our sinks and our shower yesterday. I was working on a different project, running in and out from my saw in the garage down to the basement and back, and I could SMELL the drains every time I walked in the house. I thought it would make me hurl, but I powered through. We usually have to take the trap apart to get our clogs out. Nasty.
I feel you Hillary. There are so many great things about owning a home… cleaning out the drains is NOT one of them.
Pretty good DIY’ing
Thanks for the warning not to read and eat. I usually catch up on my blogs over lunch, so I came back to your post after I finished! I saw this Q&A with the author of a new book called That’s Disgusting and thought of you… particularly on the question “why are we more grossed out by other people’s bodily fluids than by our own?”
http://www.theglobeandmail.com/life/health/new-health/health-news/thats-disgusting-the-how-and-why-behind-repulsion/article2309654/page1/
One of my least favorite things to do is uncloging a sink but these tips will help for next time
All four of my bathroom sinks drain really slowly, but if I reach in and pull the stopper up just a tad, they drain fine. While investigating, I found that the pivot rod has a groove worn in it where the stopper hooks in and so the stopper doesn’t raise up all the way. Luckily the replacement rod is fairly cheap. Now to find the time to get under every sink and replace them.
Simple solution if you don’t need to plug the sink drain very often and completely reversible in a rental.
Check your local dollar store/family dollar/dollar general type place for a small rubber drain plug and a small basket sink strainer. You will need to have another pivot arm (or buy one) or find a small semi-hard ball (gumball machine super balls might fit) the same size of the existing ball on the pivot arm.
Remove the arm and stopper. If you have a replacement arm, cut the inside arm off and use the arm with the external bar and ball or insert the super ball and then the arm cover. If the loose drain pull arm drives you crazy, just pull it up and out. Now use the basket to keep small items from going down the drain and the rubber plug to plug the drain the few times when you do need it.
Without the stopper arm and the stopper support structure, there is less surface area for hair to get stuck on and cause build up of hair products, toothpaste, soap, etc. It’s that stuff breaking down that is just plain nasty.
I moved into a friend’s place (with her family) years ago. When I took my first shower, I found the drain was clogged. So I pulled the plug and starting pulling hair. It was horrible. I vomitted into the tub three times. “Luckily,” I knew not to wash it down until the clog was clear.
I told my friend about it and she said “at least you know it was only your hair.” WTF? I was there for ONE DAY!!
Yeah, it’s one thing when it;s YOUR gunk…another thing entirely when it’s some unknown others. *urp*
Hey, speaking of Hillside….check out what I found this morning. Scroll down to the fourth pic. 🙂
http://lawrencehousepainting.com/Painting.html
+1 to Nancy V’s recommendation for Zip-It drain-cleaning tool. Two bucks, avail at Home Depot, easily pulls out all the hair-and-whatever. Works much better than screwdriver. Works on sinks and on bathtub drains. Can clean and re-use if you have a strong stomach; or for $2, consider it a disposable. So easy, your kids can do it! (Yeah, right, maybe YOUR kids… 🙂
I’ve found regular household vinegar to help a lot with unclogging sinks. It’s cheap and less corrosive than commercial products so it’s easy to use on a regular basis as preventive maintenance.
Also, I’ve taken apart a p-trap before that was so rusted it literally fell to pieces as it came off. I replaced everything with PVC pipe since those parts last forever.
I’ve been fighting with a slow drain since I moved into my house last May.
I plunged it numerous times, which brings up the nastiest sludge you can imagine. I’ve tried the baking soda/vinegar volcano trick, and I reluctantly tried Drano. A couple of days ago I extracted a pair of fingernail clippers from the drain with a Cobra Zip-It tool. After removing fingernail clippers I thought I had finally conquered it. Nope.
At this point I’m just going to replace the drain pipes. Because of their age I’m afraid that they won’t go back together after I dismantle them.
I will be victorious.
Screwdriver….Love it! I used a fork a couple months ago.
Zip-its are indeed one of those inexpensive little fixes everyone should know about. (They’re also available at your locally-owned ACE Hardware stores – we sell loads of them!) As a fellow DIY chica, I’ve enjoyed finding your blog – add my wishes for great success on your next project!
I have to do this on a regular base’s with my wife hair and im a plumber
plumbing-heating-denver.com
Those pictures are nothing compared to what I’ve taken out of my sink drains in the past. Usually a huge glob of old toothpaste and hair all wedged around the stopper and pivot arm. Very disgusting.
Comments are closed.