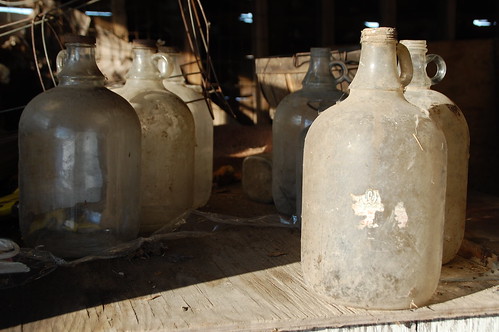
When I decided to rent an old farm house with a bunch of falling down buildings on the property there was a general debate going on in my family about whether or not I’d a.) lost my mind, or b.) become a full-blown hillbilly. Which, duh, I own donkeys. The question kind of answers itself. Especially when I find things these old moonshine jugs in one of my garages and am all, “Hey, I think those will look great in my living room.”
What? I washed them first. And, you know, added a little wiring…

This counts for at least one vote in the non-crazy category, right? Because I have to say, for minimal effort– not including scrubbing years worth of grime off the jugs– these Moonshine Lamps were a pretty quick, easy DIY project.
I started with a little research on lamp-parts. You can buy lamp kits online or at most hardware stores. Instead of going with a kit I decided to buy the parts piecemeal so I would have a little more flexibility with how I put it all together.
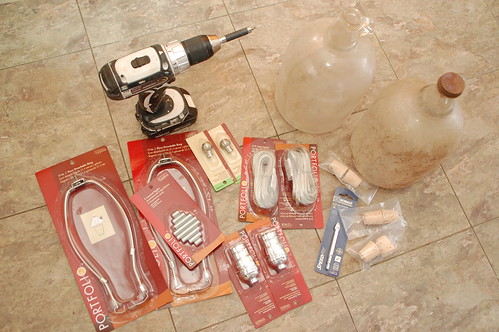
Here’s what I used:
- 2 big filthy glass jugs
- 2 lamp cords with outlet plugs
- 2 detachable lamp “harps” to hold the shades
- 2 light sockets
- A set of threaded “nipples” (hey, I didn’t package the things)
- Corks special ordered to fit the jugs from here
- Ceramic drill bit
After figuring out all the pieces and parts that I needed my first (and really, only) challenge of this project was drilling a hole in the glass jugs for the cord to enter. Luckily I had seven more bottles hanging out in the garage if this didn’t work, but– as with everything– when you have the right tools things go pretty smoothly.
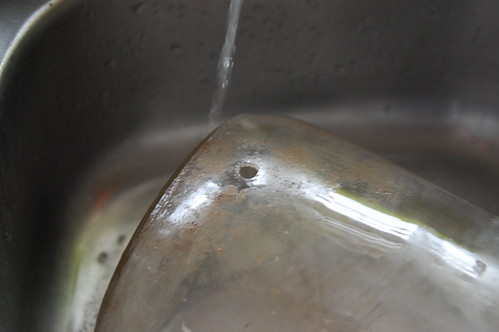
I set the jug in the sink on a kitchen towel and let some cold water trickle over it, then I rested the ceramic bit on the glass and started drilling.
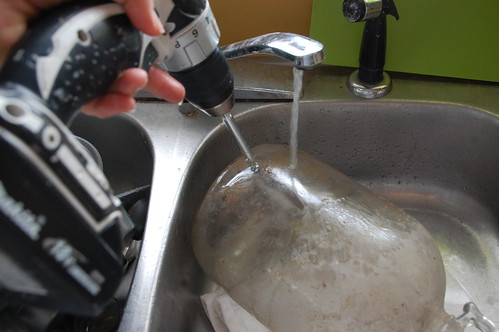
Note: I said “rested” not “pushed”. Drilling through glass or ceramic is a patience game. I never used more pressure than the weight of the drill, and once the bit broke through the glass and I was just widening the hole, I even lifted some pressure off. It took about 2 minutes of drilling to make a hole this size.
I didn’t push my luck and drill any more than was necessary for the cord to fit.
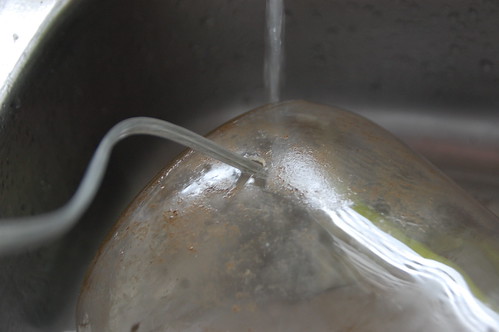
Slow and steady with very light pressure is the key (which I totally learned from this experience.) After I successfully drilled the holes then I went back and washed the jugs inside and out, then started playing with some of the wiring while they dried.
Here’s the basic assembly for the wiring:
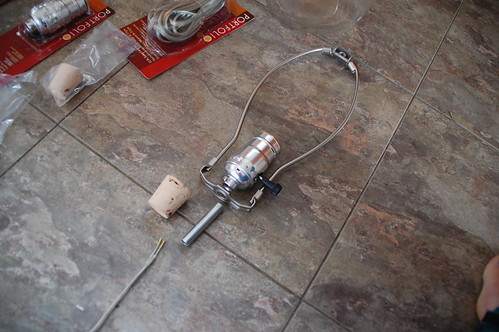
Cord runs through nipple, connects to socket. Nipple runs through cork, holds harp, and is attached to socket. Easy enough.

The first thing was to get a hole through the cork stopper for the nipple to screw into. When I was looking at lamp kits most of them came with a black stopper to hold the nipple and socket in place, but not only was the stopper the wrong size for the opening of these bottles, I also wanted something a little more natural looking. Instead, I measured the bottle openings and ordered a couple different sizes of cork stoppers online.
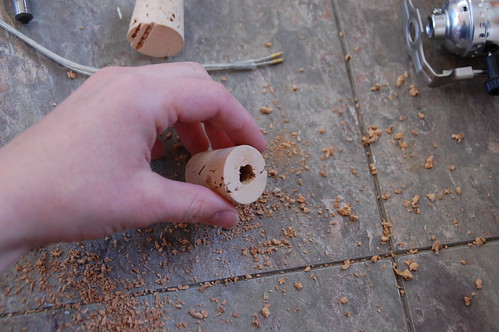
Cork isn’t the easiest material to drill cleanly so I used a bit a few times smaller than the hole I needed, and I made sure I had some extras on hand which turned out to be a good call. Not such a good call? Drilling into cork right in the middle of the kitchen floor. As someone who views vacuuming with the same degree of excitement as having a splinter shoved under my fingernail, you’d think I would be more cautious about where I make my messes. You would be wrong.
In the end I had two corks fitted with nipples, and a small pile of cork-bits for the cat to roll around in and track through the entire house in the 15 minutes (okay fine, 45 minutes) it took me to get the shopvac out.
I thought I might have to use some silicone to keep the nipple in place, but it was actually a pretty snug fit without any adhesive. I may revisit that later, depending on how everything holds up.
The next thing I tackled was the light socket. Most sockets have the word “press” embossed on them somewhere, and when you squeeze the socket you can pop the bottom off and get at the guts of the wiring.
So here’s something new I learned about wiring during this project: If you look at a standard lamp cord, one of the wires will have an intent or colored stripe on the plastic sheathing of the “cord”… this is the neutral wire (attached to the bigger outlet prong). When everything goes together, this attaches to the silver screw. The other wire attaches to the gold screw, and then you’re in business.
Here’s a look at everything as I assembled it:

Cord through the jug, then the stopper, then the base of the harp, then the bottom of the socket. Then and only then do you start attaching the wires.
I may or may not have gotten excited about getting things to light up and forgot to put the base of the harp on the first time around, but I got there eventually.

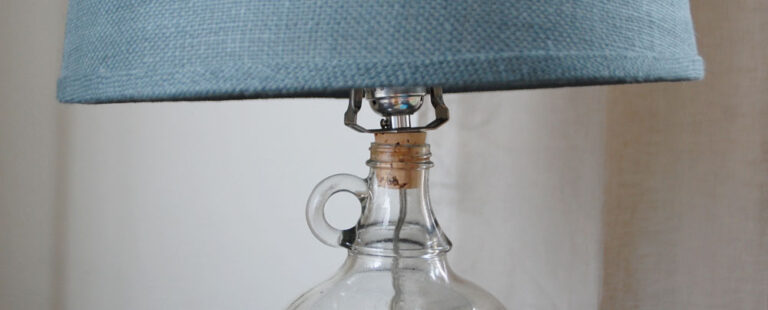
And the moment of truth:
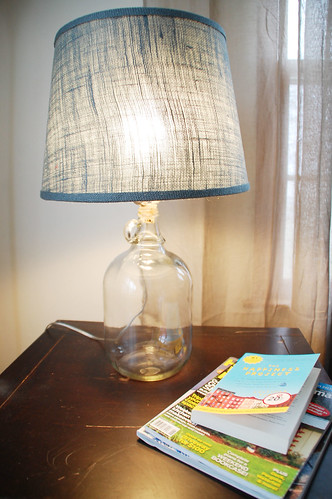
All that’s left is adding a lamp shade.
Unfortunately I bought the one kind of shade that doesn’t work with this style of harp, so this is just a mock-up of how it will look eventually, but you get the idea. All in all the lamp cost about $25 to put together, not including the shade.
I love the glass, but I’m thinking it might need to be dressed up a bit with a fun label like this:

{The work of Simon Walker found via Found, Flea & Free}
But for now, I’m just happy to have a little extra light.

26 Responses
I think this lamp turned out awesome. REally love your idea for the logo/lettering. Can’t wait to see how it turns out!
Yay! They turned out great! So much better than mine. I was too scared to take a drill to glass so just kind of bent the cord to make it come out the top. Definitely tempted to re-tackle this project though. You should check out this site for a DIY decal tutorial: http://bit.ly/zMLwJr
That link was so timely. I was just trying to figure out if I should make a stencil and paint it on or what… now I know how I’m going to tackle it!
Also, don’t fear drilling through the glass. With the right bit it was super easy!
Nice project! I’ve thought about making a lamp, someday when the right base comes along. Moonshine jugs are perfect.
This is awesome!!!!
thank you for sharing this! im definitely going to try this out at home…it looks great and fun to do! beautiful post!
Really interesting idea, looks quite complicated to make but looks like fun and the lamps turned out really well.
Wow…Really great couple of tips, thanks!
I am so excited about this! I have been wondering what to do with the amazing glass jugs that my apple juice comes it and this is perfect! Unfortunately I keep messing up! First I bought what I thought was the wrong kind of lampshade, returned it for the other kind, and now I just came back and re-read to find out I had it right! And I was going to try and make due without the custom cork but everything is way too wobbly and I’m going to order those tonight. Which sizes did you order, and which ended up working?
Thanks for the amazing tutorial!
Hi. I love the moonshine jug lights – have several jugs I’ve been “playing” with the idea of doing that with. What about using the old blue tinted mason jars as hanging lamp shades – drilling the hole in the bottom for the wiring to run through for the bulb and hanging them like a pendant light? Have you ever done that, and if so, could you show it? I’d really appreciate it! Thanks in advance!
Definitely stealing this idea.
Not necessarily for moonshine. Cider, water, etc.
I really hope this feedback isn’t deleted like
my last one…
Hi! What size cork stopper did you order?
Wonderful tutorial.. I found a Mt of these 1 gal jugs… clear and green at an abandoned house.. The old man that lived there 36 yrs ago worked for Coke and mine are Coke Syrup jugs… I was wanting to do this but was afraid of breaking it… I have thought of stacking them to make a pole lamp.. with a thin rod in the center.. so is it hard to drill the glass??
My finds were extra dirty inside. Use Stain Away powder for cleaning dentures, a handful of marbels and a few inches of water, then swirl like crazy.
Awesome tip, thanks!
Great idea there! What if you could somehow send light into the bottle as well? Your project reminds of how Ikea saved millions by a simple modification of their textur lamp, which flat pack genius, if peculiar I’ve left the link for you, cheers!
Very informative, thank you. I wonder if soaking the cork in water ahead of time might be an idea, people do it when using them to make stamps. It makes them easier to cut into, they do not break or flake like when dry, you could put the hole in by hand and then let it dry, maybe drying on the piece it is meant for will make it even more snug?. Just a thought.
I think you have done a great job. You are so creative and you would make a great carpenter!
You are a great builder!
Nice project! I’ve thought about making a lamp, someday when the right base comes along. Moonshine jugs are perfect.
Nice project! I’ve thought about making a lamp, someday when the right base comes along. Moonshine jugs are perfect
Comments are closed.