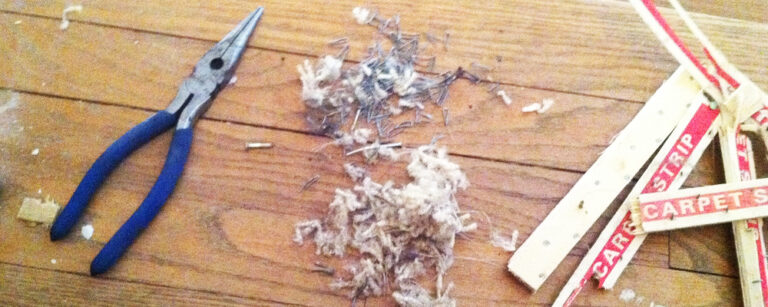
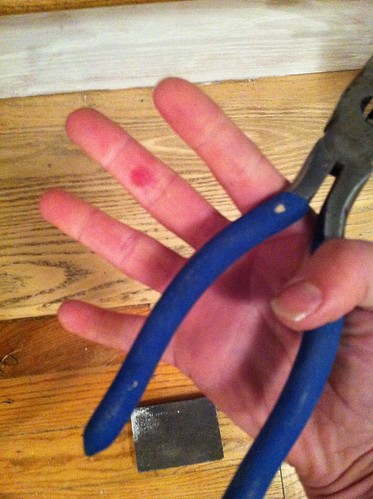
Last week Sarah @ Ugly Duckling House and I announced our DIY throwdown, and I’m going to claim the very first injury in this epic battle of staircases, with this…
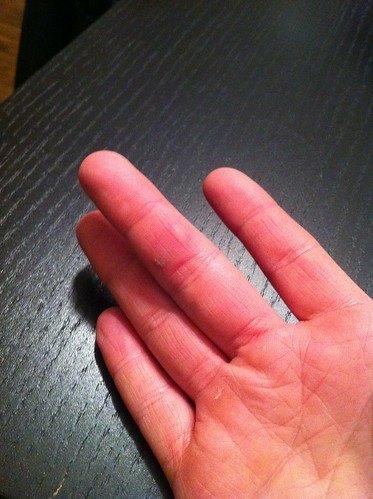
Yep. I’m not even going to build up to it, we’re just going to dive right in and start this party with a blister. And let me just say this, for as much questionable shit as I do with my tools, I very rarely sustain an injury from them… much less some sissy repetitive-motion style injury like a blister. Wait. I’m sorry, not a blister. Two blisters. On the same finger. Tell me this isn’t karma for flipping off bad drivers?
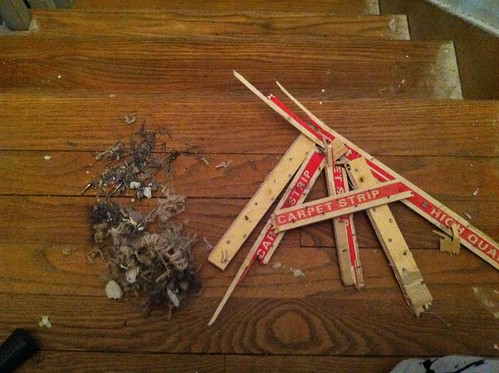
What happened was that the people who installed the carpeting on my stairs used about 300 industrial strength staples per square inch of carpet.
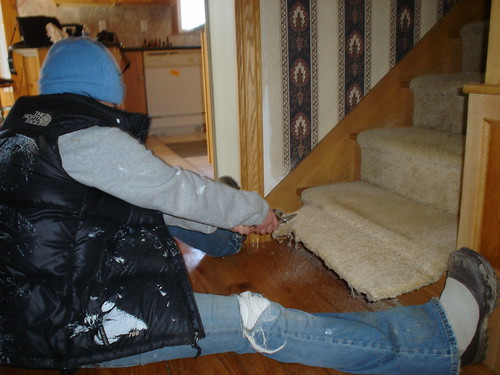
Right? That is me trying to remove the runner when I first moved in. Really successfully, I might add.
So there was a little bit of staple-removing I had yet to do, which is how I began my staircase refinishing journey this weekend. I also taunted Sarah with my remarkable progress…
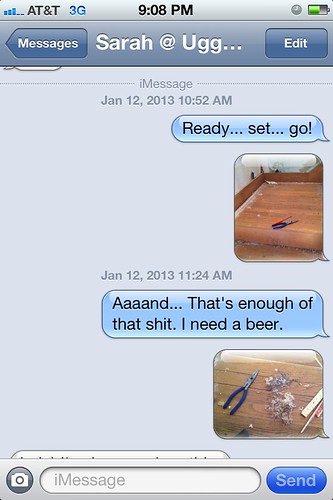
I’m pretty sure I felt her roll her eyes at me all the way from Atlanta.
This pile of stuff looks unremarkable, given how long it took me to produce. And here’s how ridiculous I am… at some point while I’m doing this, my hand starts to feel a little wet and sticky and the first thing that goes through my head is, “oh, I must have gotten paint on my hand.”
 Paint.
I’m removing staples from a staircase, but at this point in my life it’s just so natural for me to have paint all over myself that I don’t even question the fact that a.) I’m not painting anything, and b.) there isn’t an open paint can within a twenty-foot radius.
So you can imagine my surprise when I realized it was not, in-fact, paint, but something oozing out of the torn skin on my finger. Did you just faint? Sorry. But for real, that sucked.
The good news is that the skin has hardened into some kind of super-callus now, and I can continue to yank out staples with wild abandon.
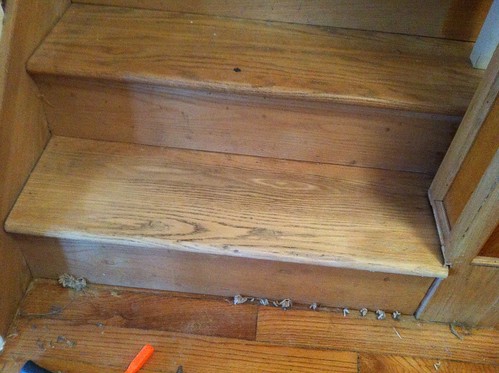
The other good news is that I actually got more done this weekend than yanking staples or complaining about blisters. I also took the stairs from this…
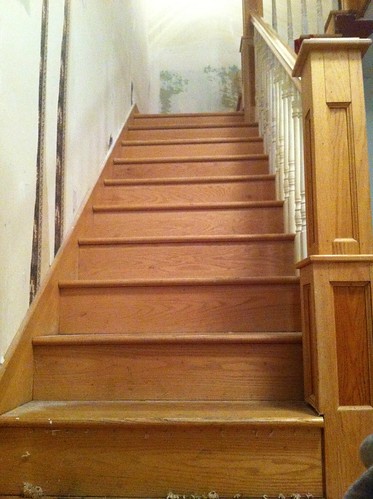
To this…
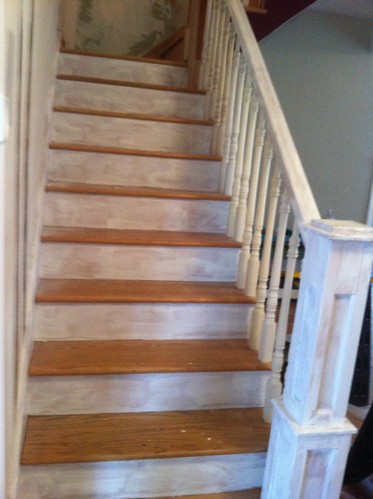
(I’m blaming the extra crappy iPhone photography on my injury. Don’t judge.)
So, let’s have a serious moment about projects and processes. In the grand scheme of this project, does it make sense that I went through and primed the handrail and risers before sanding down the treads? Eh. Maybe, maybe not. There are two reasons I chose to do this first though.
As far as painting (and painting trim) goes, I’m a bit of a disaster. I just don’t have the patience, and I figured at least doing a coat of primer first when I don’t have to be as careful would save me some time down the road. But it also serves a larger purpose–and this is something I’ve found to be key on these marathon projects– visible progress.
It might sound a little strange, but I’ve been doing this for almost a decade now, and I know how my brain operates. If I’ve made enough progress on something that it immediately triggers an image of the end-result when I walk by? That’s my sweet-spot for staying motivated. (The other trick is making sure to go from “looks in-progress” to “is actually finished” in one fell swoop, because if it looks finished but isn’t? That’s how I end up without trim on one side of my bathroom door for five years.)
And I will tell you what, it works… every single time I’ve walked down the stairs in the last two days, I’ve been seized with a sudden urge to put a real coat (or three) of paint on the damn thing. However, before I actually paint anything I do need to sand down those treads. I did the first one over the weekend just to get a feel for how long it will take.
This was about 30 minutes with the sanders. So, ah… I’ve got some work to do.
I put about 4 hours in on the staircase this weekend, so I’d say I’m realistically about 15% done. But hey, progress is progress. You can check in on how Sarah is doing here.
We also had a few other crazy people friends jump in on this Dueling DIY challenge, and you can check out their progress here:
- Micha @ Little Old House has a lot of stripping in her future (Um. Paint stripping. Obviously.)
- Christine @ Little House on the Corner has a head start, and is already working on a few final coats of paint… she’s currently the person to beat, if any of us can catch up to her.
- Ann @ Our Handmade Home looks to be about where I’m at, with slightly less sanding (but no less painting) to get her staircase complete.
If anyone else wants to get in on this fun (or if I missed a link to your site) leave me a comment and let me know. And to everyone joining in or cheering along from the sidelines? So far, you’ve made this project way more fun than it has any right to be!

21 Responses
We’re actually going to be working on our staircase in the next couple weeks – it’s part of our basement finishing project. We need to sand, paint, install spindles and handrails. The goal is to have it finished by our daughter’s first birthday in 3 1/2 weeks – yikes!
Ouchy! Blisters suck. I’m such a wuss about them because they’re usually in a spot that touches something else at least 3 dozen times a day.
Looks like you’ve got a good start! you didn’t have to sand down the risers first? THAT I’m jealous about. That part was were my back started spasming and being all, “WTF are you doing to me?” and “Why are you using a tiny 1/4-sheet orbital sander? GO BIG, GIRL!”
Wishing you luck and patience on the treads!
I don’t know if the proper phrase is “didn’t have to sand down the risers first” or just plain “didn’t”… lol. I did actually rough them up with a sanding block and I used a shellac-based primer/sealer which supposedly adheres to any surface without sanding. We’ll see!
You needed to add yet another tool to your arsnal and unfortunately i am not sure what it is called! Its more like a slat head screwdriver that has the blade split much like a tiny cats paw. I found this thing at a JoAnn Fabric store and its built to remove staples from upholstery, so maybe thats what you would call it, a staple remover. Much easier on the hands than a needlenose pliers, because you use leverage verses pulling force. You willstill need those pliers, but not as frequently. I dont know why carpet layers use so damn many staples, but it is infuriating and annoying job!
Yeah, my cats paw is definitely too big… I didn’t think to check a fabric store! I did notice when I was using the screwdriver and leveraging them out I was dinging up the wood a little to much, so the yank-it-straight-out method was a little better in that respect. I think a smaller staple puller would totally be the way to go though!
I’ve pulled out far more than my share of carpet staples, and the best way to do it w/o damage to the floor is to use a split-end nail puller/chisel/remover thingie, and you use leverage to get the staple out. But first you put a wood paint stirrer under the back edge of the remover and that protects the floor pretty well. I’ve used a hammer to apply leverage and my body, and like the hammer best. I think for fiddly, tiny spots an old credit card would protect the floor as well as the paint stick.
it’s simply called a claw, and if joann’s doesn’t carry it, i know home depot does. i work there, and i’ve sold them to people.
good luck! yay progress! 😀
you need a tool like the Estwing 9 in. Pro-Claw Nail Puller (the link for this type of tool at Depot was so long that I just picked a brand)
As a long time bowler, I will tell you those blisters build up until you have a nice weird shape callous, and then you feel nothing. That is why my bowling thumb is noticably larger than my other thumb, years and years of callous build up! Funny, but true!
I’d love to throw my hall bath into master suite renovation into the mix, but considering we are still stripped down to the studs, I’m guessing you will have 8 projects tackled by the time I am drinking beer in my new shower (yes, that happens, I even have a nude Burt Reynolds coozie for such occasions). http://www.pardonoursawdust.com/2013/01/11/master-bathroom-mini-update/
Well, it looks 100% better than the rug covered stairs! Wonder if you could rent an edge sander for half a day. That sucker would rip through the middle of the treads, but you’d still need a palm sander for the corners.
You know what? You sound just like me. I would do the same thing you’re doing except I would have blisters on both hands because I would have switched hands! HA! I am so sorry about the blisters though… they suck big time!
I just realized that I need to prepare the wall BEFORE I do any painting… so stupid not to think that I needed to pull nails off the walls and fill them etc… DUH!
I am going to read all about your duel as if it’s a book novel… with anticipation and eagerness!
ouch, ouch, ouch!
One thing good about our full re-build. We have never had to pull a carpet staple up… we just ripped up all the floors instead, which may have been easier.
A couple of strategically placed sticky-plasters will help a lot though.
I am fighting the urge to just paint the damn stairs too. Especially now the tin of paint is sitting there, tempting me.
must…..resist….must…. resist…. lol
The people that install carpet on stairs must be paid by the staple because it’s the only way to explain the 200 staples per stair tread that I pulled out by hand on our stair redo. Sorry about your blisters 🙁
Lowe’s also carries a set of four picks of various shapes by Kobalt that are cheap but have a sharp point and curves or angles that allow you to get under all those maddening little hairpin staples. I found it easier to get leverage under them before pulling them out with pliers. I won’t spam your blog with links because I don’t want to be rude, but they are another option.
I HATE carpet installers, don’t you!
Looks great! I completed this project last fall, and used the shellac primer on the risers and side trim (whatever that’s called). The topcoats adhered just fine. Sanding treads was tedious, but it’s worth it to hear your feet land on those solid treads instead of nasty carpet. Good for you!
I can’t tell you how many staples/nails I have had to pull. I worked as the master carpenter for a big theater company in the San Francisco bay area for years. Almost everything was put together with narrow crown staples and we reused everything we could. That meant taking staples out of everything you can imagine. The Channellock End Cutting Pliers (End nippers) is one of my favorite hand tools. They get a very good grip in close to the staple, and the curved head means great leverage. Once you learn how to not clip the staples in half, you won’t start a project without these in your toolbelt. They also work great for pulling finish nails through the back of molding. 😉
http://www.amazon.com/Channellock-357-Inch-Cutting-Plier/dp/B0000BYDYD
Looks better without the carpet. Congrats!
Haha I have to say you made me laugh reading this post, pulling up old carpet is the worst job but on a stair case none the less. What type of wood was used beneath as it looks nice, is it an oak?
The unique challenges and concerns of attic Remodeling are not to be taken
lightly. The cold continued to come and go and the family continued to cope.
If you are considering doing some improvements to your attic the first thing you need to
do is make a list of what you would like to use the space for.
Comments are closed.