For the last four years (and two houses) I’ve had dreams of a glorious vegetable garden. Raised beds, gravel paths, trellises and fences. You’ll note that what I’m actually dreaming of is building things for a garden. When it comes to planting and nurturing and harvesting… I just kind of stand around with my hammer. Blinking.
What do you mean I don’t need my hammer to garden?
Well, this is crap.
But seeing as how I’ve already got a load of gravel in my driveway and four raised beds built… I guess I’m in for the planting and nurturing thing. (I’m pretty sure I can nurture with my hammer, but whatever.) And I finally decided the first step to getting those beds in the ground was to design and stake out the garden.
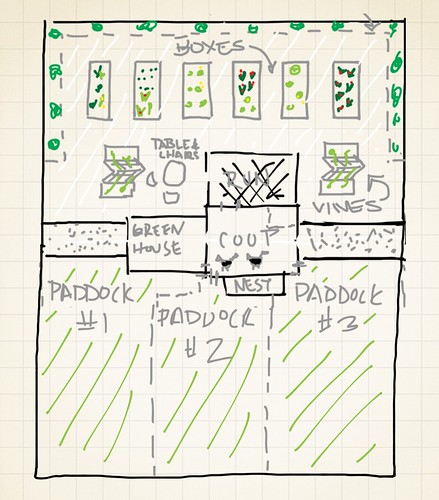
Here’s my current plan:
The idea is to build a more permanent chicken structure in the middle (and maybe use some of the old windows I found in one of the barns for a little greenhouse), and then use half the space as a vegetable garden that will be a chicken-free zone except for specific times of the year when I use them to help cultivate the beds. Mostly the chickens will free-range in the paddocks that will contain all kinds of chicken (and people) friendly plants. (Sunflowers, mulberry bushes, blueberries, chickweed, hops, and chard are on that list.)
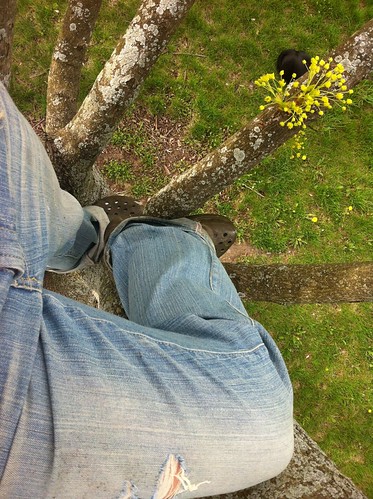
Realistically the structure of the garden– buildings and fences– probably won’t be done until late Summer, but you’ve got to start somewhere so I started by climbing a tree…
In crocks. My tree-climbing skills are unparalleled, and in this case, useful, because I’m not an engineer and in order to properly stake out the garden, I needed a birds-eye view. (I’m telling you… living with an engineer for a few years will really give you a false impression of how easy it is to lay out building stakes.)
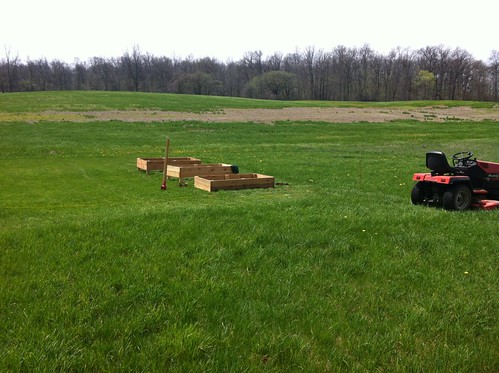
To make it easier to visualize I actually just mowed the grass inside my proposed garden area and left everything else a jungle for a few days. This worked surprising well.
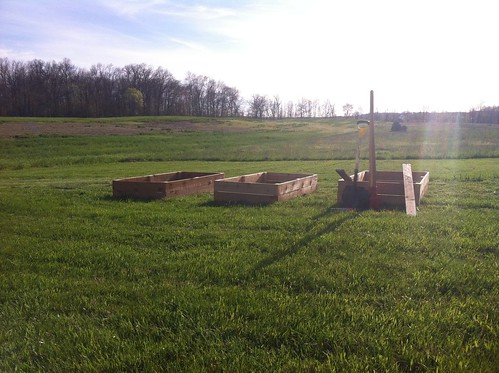
Then I started setting the first three of my six beds (you can see how I build them for $25 here), which I expected to take a couple of hours, and by “a couple” I mean “eight hours and a decent sunburn.”
I don’t know why in the hell it took that long, but I did spend some time puzzling over how do deal with my gently sloping yard. In the end I decided to “step” the boxes, so individually each one is level, but they step down with the grade.
Next up, two more boxes need to go in, and they need to be backfilled and planted, hopefully in the next two weeks. Then it’s time to move on to things like fences and foundations.
I’m so good at this “gardening” thing.


10 Responses
YEAH!!!! i did raised beds on my useless gravel pit when i moved in my house…. best advice— lay newspaper under any dirt/drainage gravel first- really helps the weeds and grass not grow through! and kind of helps the dirt from not escaping the bottom crack….
and before you pull a “me” and chase your paper around the yard like a fool… have the hose ready… wet paper eludes you a lot less
oh yea- and you can order worms on amazon…. since the dirt youre filling them with most likely wont have any…. and common…. how exciting is it to get 500 worms in the mail…
I’ve read you can use a layer of cardboard under the dirt. Anything is a big help to keep the grass underneath from growing through.
I don’t have the place for a garden, as I live in a condo apartment. So the balcony and containers will have to do. I used to have a huge garden when we lived on the farm when a teenager. We had everything in there even corn and strawberries!
I am drooling over your garden layout (while half of my much smaller garden is empty).
Pro tip: If it has two doors, its a chicken coupe. If it has four doors, its a chicken sedan. *nods wisely*
haha!
The best weed barrier I’ve ever used, I get from Shaw Fabric Products (http://shawfabricproducts.com/). The Lumite fabric barrier lasts for many, many years, and is extremely sturdy and incredibly effective.
I use the Lumite fabric as the layer under my entire garden–placing the raised beds on top of it. In the aisles I keep it free and clear of any debris by easily sweeping/raking/hosing away dirt/leaves/whatever. I got the idea from seeing how many nurseries have that weed barrier fabric in their walkways and seeing how easy it was to keep things clean. Anything in the aisles, like pea gravel for instance, is just going to allow dirt and crap to nestle in there and end up being a huge pain in the ass to maintain and keep weed-free in the long run.
If you absolutely want some kind of gravel in the aisles, definitely use “breeze” (crusher fines). Breeze is vastly superior to pea gravel, as it packs down beautifully, creating a sturdy and solid path (parks and the forestry service use it on their trails) and doesn’t shift around and let crap sift down like pea gravel does.
I like the plan and I love that there is a table and chairs in the garden. The only caution I could give is: chickens are stinky. You might not want to have a table and chairs where people will be sitting for a period of time next to stinky chickens.
I bought our house last year during the summer. This year I’m very pregnant and due in the summer. Next year, I have LOTS of plans for my vegetable gardens. I have, at least, planted 6 raspberry bushes, 2 lilacs, 2 roses, and a hella buncha perennials in the yard. I have a small container garden with cherry tomatoes and strawberries.
I REALLY want to see you build a greenhouse out of windows. They are so cool.
Comments are closed.