If there was one unfinished thing on my list that was going to cause me some angst over the winter, it was this…
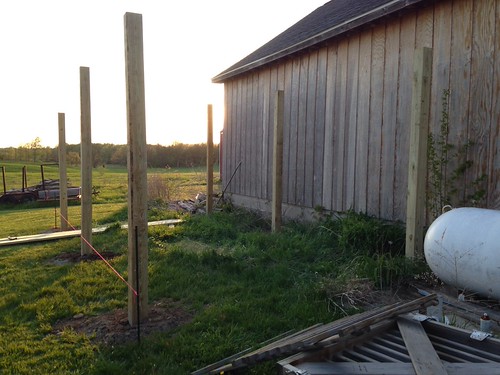
Six 6×6 poles set in the ground almost 6 months ago, ready to become my next badass (or, in this case, bigass) pergola project. Except I never got around to working on that damn thing over the summer, and I’ve been worried that if I didn’t put the crossbeams up the posts would warp over the winter.
(Trust me. Wood does that shit.)
But it got super cold, super fast, and I found myself unwilling to spend hours out in the freezing rain, wind, and snow to finish this thing up.
More than once I said, “if only I had just one more day were the temp was over 50…”
Well, I’d planned to spend my post-thanksgiving weekend huddled up in the house, getting things ready for Christmas. Except, as it turns out, the Sunday after Thanksgiving was fifty-eight degrees in Michigan.
Fifty-eight.
Remember when it was eighteen degrees two weeks ago and I cracked a pane of glass out of one of my windows with my hard-ass head? Well. That’s Michigan for you.
But I asked for one more day of over-fifty weather, and since I had it, I damn well wasn’t going to waste it.
I also didn’t have any help on hand, so the question became, how am I going to level and install some 14-foot-long 2×8’s by myself?
Here’s what I did:
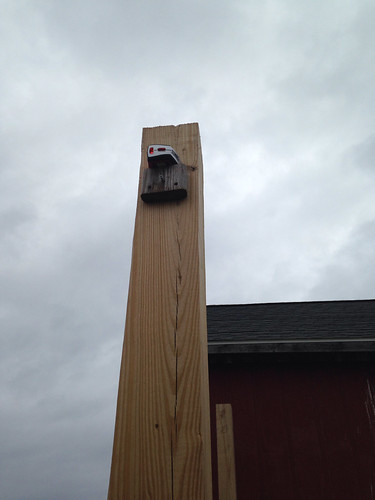
I used the cheapest “laser level” known to man to help me set my “resting blocks” (just scrap wood screwed to the posts to act as another set of hands to hold the beams in place while I attached them to the posts.)
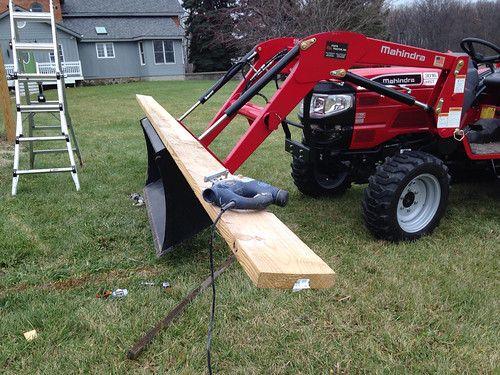
Then I got my tractor out and used it instead of sawhorses to hold the 2×8’s while I cut them down to size….
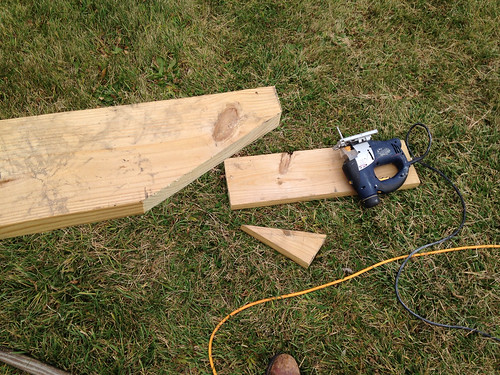
I also decided to put the decorative edge on them. I’ll have to take them down in spring to trim the top of the posts, but this will be one less thing to worry about, and helps me get a feel for how it will look.
Getting the board up on the blocks so I could attach it to the posts was way easier than it probably should have been. I used the tractor to lift the boards up and then maneuvered it in to place using the sheer force of my stubbornness.
It worked.
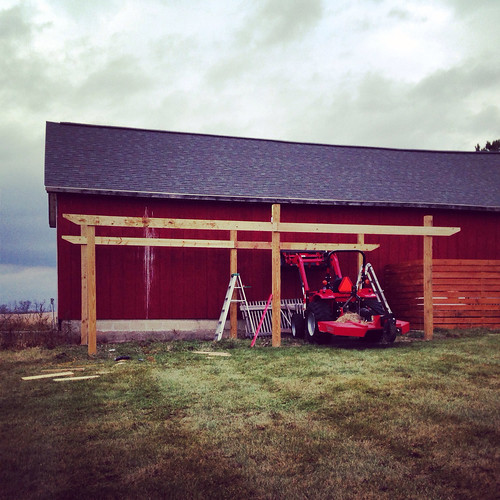
I had about 4 hours of daylight to get this job done, and I ran into a couple of snags–if you have sharp eyes, you might see one of them in the pic below– but, check it out…
That is going to be a bigass pergola. I didn’t quite realize how big until the crossbeams were up, but ho-ly shit. There’s 450 square feet of space under there… that’s more than the garage I lived in (with a whole other human and two cats) for a year in a half. And it’s going to be a lot of building come spring.
Being a one-woman building crew isn’t right for everyone… it takes more time, ingenuity, and swearing than if you had another set of hands around. But I’ll tell you, knowing I can successfully build something like this on my own is also a powerful, powerful thing. And it will make all the beers I plan to drink under it next summer taste that much better.



16 Responses
That’s one hell of a helping hand you have there!!!
Right front tail is longer than the others?
Better tie them front to back too.
Yep! That’s it.
You have to take them down to trim the tops of the posts?
You put the back cross braces on the inside instead of the outside facing the barn. Prolly because it was a tight fit and it should have been placed when the posts went up.
If you do decide to “fix” this later, bolts and steel plates are sexy on big timbers. Just get some all thread and some scrap steel or angle brackets and put those beams up with bolts.
Nice weather!
It’s not a tight fit, actually, there’s a good amount of space between the back posts and the barn. I’m going to end up doubling up the beams on both sides of the posts for the final build, but I didn’t have the lumber on hand for that pre-winter, and it was easier to level these on the “front” of the posts (and use them as my guide for the back beams eventually.) Agree on the lag bolts though. That will be the final hardware eventually.
I always feel that way too. If I had help for something, I’d use it, but when I do it myself I get a bigger pat on my back from myself!
Hi,
If you had one suggestion for the best first tool “saw wise”, would it be a miter saw or a table saw?
(Pluses, minuses,??)
Well it depends some on the type of work you most see yourself doing. My miter saw has always gotten much more work than my table saw… I use it for everything from cutting down flooring to wall studs to trim. Table saws are great for ripping down boards and cabinetry work, but I use a hand-held circular saw for a lot of cutting down sheets of wood. So miter saw tops my list as the most useful “general purpose” saw I own… definitely depends on your mix of work though!
If you can swing it, buy a Festool track saw. Functions as both a circular saw and a quasi-table saw. It’s easier to rip panels with the track saw (doesn’t require superhuman strength to wield the panels around), is less dangerous, and can become part of a tool system that doesn’t create mounds of sawdust. Yes, it’s expensive. However, I’ve used this in ways I could never have imagined.
I have a table saw, (Bosch contractor), a miter saw (Bosch 12″), and a multitude of other tools of mass destruction. However, the handiest tool I have is the track saw.
Check it out. Yes, it’s stupid money. But you only need one.
I used my Festool sander to refinish a Corian counter top. Normally, I’d have to leave town for a week after doing that as the female member of our tribe would be hunting me with dogs – due to the dust. Did it a few weeks ago with my vacuum attached to the sander and ended up with a fabu matte finished surface and a relatively clean workspace.
I learned a long time ago… never chintz on tools. Buy the best you can afford. Buy one at a time and don’t look back.
As my Dad taught me… oats are always cheaper after they’ve been through the horse.
Looks like the crossbeams are overhanging the right side upright farther than the left? By maybe 6″? if that’s the case you could build the story around your wanting the left edge of the pergola to be even with the corner of the barn or whatever someone will likely believe :0)
In any case nice work with getting it done. It is one of the joys of country living to sit back in the winter and remember all the accomplishments that happened in the “good” weather….and crossing them off that monster list you made way back when.
I see that the far left pole in the front looks like it was either sunk deeper than the others, or isn’t as tall? The cross beam is attached at the very top of it, whereas the other poles have extra height above where the crossbeam attaches.
Either way, I couldn’t do any of that stuff. Brava to you! 🙂
Yep, where there’s a will there’s a way and with your L/L n high lift loader you did it as true as can be. Trim posts in spring, add stringers, maybe some flowering vines uo top…and wa.. laa! neat place to sit sipping a glass admiring your work, viewing the garden, sunset and back 40. Good idea wanting to tie it together now. Treated lumber does indeed take on new design and properties after all the moisture it when it leaves the mill dries out.
Looking forward to seeing the finish bath Kit. obtw…your tractor and perseverance ROCK!
🙂
I never comment, but I had to today. I just love your posts and I find you amazing! What a wonderful inspiration you are to young women (and old ones like me!)!!
Ha! When I first read your comment, Susan, I thought you were referring to Kit’s posts aka wooden pergola poles… LOL… at least it gave me a good laugh once I figured it out 🙂 I’m battling a head cold so I’ll blame that.
That IS funny! Her posts vs. her posts! Regardless, I think everything she does is amazing!
I hope you feel better soon!
Something about country folk, they are friendly, sharing, and resourceful. You fit in nicely.
Margaret
Comments are closed.