When I first considered adding a few rows of grapevines to the farm, I figured building the trellis to grow them on would be the easy part. I mean, I’ve built entire houses before… how hard can a few posts with a wire strung between them be?
Uh, well, apparently the answer to that question is: way effing harder than you’d think.
The grapevine trellis was more difficult than expected mostly because I felt like I struggled to find the right information for what I wanted to build and simultaneously found a lot of info that provided way too many options for how to build it.
Also, post-hole digging is a bitch.
In the end, constructing the trellis was fairly easy, but I spent almost a full year procrastinating parts of building parts of it because sifting through all of that information was a little overwhelming. (Also, I’m an expert-level procrastinator.) What follows here is simply one way of building a top-wire grapevine trellis (for a substantial home vineyard… not a commercial operation) but there is no shortage of other ways to build this kind of thing.
There are several different styles of trellis, I decided to build a top-wire system based on ease of construction, the look I was going for, and, most importantly, the type of grapes I wanted to grow.
If you want more information on the different types of grapevine trellis systems, I’d try here (it’s about as helpful as anything else I found online, which isn’t saying much.)
Each row of trellis I built is approximately 80′ long. I believe this system could easily work for up to 150′, and possibly longer, but I’m going to stick to what worked for me.
For each 80′ section I used:
- 3 – 6x6x8′ posts (one of which was cut in half to make two 4′ posts)
- 4 – 4x4x8 posts
- 2 – 2x4x10 braces
- 90 lf of 9ga galvanized wire
- 1-3/4″ staples
- 9ga wire crimping sleeves
- 2 wire insulators (not really necessary)
- 1 line strainer
- 1 tension indicator spring
- 4- 80 lb bags of concrete
Tools Used:
- Post-hole digger (plus the auger on my tractor to make it go faster)
- Shovel
- Tamping bar
- String-line and stakes
- Post level
- Marking paint
- 1 line strainer handle (these are sold independently of the strainers)
- Wire crimper
- Bolt cutters
- 100 ft tape measure
At its most basic, the trellis system really is just a bunch of posts in the ground with a wire strung between them, but when I was researching how to build a vine trellis there were three specific areas where I found myself stuck and unclear about how I wanted to move forward:
- The overall length and spacing of the trellis system
- The end braces for the trellis (i.e. the best way to keep the wire from pulling the end posts in)
- The best way to attach and tension the wire
Here’s what I ended up doing:
First, I picked an area that was mostly flat/level. I decided on an 80 ft long line, with vines spaced 8′ apart (so 10 vines per row of trellis.)
Here’s a diagram of my plan (that’s one step above a napkin-drawing, because I’m fancy like that)…

The end posts and brace posts are both 6x6s, the mid-line posts are 4x4s spaced 16 feet apart. All posts were sunk 3′ into the ground.
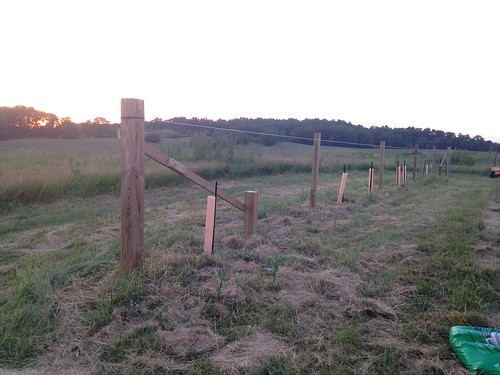
For the end braces, again, there are several different ways you can do this (for more information on the different ways you can end-brace a grapevine trellis system, check out this PDF) but I used an 8′ 6×6, and a 4′ 6×6, spaced 8 feet apart, with a 10′ 2×4 braced between them at an angle.
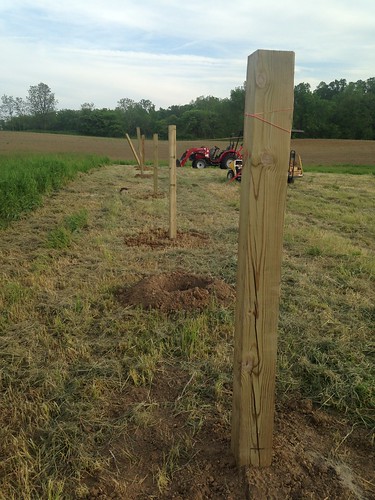
Once I decided on the general spacing and dimensions of the trellis system, I laid each row out using stakes and string-line, marking the location of the holes needed for the posts with marking paint.
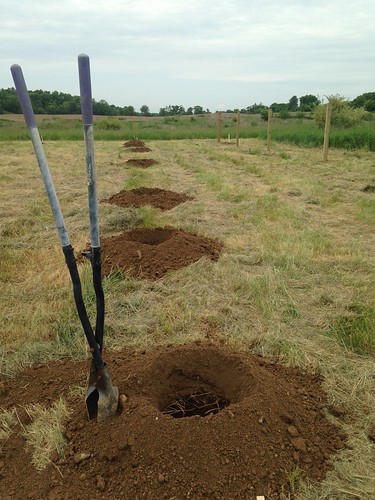
Then I got to digging. While you can do this with just a manual post-hole digger, with my clay soil it might take the rest of my natural life to dig the holes by hand. Luckily, I have an auger for my tractor (but I’d also venture to say that renting a gas-powered auger for a day would be a good investment if you don’t have access to a tractor with an auger.)
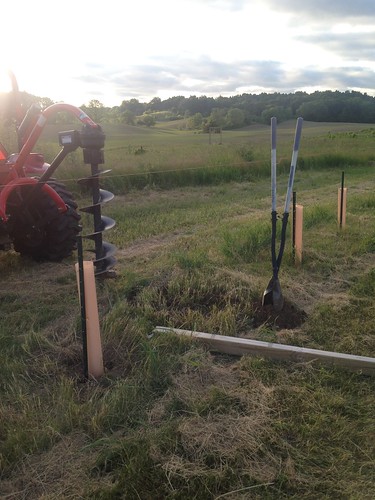
It still required a bit of cleaning out with a manual post-hole digger, but far, far less work than doing the whole thing by hand.
I set my two 6×6 end posts first, using one full bag of concrete per post. I decided for aesthetic reasons to sink the 4×4 mid-posts 6″ shorter than the end posts. A year later, I actually have no real recollection for why I did it that way, but I like how it looks so… good enough. There’s no reason they can’t all be the same height. For the mid-line posts I set them simply by tamping dirt back down around them, and didn’t use concrete.
To ensure the posts stay true and level across uneven terrain, I strung the string-line from the top of the two end posts, then marked each 4×4 with the spot it should hit the line.
As I set each mid-post, I checked to make sure it was plumb using my post level, and made sure it was in line with the string and the right height. This made setting the posts a fairly tedious project (also would probably be way easier with a second set of hands, but I did all of it on my own so I know it’s possible to do by yourself.)
My trick for making sure posts are plumb when I don’t have someone around to hold them in place is to put the post in the hole (making sure it’s at the right height) then put just one or two small shovel-fulls of dirt in the hole and tamp it down with my tamping bar. This will hold the post in place and allow for minor adjustments to get the post standing straight.
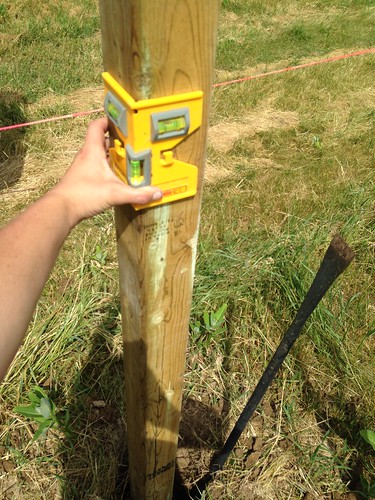
I leave the tamping bar in the hole, and as I adjust I’ll continue to tamp around the post to keep it in place. When it’s plumb I’ll shovel more dirt in, tamp it down, and continue the process until the hole is full.
I did the same thing for the 4′ 6×6 bracing posts, using one bag of concrete for each of those as well. And I waited several days for the concrete to cure before stringing the wire.
Attaching and tensioning the wire was another big sticking point in this project. It took at least four Amazon orders and three trips to Tractor Supply to get the right stuff, but here’s where I ended up:

The wire is basically looped around both end posts, and then tightened with a line strainer. I also used a tension indicator spring to let me know when the line had the appropriate 250 lbs of tension on it. (This is a great video of how to install a strainer and tension indicator spring.)
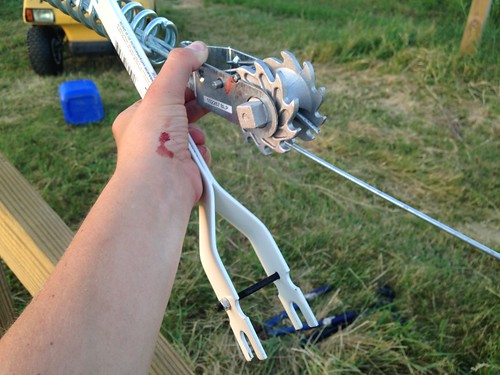
To actually put all of this together, you need some wire crimping sleeves and a wire crimper (which looks a lot like a bolt cutter that doesn’t actually close all of the way.) The sleeves need to be made for the size of wire that you have, so I used 9 gauge wire and specifically needed to use 9 gauge sleeves (and definitely not 10 gauge sleeves… that was the lesson that necessitated my second trip to TSC)

You slide the sleeves over the wire and then crimp them down with the crimper.
I used a wire insulator on the loop of my wire, but it’s not actually necessary… I just liked having a bit of padding on the wire where it wrapped around the post. I created the loop by putting two crimping sleeves on the wire, then the insulator, the looping the wire back around and through the crimping sleeves (and then using the crimper to tighten them down.)
I also made a loop on the other side of the wire, but this side has the tension indicator spring and the strainer…
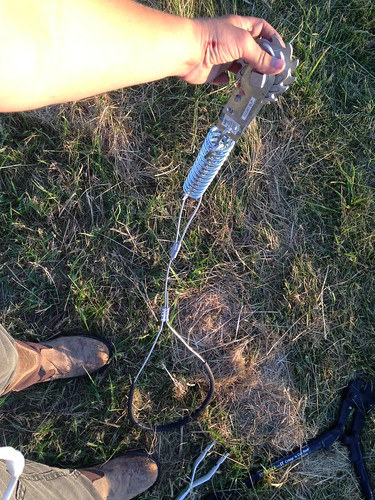
Again, see this video for a better explanation of how all of that should be strung together on the line.
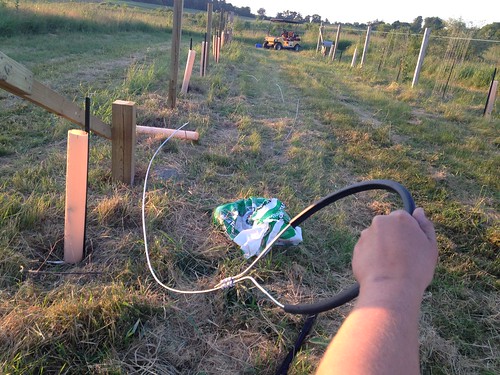
The end of the long wire is strung through the strainer, and then you use a strainer handle to tighten the wire. (That handle needs to be purchased separately from the strainers… and that was the reason for my third trip to TSC.)
(I definitely pinched my hand in the tension indicator spring when putting this together and didn’t realize I’d bled all over the strainer until after I took this picture so… sorry about the gore. Hey, maybe wear gloves when doing this? Or don’t. Like my dad always said when I was growing up, “You’ll be fine. It’s a long way from your heart.”)
After the line was strung I used 1-3/4″ staples to hold it in place. on the end and mid-posts. Also, it’s a pain in the ass to hammer a staple or nail into a post that’s sticking out of the ground with no other support, so I used the tractor to brace it.
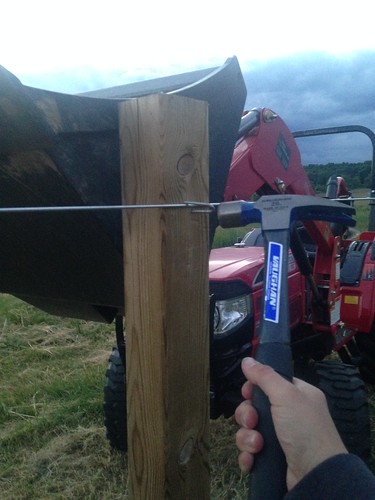
Work smarter not harder guys. And always use a tractor if there’s one available.
Also, note: The staples shouldn’t be all-the-way tight to the wire on the mid-posts so that you can still tighten the wire with the strainer when needed.
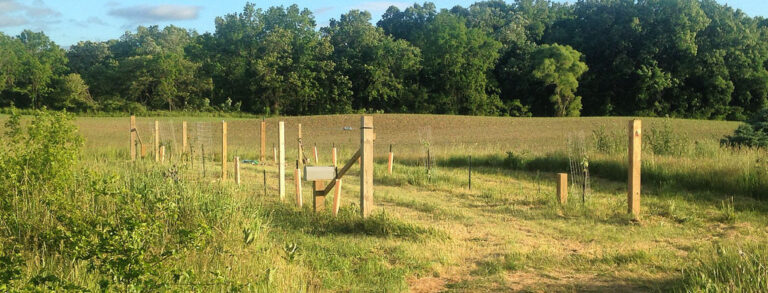
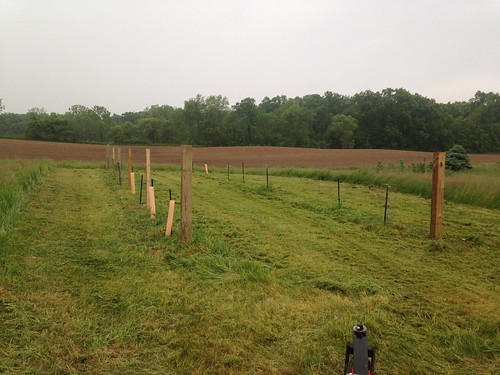
And just like that…
A finished grapevine trellis!
Now all you have to do is grow a bunch of grapes, make a lot of wine, and live happily ever after, right?!
Okay, actually, the whole “growing and pruning grapevines” is a whole other topic to explore at some point, but I’m still in the early days of my little vineyard so for now I’m just going to skip right to the wine-drinking part.


11 Responses
Wow! You’ve got some serious determination! This will be an incredible grape arbor (?) to say the least and looking forward to watching it over time. My Nono used to make homemade wine, I’m told. I didn’t exist at that time, but remember finding the wooden press which was cool.
What types of grapes will you plant?
Yes…two runs of eighty ft. 20 plants / just curious how many varieties of Black Feather Wine when it’s time, can we expect. When mature you’ll have many grapes. When I was knee high to a grasshopper my older brother would borrow his brother-in-laws welder and make things for these elderly german sisters who had an A-Framed Southern Fried Chicken Shop with a grocery store in the front of it, all attatched, one thing in particular I remember being a wheeled wrought iron wagon type thingy they could put their garbage cans in and pull around where they wanted it. I mostly helped them in the garden ( lots of grape vines ) and in the resturant deskinning potatoes and restocking coolers. I went to highschool with their grandson as well. We played widow whist and when Ema & Pauline got togeather wasn’t anyone going to beat them girls…sharp n smart as a tack 😉
Very nice step by step informative post, When selling all of the supplies you purchased at Theisens…TSC & Blaines compititors in Ia. I knew the strainers & springs were for stretching and tensioning but had never seen them in action so the photos have explained much to me I didn’t know. I effing enjoy this blog and don’t mean to hog just ramble sometimes….Symetrical well built kick-ass trellises Kit now sit back and watch them fill with grapes
🙂
We have set our posts for our 4 vines but have not strung any wire yet. Thanks for the info! I already know we should have done more research before planting because we only planted the vines 4 feet apart. You can never do enough research!
I wish I had the land for a vineyard! I am a wine lover through and through
Love, love your blog!!! Found you through UDH and have spent the last 2 days reading from the stair challenge and finally finished. So 2 days not working at my little suburban 1/4 acre, but dreams for the next house. I even sent my daughter links to your site. She is 26 and we will looking to buy her first place hopefully this winter. Not 6 acres but hopefully at least a townhouse with a little yard. My goal is to be her back up for her projects and share all of my plants with her. You are an inspiration and thank you for sharing.
Thank you so much for this! I was actually just thinking of that stair challenge a few days ago (as I walked up my still-unfinished stairs… ha!) and about how much has changed since then. It’s been a wild ride, but I wouldn’t change it for anything.
Best of luck to your daughter on her first home. I can tell you from experience, there’s nothing like having a parent around to back you up on projects AND share plants with you 😉
wow, that is total crazypants, but in a good way! great job! very inspiring. looking fwd to seeing the grapes 🙂
Amazing website. It was very resourceful for my trellis and garden bed projects. I can’t wait to start planting this spring.
I really want to decorate my garden with a vineyard. I want to do something in a certain design like here http://gardenbestdesign.com/best-grape-trellis-design/ My husband says that it’s very long time to do it yourself, it’s easier to buy a finished one. Will this work at home?
Hey Kit, awesome trellis! Pretty much exactly what I was looking for to get my grape plants off the fence; I haven’t been very creative with my grape trellises in the past 😀 Loved it so much, I’ve included it in my “15 Sturdy Grape Vine Trellis Design Ideas For Your Backyard Arbor” article! (https://www.outdoorhappens.com/15-sturdy-grape-vine-trellis-design-ideas-for-your-backyard-arbor/
Thanks, Elle
Comments are closed.