So the ink is barely dry on your building permit and you’re ready to break out the excavator and start digging?
If you just read that sentence and said, “What the hell is an excavator?” First, this…

… is an excavator.
Second, you need to hire someone to do this for you. Even if you know what an excavator is, you still need to hire someone to do this for you, unless you are a licensed and trained operator. Not kidding here. You could accidentally knock your house down very easily with one of these puppies. And on that note… happy digging!
Just kidding. Let’s start with some foundation basics, shall we?
Basic Foundation Types:
- Slab – Basically a slab of concrete that your house or addition sits on. Slabs still require excavation and footers, particularly in areas like ours that get reallyeffingcold in the winter.
- Crawl- In a crawl, walls are built to a depth below the frost line, but the majority of the foundation is unexcavated. There is space between the ground and house for running utilities, etc.
- Basement – Um, do I really need to define basement for you?
Basic Foundation Materials:
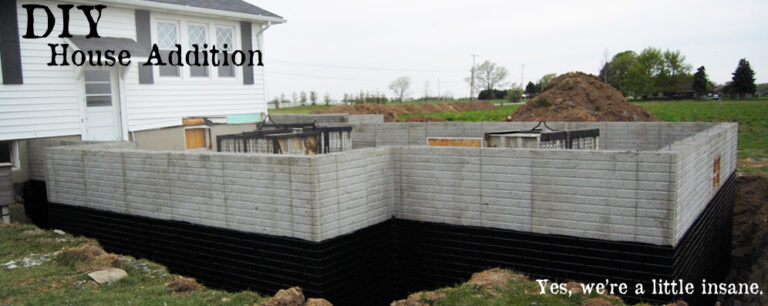
- Concrete block- 8″ blocks are installed in a brick pattern to create foundation walls.
- Poured walls- Concrete is poured into forms to create foundation walls.
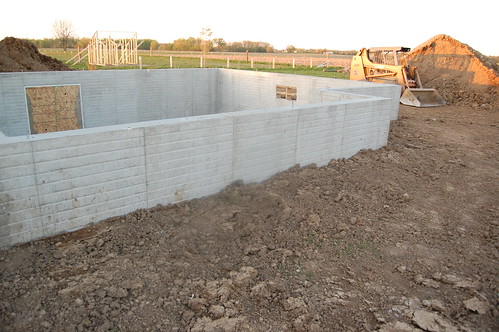
Here’s how it works:

The basic elements of the foundation are shown in this professional, high-quality, dimensionally accurate cross-section, that I definitely did not make in PowerPoint at 2:30 in the morning.
1. Excavation – someone digs a bigass hole in your yard a couple of feet wider, but in the same general shape as your foundation. If it’s a basement, the center will be dug out and the hole will be basement depth. If it’s a crawl or slab just the area for the walls will be excavated to a depth below your frost line. (In Michigan, for example, all foundations must be set to a depth of at least four feet below grade.) The someone who digs this should be professional.

Things to be alert for in the excavation phase of the project:
- If you’re acting as your own general contractor, you need to call a utility marking service (In Michigan it’s Miss Dig) about a week before you excavate, or you could end up running madly through your yard trying to escape certain death from a gas line explosion. They do this for free, just so you don’t kill yourself and your four closest neighbors.
- If the person you hired to excavate makes a mistake and digs a little too deep, they can’t just add the dirt back in and pack it down. Your house should be built on undisturbed soil. If there is a mistake, it needs to be filled in with stone or extra concrete.
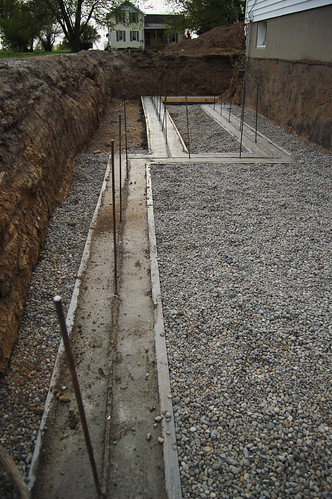
2.) Footers/Pads – Footers are the foundation of your foundation. Your basement or crawlspace walls will rest on them, and they will bear the weight of all exterior walls of the house. If it’s done right, footers under a basement wall should have drainage tile around them, like form-a-drain, that carry water away from your basement. Crawls don’t need this.

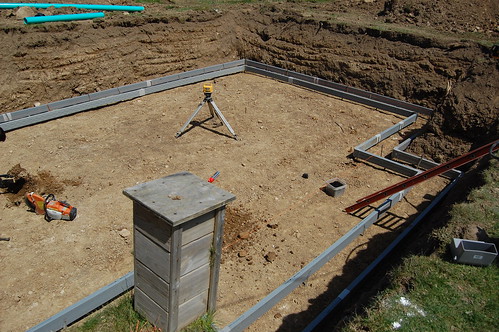
The size of footings depends on the size of the structure, but be warned, there are rules about this. For example, minimum footer depth is 6″ no matter what size the structure is. There should also be two lengths of rebar in the lower third of the footer, and a groove or additional rebar to tie the wall into the footer when it is poured.
Things to be on the lookout for for while footers are being formed and poured:
- Unlike excavation, you could form up and pour your own footers if you were so inclined. It’s a thankless job though, and being the foundation of your home you may want to consider professional help.
- The forms for the footers will need to be inspected by a building inspector before you pour concrete. Don’t skip this step or you’ll be in a world of trouble. Rebar in the footer is not a suggestion, it’s a rule.
- Having a drainage system and keeping it intact (and by that I mean, making sure parts don’t get damaged or filled in with dirt) is going to be a better investment of time and money than sucking all the water out of your basement with a shopvac every time it rains.
3.) Walls- If they’re block, you’re going to need a mason. If they’re poured walls, you’re going to need a crew with forms, a boom truck, and a little know-how. Again, I’m all for DIYing the hell out of stuff, but this will be significantly less painful and your house will be less likely to collapse in on itself if you hire it out.
Poured walls are created by erecting forms (with a smooth or brick-face imprint) and then filling them with concrete from a pump. The concrete is then vibrated and finished.


Things to you need to be in-the-know about with foundation walls:
- Anchor bolts will need to be installed every so often so that the wood sill plate (the first level of your frame) can be attached to the foundation. As will everything else, there are rules for the spacing and frequency of these. (In Michigan you have to have an anchor bolt every 6 feet along the wall, and within one foot of corners or openings in the wall. They must be at least 1/2″ thick and embedded 7″.)
- The walls need have time to cure before the forms are removed. Don’t let them just strip those things off the second the concrete feels firm (and a reputable foundation company wouldn’t). Ideal curing time in mild weather is at least overnight.
- Concrete continues to cure as it sets. Even after the forms are stripped, it’s ideal to wait at least seven days before backfilling and building on the walls
4.) Waterproofing- All parts of the foundation walls below grade should be waterproofed. If you’re using a foundation company, this is generally included in the price of the foundation, and they will take care of scheduling the waterproofing. It can generally be done as soon as the walls are stripped, but you want to let it set up for 24 hours before backfilling.

Things you need to know about waterproofing:
- There are a number of different types: liquid (shown above), sheet, and even clay-based methods. Find out more about them here.
- Most waterproofing methods employ some sort of asphalt based product, but there are polymers and other options available. Most of them stink, but it’s a short lived problem, since soon they’ll be underground.
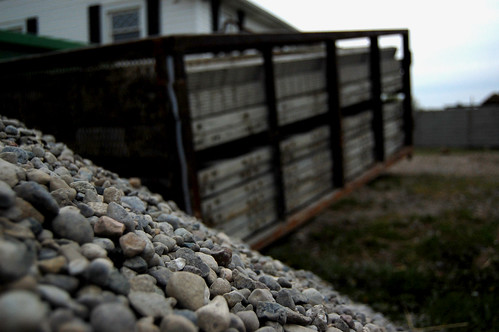
5.) Backfill- This is the step that takes you up to “buildable”. A skidster or other small pieces of equipment with a bucket is used to backfill with stone and topsoil.
Things to know about backfilling:
- You want a minimum of 12″ of stone on top of the drain. The more the better for drainage, and it has the added benefit of taking pressure off the walls. I don’t know why because I’m not an engineer, but I live with one. When it comes to the Laws of Physics, I try not to argue with him.
- You also want a minimum of 16″ of dirt or topsoil to bring you up to grade.
- The dirt should SLOPE AWAY from your house. Seems obvious. If you don’t do it, don’t ask why you require floaties to get from one end of your basement to the other.
Like I said, this gets you to the point where you can build a house on the foundation, but at some point (after you have a roof) you’ll need to have a slab floor poured inside your basement. (At least 4″ thick.) Let’s worry about crossing that plank when we get there. Kind of like this…
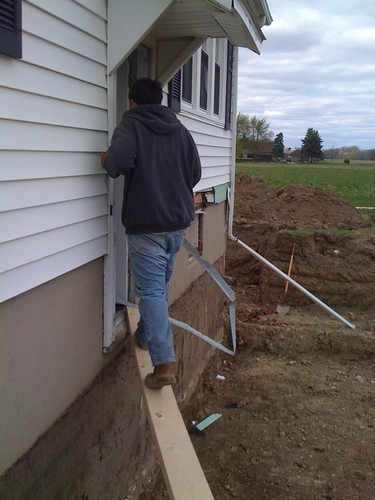
Yeah. Not OSHA approved, if you were wondering.
Timing:
Ah, yes, and therein lies the crux of the major ass-pain involved in foundations. Timing is key here… getting the inspections when you need them, timing the concrete delivery, and making sure everything has enough time to cure. My foundation experts tell me the ideal scenario looks like this:
Day 1: Excavate
Day 2: Footers (Frame, inspect, and pour)
Day 3: Set wall panels
Day 4: Pour walls
Day 5: Strip forms/ Waterproof
Day 6-12: Wait
Day 14: Backfill
Real life experience tells me that you should give yourself an extra week before framing crews are going to show up. And remember- keep one eye on the weather channel at all times. Rain is not your friend when pouring foundations.
This will be the first part of your project that really tests your patience, resiliency, and capacity for dealing with the destruction of your lawn. Things will definitely get worse before they get better, but it sure is fun, ain’t it?
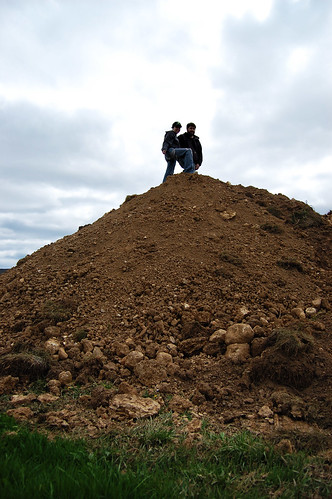
Happy building!
Up next? Framing that baby!

10 Responses
An excavator is a Snort. (A reference to the children’s book Are You My Mother) and isn’t a crawl space where you burry the bodies?
Janet
I agree with you,especially this ” If you’re acting as your own general contractor, you need to call a utility marking service (In Michigan it’s Miss Dig) about a week before you excavate, or you could end up running madly through your yard trying to escape certain death from a gas line explosion. They do this for free, just so you don’t kill yourself and your four closest neighbors.”
This article is too technical for me. But what I got from this article is to hire a reputable contractor to work the excavator if I ever need to have some part of my house excavated.
Can you give advice on building a basement home?
I’ve never built a basement home, and you’ll probably want someone experienced to give you advice on that.
Nice presentation about DIY House Addition! I loved your post .
You never talked about insects getting into the basement or if there is anything you can put on your walls or footer for rent spiders ants and all the rest
Der Staat ist das Problem und nicht die Lösung. Wenn der Bürger Bio essen möchte oder Biostrom oder Biosprit bitte – dann soll er aber auch dafür zu zahlen.Der Staat hat sich aus derlei Dingen rauszuhalten. Das Problem ist, dass die meisten keine Ahnung von Wirtschaft haben, sonst würden sie sofort erkennen, wer sie ausraubt. Kleiner Tipp: Es sind ganz bestimmt nicht die gierigen Unternehmen und bösen Spekulanten.
So sorry to hear this Kelly. I wil do an update on the situation in coming days, but it looks very bad for learner drivers out there. The impacts on job prospects and study, without adequate public transport, are dire.Best of luck for next time.
Comments are closed.