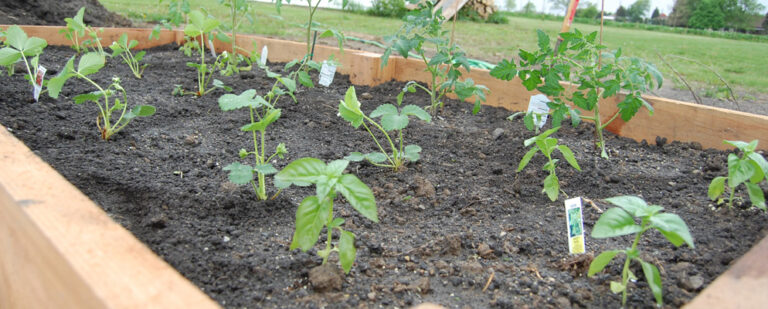
First completed project of the year!
Here’s how I did it…
Materials:
- 48 lf. of rough sawn cedar 2×6’s (I got 3 2×6-16′ boards)
- 12 lf of rough sawn cedar 4×4’s (I got 2 4×4-8′ posts)
- 48 5/16 lag screws
Tools:
- Drill w/ 7/16 socket
- Miter Saw
- Guy to dig post holes
Time: Once I had everything together, this was about a half a day project to build.
Cost: Approx $200 (The price of cedar is killer, isn’t it?)
Step 1: Cuttin’
Or you can buy the boards cut to length, but then how will you get that wonderful cedar sawdust smell in your shop?
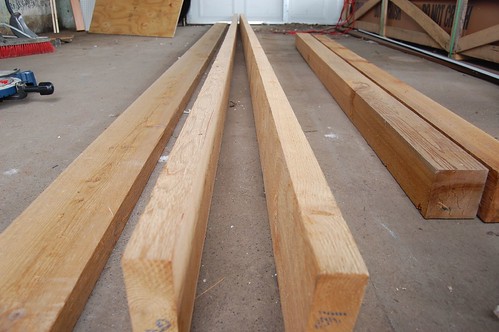
This box is 4’x8′ and 12″ deep, so I needed the following board lengths:
- 4 2x6x8′ boards
- 4 2x6x4′ boards
- 6 4x4x2′ posts
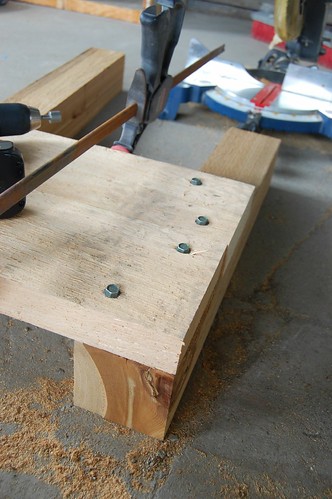
Step 2: Drillin’
After the cutting part, the rest of it involves a lot of juice in your drill batteries, and that’s about it. I wanted something stronger than standard deck screws and after much debate in the “Nuts & Bolts” isle in the Depot I decided on the Spax 5/16 Exterior lag screw.
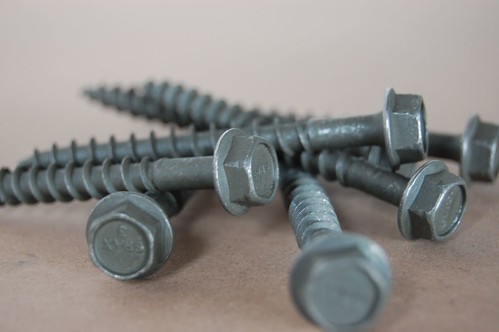
They aren’t crazy huge (I briefly considered 3/8″ stainless lag screws… but at $2 apiece? Not necessary.) but they are significantly sturdier to use, and the head shape prevents needing to put washers on.
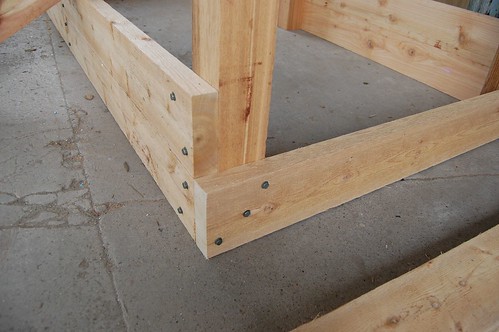
I built the long sides first… so the top board was flush with the top and side of the 4×4. And I attached the top board to both end 4×4’s first. Then added the second board. I clamped the two boards together to make sure they were tight before I attached the second one… don’t want any soil seepage!
As you can see, I thought 2 screws per board were plenty on the long sides.
Then I attached another 4×4 in the middle of the 8′ sides for support… I waffled on this for bit, but I really wanted these to be solid structurally and the extra post definitely made a difference.
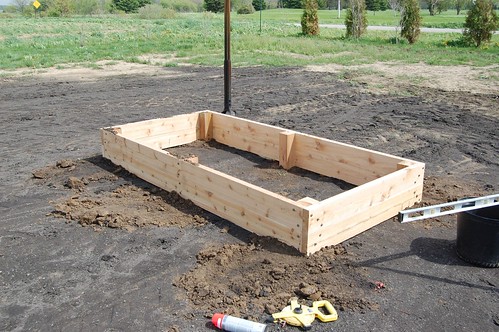
After both long sides we done. I stood them on end (upside-down) and attached the top short board flush with the top of the 4×4
In this case it was two screws securing the short board into the 4×4, and for good measure, one into the end long 2×6.
I put the top short board on both ends before going back and adding the second short board… just in case things didn’t line up right.
Here it is upside down:
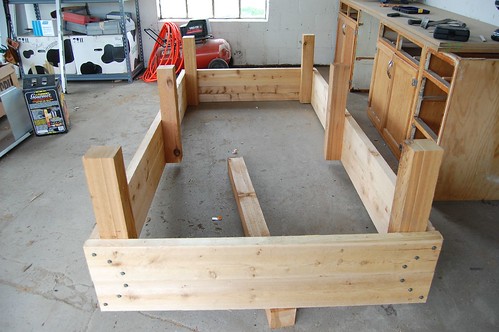
Even though cedar is a light wood… 48′ of it attached together, not easy to move. Which bodes well for the durability of my garden, not so much for my back.
Step 3: Diggin’
After worrying over the placement for a while a little orange spray paint helps mark where the holes should be dug.
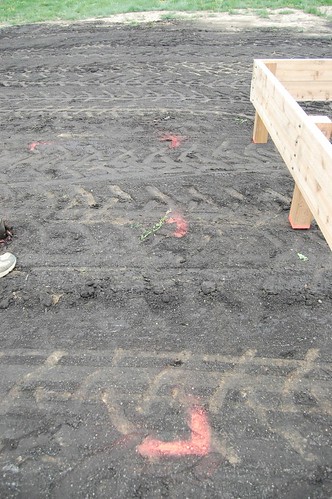
The holes were about 12″ deep… and I suggest digging them even larger around because filling them back in with the posts in there was a pain.
All it needs is fillin’ and vegetable plants!
I expect to build 3 more of these in the next couple of months… and two more next year. It’s gonna be quite a vegetable garden when I’m done.
Other ways to build this kind of thing:
- Erin @ Erin Covert*Hands On built a similar bed. I used it as a model for mine, but added additional screws and posts.
- A slightly different type of bed from eartheasy.com
- Or you can buy pre-made pieces. Naturalyards.com sells something this size for $265 +S&H
Possibly Related Posts:

21 Responses
These are just beautiful. Very well done!
We made some shabby (free!) beds from reclaimed railroad ties!
wish I could send you some green Douglas Fir ~ 33 cents a linear foot here in Oregon for 2*6 – makes great garden beds. Not as long lasting as cedar but still has a good smell once cut (someone needs to put “fresh cut wood” smell into cologne).
What are you planting this year?
Alicia – ditch the railroad ties – they are treated with heavy metals that leach into the soil (and then plants). Bad stuff in there – take em out!
Do you line the bottom of the beds ? It doesn’t appear so, but I would like to know for sure.
Thank you,
Denise
Nope, didn’t line the bottom!
Thanks for the information… appreciated… been reading for awhile, and just want to inform you I always enjoy your writing.
this is such a lovely idea! it will definitely work with our post about how to plan and plant your own herb garden! let us know what you think!
http://www.eieihome.com/blog/how-to-plan-and-plant-your-own-herb-garden.html
Enjoy!
Great to see cedar being used in a raised bed. Okay, so you’ve spent a bit more than need be, but it’s safe, smells lovely and will probably outlast all the ‘treated’ options out there. Good value for money in my opinion!
Go to store and buy Preem to help control the weeds….if dandelions, eat them, they are good for your liver….lol
for beds of that height, using 2x lumber is overkill. use 1x if available, or heck, use cedar fence pickets. along with that, use a 2×4 for the posts instead of a 4×4. I’m all for overengineering, but with the cost of cedar being what it is, less is more.
All that notwithstanding, they look great!
Anything less 2″ thick boards will start bowing out over time, even with supports.
You’re so interesting! I don’t suppose I’ve truly read through a
single thing like this before. So nice to discover someone with unique thoughts on this
issue. Really.. thanks for starting tuis up. This website iis
one thing that’s needed on the web, someone with a bit
of originality!
I’m amazed, I must say. Seldom do I come across a blog that’s bot educative and engaging, and let me teell you, you’ve hit the naikl on the
head.The issue is something which not enough men andd women are speaking intelligently about.
I am very happy I found this in my hunt for something regarding
this.
The beds look great and are very similar to what I had in mind for our garden. Been also waffling about fasteners. How have they been holding up with the 5/16″ Spax?
I think they’re holding up well… I don’t live at that house anymore, but I know the boxes are still there. I’ve at my new place I’ve been putting in beds that are much cheaper (which you cans see here) and use much smaller wood and screw sizes and those have been holding up well for 4 years, so I imagine the heftier ones are doing even better.
Comments are closed.