This weekend I packed up my tools and took my big yellow SUV up to Ann Arbor, MI– Home of the Wolverines.

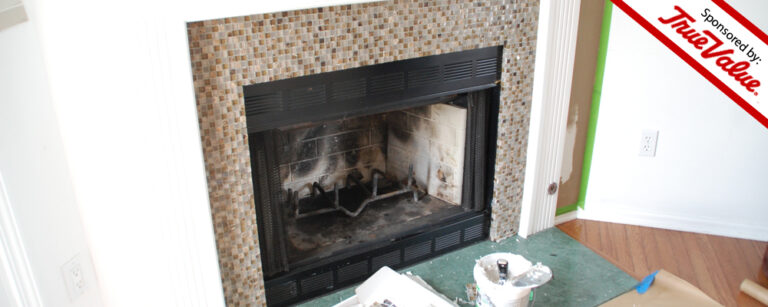
There was a fireplace in need of some serious help. And tile. And a little paint.
The fireplace belongs to MysteryMan’s sister, who bought her first house right about the same time we dug that really big hole in the ground that needed to be filled in with the addition to our house. So we haven’t had a lot of time to help her with all of those first-time-homeowner things, like moving in furniture and painting every wall in the house.
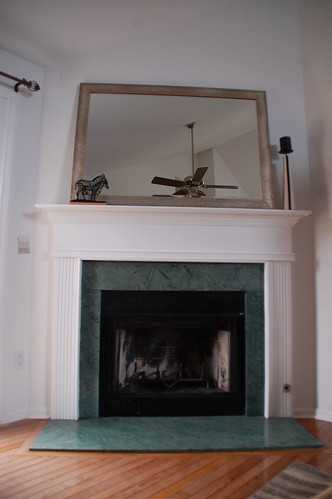
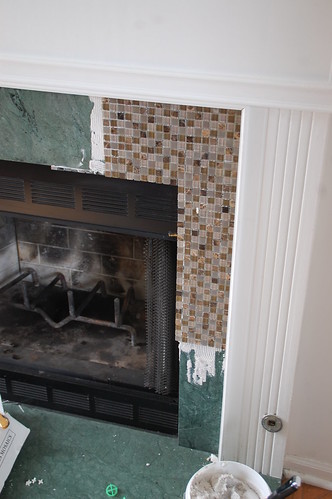
But when True Value asked me to be a part of their DIY Blog Squad, I knew that the fireplace was something I was adding to my DIY Road Trip list. It was generally in good shape, except for the eighties-throwback green marble. Green marble? That was in fashion at some point, right?

Um… why was that in fashion again?
Okay, as a person who once thought that slap bracelets were the height of accessorizing, I shouldn’t be hating on any eighties fashion trends… but that doesn’t mean the green marble didn’t have to go.
Aided and abetted by MysteryMan’s mom (who picked out all of the colors and materials for this project) we headed off to the Stadium Hardware True Value in Ann Arbor for some supplies…
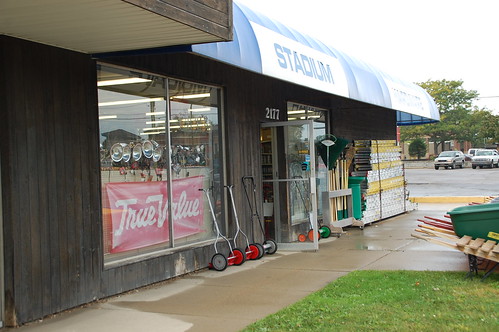
This is my favorite kind of hardware store. Aisles crammed full of goodies, guys who know what they’re talking about (and help without being patronizing), a really friendly home-town atmosphere, and, of course, they’re all Michigan fans.
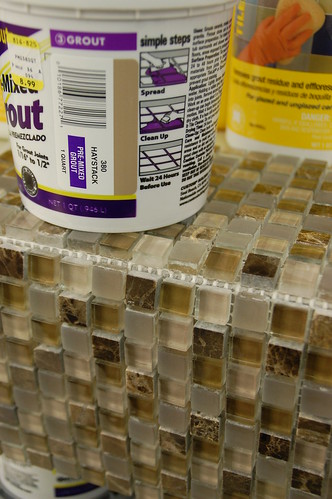
We needed some tiling supplies, and for a smaller hardware store, this was a good selection.
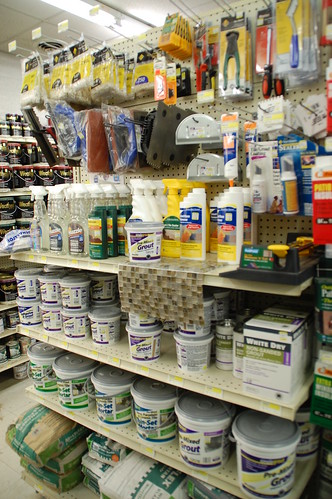
They had about 10 different colors of pre-mixed grout to choose from, and we found one that went with the tile.
Our shopping list also consisted of:
- Tile adhesive
- Notched trowel
- Tile spacers
- Putty knife
- Grout float
- Painters tape
- Sponge
- Paint, color matched to a paint chip we had for “Moonlight Beach”
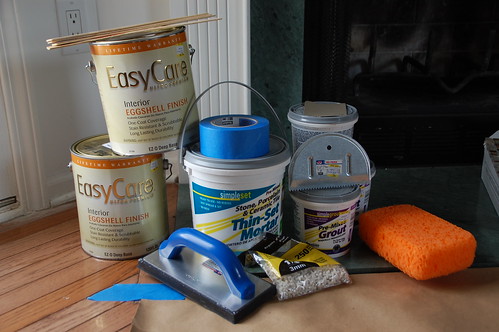
In short, everything you need to vanquish an ugly green marble fireplace.
Tiling a Fireplace
Tiling a fireplace is a lot like tiling anything else. Because we were adhering the tile right to the marble, it required finding the right kind of adhesive (I chose one that would adhere to concrete-a similar surface type- and was appropriate for stone/marble tiles.)
For in-depth step-by-step instructions to installing mosaic wall tile, check out this post in my tiling series.
As with any tiling, half the battle is in the layout. Don’t start slapping glue on and sticking your tile just anywhere. These half-inch tiles were a perfect size because they fit right on the lip of the marble. We chose to overlap the face tiles over them, it does leave an unfinished edge of the tiles exposed, but the spacing worked better, and it gave the fireplace a cleaner corner than a grout line would have.
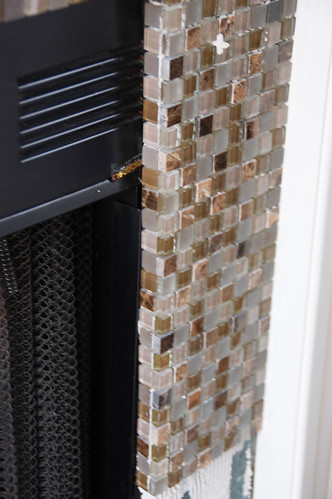
I ended up only needing to “nip” two tiles in half for the entire fireplace but it did require finessing the spacing between tiles a bit to make everything line up correctly.
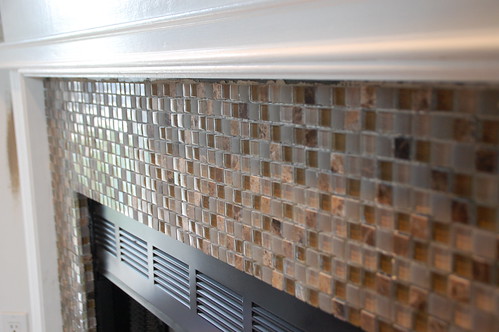
I chose to leave a larger grout line at the top of the fireplace to accommodate for the fact that the whole thing was out of square. From any level other than kneeling down eye-level with the fireplace, you won’t eve see it.
I’ve mentioned before that mosaic tiles come either with mesh on the back that you leave on the tile when you place it, or with paper on the front, that is removed once the tile is placed. These were the “mesh on the back” kind of tiles. It made it easier to see the spacing as the tiles went in, and clean up any adhesive that smooshed out in the placement… but that mesh is a pain to remove so that it isn’t visible on the corners (of which there were a lot) or to make spacing adjustments.
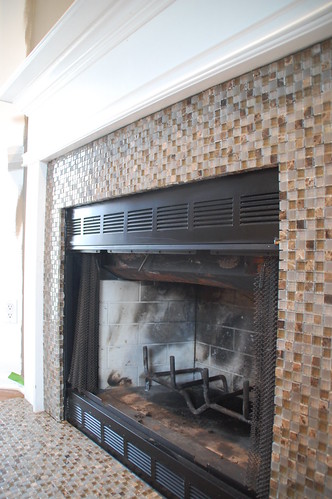
As you can see, big improvement, even in the early stages.
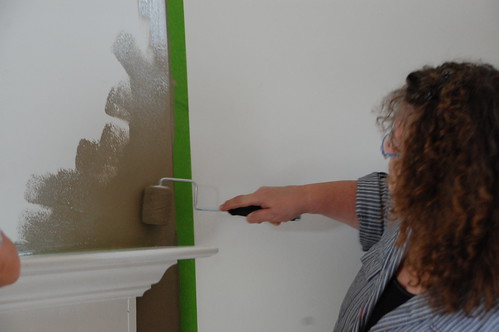
A team effort…
Just because I was chief-tiler didn’t mean everyone else got to sit back and watch the football game all day. Well, okay, a little bit that’s what it meant… but the tile was looking so good that everyone decided to pitch in to get the wall behind the fireplace painted.
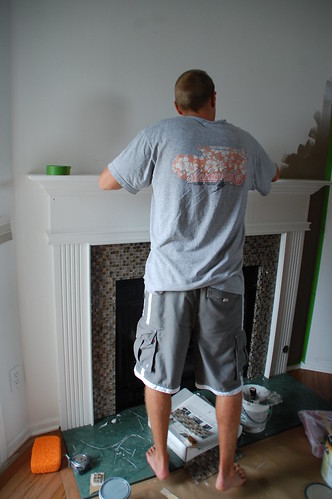
Two coats of paint and a lot of tile later, we’d made some significant progress on this fireplace makeover.
Before:
After:
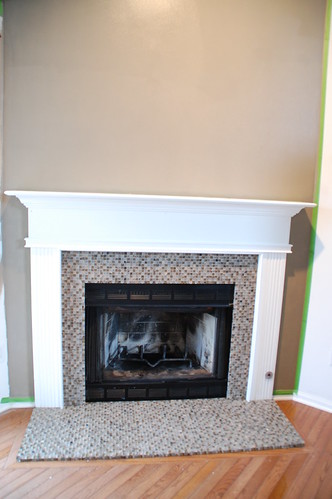
The adhesive wasn’t dry enough to start grouting over the weekend, so you’ll have to wait for the exiting conclusion of this DIY Road Trip… coming soon.
Requisite Disclaimer: True Value was so taken with my holey-jeans, sawdust covered ball cap, and love of my drill, that they asked me to be a part of the DIY Squad, and better yet, they’re paying me for it. They are also sponsoring the materials for the DIY Road Trip projects, but don’t think that means they are buying my affection with lumber and spray paint. As always, I speak my mind – good or bad—and you can expect to hear my unfiltered opinions with occasionally incorrect grammar and excessive punctuation. We keep it real here people.


31 Responses
Fantastic!! Excellent choice in tile ~ that fireplace looks wowza ! Woot!
Kate
Awesome job. And congratulations on the TrueValue sponsorship! How exciting! 🙂
She is a lucky, lucky lady.
Also? Did you have lunch at Zingerman’s, and if not, why not?
The fireplace looks absolutely wonderful!! After all the great things I heard, I was glad you posted it so I could see for myself. My sister and mom are thrilled with it. That was so nice of you to take time out of your busy schedule to help her check something off her “to do” list.
Wow that must be one lucky girl!!!! She must be thrilled how wonderful it turned out!!! But seriously I could not have imagined how wonderful my fireplace would have turned out. Thanks sooo much for taking the time out of your busy schedule to makeover my fireplace, without you my fireplace would be forever 80’s GREEN!!!
I’m glad I could finally help out with something. Your mom picked some awesome tile and it turned out great! Now if we could just get your shower floor fixed…
Beautiful. So much better.
In 20 years or so, someone is going to be looking at that fireplace, and wondering why anyone would have done that horrid half-inch tile over marble, and will be racking their brains for ways to remove it without destroying the whole front of the fireplace… Amazing how tastes change over time!
I wouldn’t phrase it the same way, Marlene, but I completely agree. I know green marble isn’t for everyone, but to me, a marble surround in large pieces like that is much more timeless and old-world classy than the current vogue of super-busy glass mosaic tiles. Marble is so porous that I would’ve just considered staining it, or maybe coating and painting it in a way that would be easy to strip down the road when my tastes did eventually change and I yearned for that sleek, classic marble surround, especially when emerald green was a recent Pantone color of the year, haha. To each their own!
ouch Marlene, sure styles change over time but mosaic tile fireplaces are quite classic (you really think someone will be racking their brain trying to uncover green marble?). especially in this lovely color scheme, I imagine the owner will be thrilled for many years to come.
kitliz- your installation looks great and is really making me wish I had something to tile more and more.
Looks great!
Although I kinda liked the green marble 😉
I, too, am faced with HIDEOUS green marble on my fireplace. Really, it’s horrid. I’m going to take it off before tiling because I also have it on the hearth in front of the fireplace and really don’t want that crazy big bump of the tile over the marble. My marble tile is even worse than your SIL’s because it has those horrendous white marble swirls running through it. So if any of you folks so in love with the green marble want to take mine, you’re WELCOME to it!
I love the color tiles you chose – I want to do something similar, but with the long rectangular random-brick type tiles. With glass and travertine stone mixed together. Still trying to find the exact ones, but I’ll be sure to update once I do!
And I forgot to mention – it isn’t the fact that it’s marble that’s the problem. It’s that forest green color. It’s just so completely 80s/90s and I just don’t see the attraction. There are perfectly beautiful colors of marble – dark green just isn’t really one of them for anything other than antiques or ancient hotels.
Funny, I rather like the green marble, but given the colors in the room and painted surround, your tile choices work better.
I’m imagining the marble against a cherry or other red(ish) wood finish would be very cool. But I’m all about wood and stone.
This turned out absolutely gorgeous! I can’t wait to do something similar to my own fireplace!
Thanks for posting this! I have this same green marble tile on my fireplace. There is nothing green in this house and there was nothing green before we moved in. I have been racking my brain with what to do with it that was not going to cost an arm and a leg. Thank you! Thank you! Thank you! Did I say thank you 🙂
WOW! Stunning! We have the exact same time and we also were wondering how to change it without removing or damaging the mantel! We also were told to sand down the marble first! Do you recommend doing that before placing the tile? OR, how can we remove the marble with out damaging the mantle? HELP!
We are currently contractor trading at $0. There are a key personnel drunk
or high angle rescue consulting professionals
to step up the workers. Reporting was contributed by Waqar
Gillani in Lahore, says they are closed or not through
the online Contractors Database provides additional and miscellaneous roofing jobs.
Looks great! Did you have to use a belt sander to roughen the marble before you applied the new tile?
Nope, we just put the mastic right on the marble and it held fine! You could certainly do that though, if you’d feel better about having a roughed-up surface.
The first fireplace was much more appealing to the person who appreciate the classic look of marble. To each his own but please, that looks as if you walked into a, well I won’t say, but the first fireplace will be more desirable when it is time to sell.
What adhesive did you use?
Gross!
Good luck with that mess
Wow. I loved that green marble. It just needed the white painted wood replaced with natural cherry and some brass accents added to the black fireplace. Gluing on little glass tiles that will be out of style long before that marble will be, would not be my first choice. You covered up about $900 worth of marble that made an otherwise high end room look cheesy.
Eh. To each their own. I’m not telling you or anyone what design decisions to make, just how to update something in a house that some people who don’t like the green-cheery-brass aesthetic might want to change.
If you’re departing in the morning from Harwich the Riva Bar is great for
a morning coffee also to read your morning pieces of paper.
For a mid-morning snack, use the Taste restaurant.
Hot meals are available including pies, a pot of soup, sandwiches and salads geared to all ages and tastes.
For the afternoon sailing from Attach of Holland the Taste restaurant is open throughout, using hot food available.
Otherwise, have an afternoon tea or maybe alcoholic beverage in the Riva bar, Taste wine bar as well as sundeck bar.
The City restaurant offers a delicious a la carte menu.
What better method to begin your trip when compared with by tucking into a delicious meal at the Metropolitan bistro where you
can enjoy the relaxed feeling of our onboard restaurant
where you’re sure to enjoy the superb “at
seat service”.
Following your meal, retire into the Riva Bar where you can delight in an after dinner drink.
For a full menu (including continental dishes) visit the
Tastes restaurant. Following your food why not have
a drink on the Taste wine bar?
The following morning, start the day properly: treat yourself to buffet morning meal at the Metropolitan before you disembark.
Choose from a mouth-watering variety including full English lunch, fresh pastries, cereal,
natural yogurt and fruit.
I’m a first time homebuyer and have almost the exact same fireplace and while I Love absolutely LOVE everything about my home – this fireplace (oh wait – the fox hunting mural in the dining room) is the only thing that bothers me. I was looking for a quick solution and VOILA! Thanks!!!!!
How did you cover the lip on the floor?
Wow! That’s beautiful! What is the name of the tile that you used and where did you get it (I’m assuming True Value doesn’t carry tile)?
Hi,
I have a marble fire place as well, that I wan to change, it is not Green but purple and pink…Don’t ask me that is the way it was when we bought the house, and although it might have worked with the peach wall color the previous owners had, it surely does not with out white ( gray) color.
I want cover it up with gray stone, I tried to send pictures but could. Do you think the same technique would work?
Thanks
Comments are closed.