It’s time for me to grab my pillow and sleeping bag and go camp out in the master closet in the not-finished house. Why? It’s roughly the same size as my current living area, and it looks infinitely more gorgeous.
That’s right, I used the word gorgeous to describe a space primarily used to store clothes. That’s how spending a year living in a garage can warp your perception of things.
Here’s how the room has been coming together over the last couple of months, and you can make the determination when you see the final product about whether camping out in there is extreme, or completely and understandably justified.
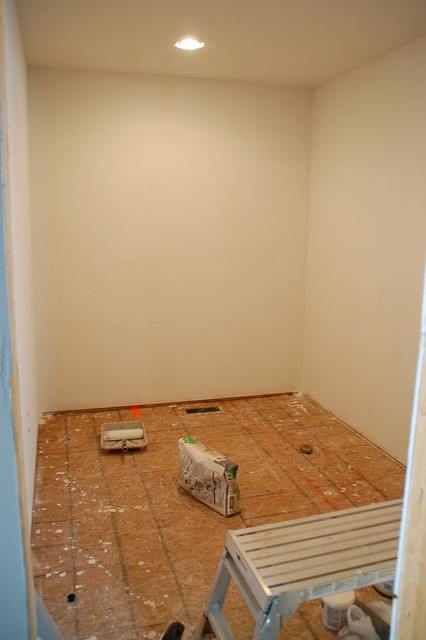
Here’s the closet early on. Its roughly 7×10.
After coming up with the shelving plan (inspired by these shelves at The Brick House), it was a matter of doing all the math and making extensive parts-lists. Here’s what a basic segment consisted of:
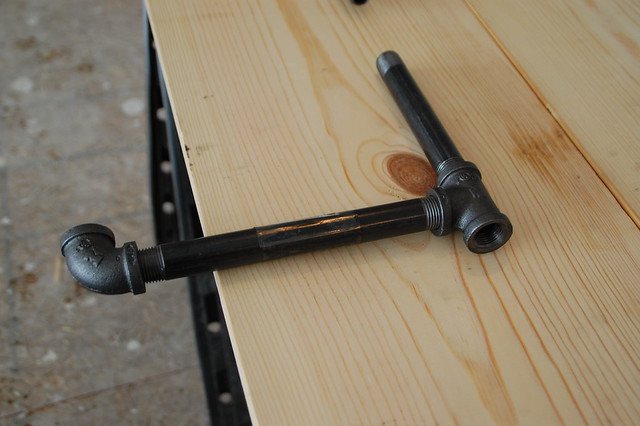
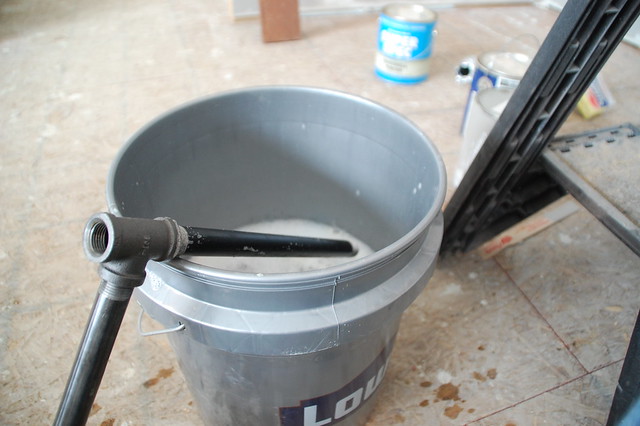
This is natural gas pipe. It took more than one trip to Lowe’s to get everything we needed because when does it not?
Once everything was laid out, it was time for dis assembly and washing. (I used soap and water, MysteryMan used brake cleaner… both worked equally well.)
Next came flat black spray paint.
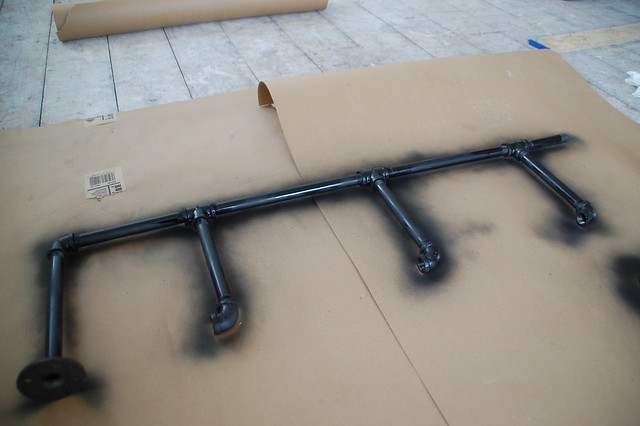
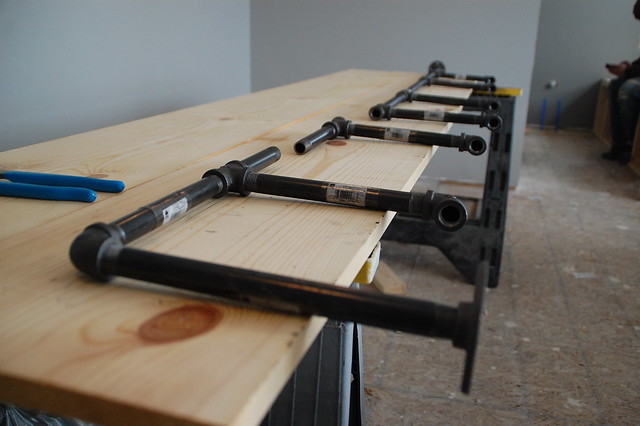
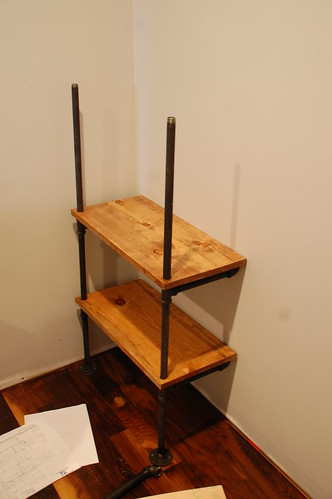
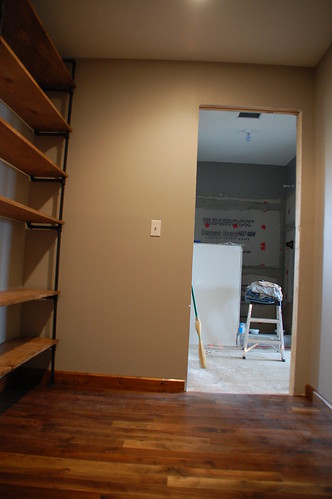
Then the basic frame was mocked up before the floor went in.
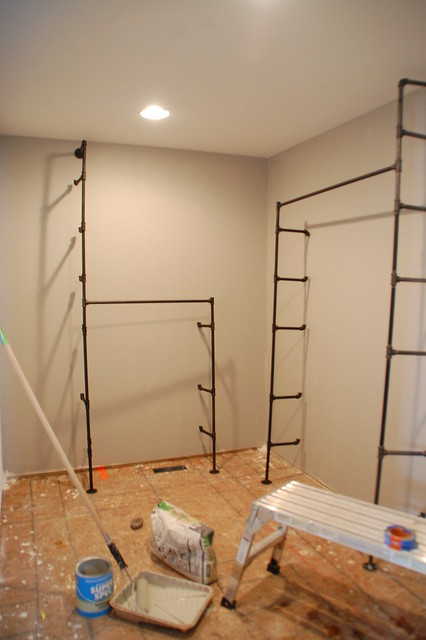
I also painted the ceiling and walls before the floor went down. And a few days later we had this:
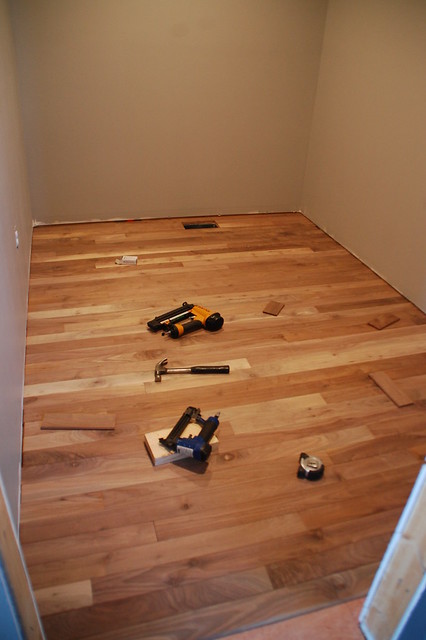
After the floor was finished the actual real assembly of the shelving unit started. The shelves were made from 12″ wide pine shelving from Lowe’s. (Bought in 12′ planks and cut down with the trusty miter saw.)
Two holes were drilled just wider than the pipe for each shelf, and the shelves were stained and polyurethaned before everything was assembled.

Figuring out how to get the hanger rods screwed in (since one was not reverse-threaded) was a bit tricky. Essentially one side had to be assembled from the rod down so that everything could still be screwed together.
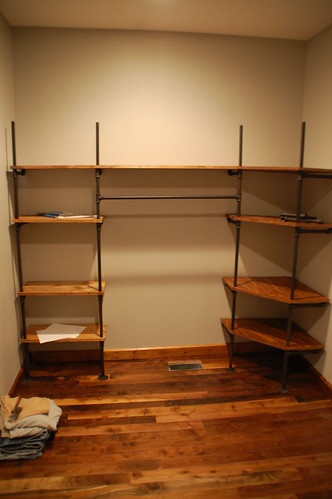
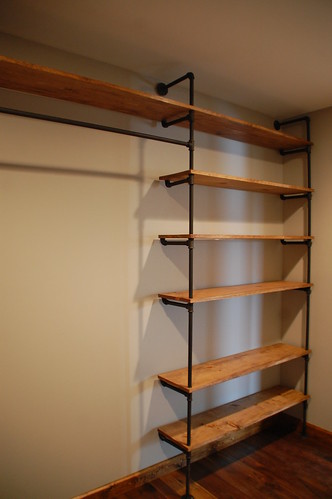
The corner shelves were cut from stain-grade plywood and ended up staining darker than the regular pine shelves. In retrospect we would have put another coat of stain on the pine to even things out, but they were already sealed. Live and learn.
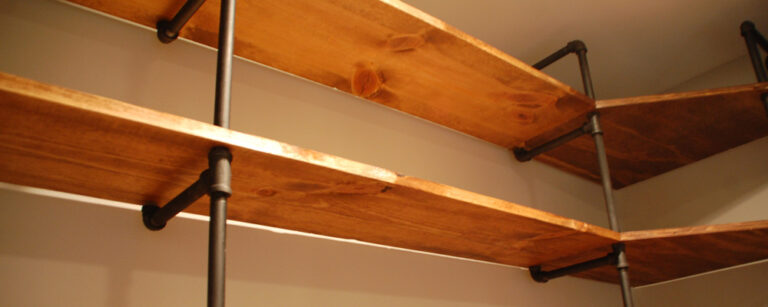
Its hard to care about a little uneven stain when you see the final product.
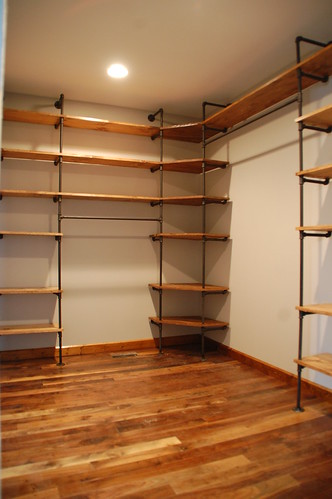
I mean, I think there’s almost enough room to string a hammock up in there, and could you blame me?
The total cost of the shelves was around $500. If we’d gone with solid wood shelves it would have been something like $2000. (Granted, the white wire shelves would have been cheaper, but not nearly so hammock-worthy.)
The Storage Breakdown
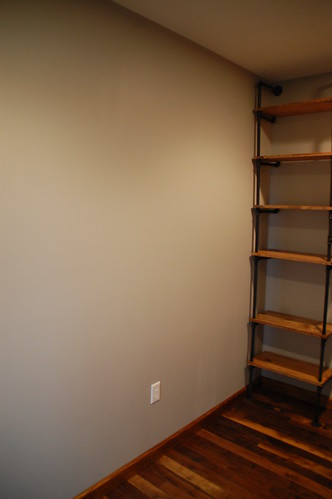
While the shelving unit is done, there is still some additional storage to be added in this room. As it stands now, the back wall belongs to MysteryMan. He preferred more shelves and one short hanging rod for his collection of flannel shirts.
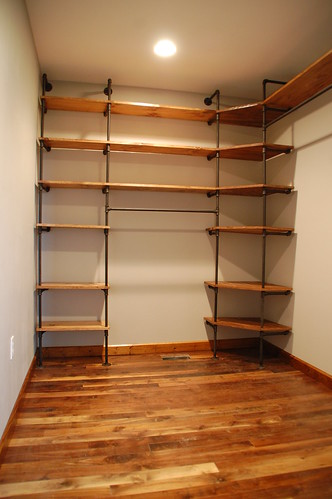
The side wall with the double shelf and the high hanger rod is mine.
Half way below the rod I’m going to build an improved version of my pants rack, seen here:
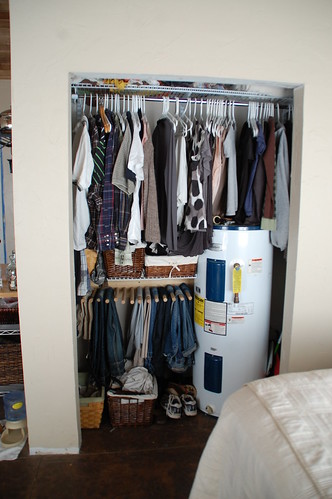
(That, by the way, is the sum total of our current closet space. So you can see while the miles of shelving in the new closet is such a big deal.) The pants rack is basically dowels set into a 2×4 and it’s by far the best way to store pants–and I’m not just saying that because I invented it. The whole looping through a hanger thing never worked for me so my pants always ended up draped over a chair or heaped in a mountain on the floor. This is basically just a more organized version of throwing pants over the back of a chair.
On the new version I am going to space the dowels out a bit further, since it take some maneuvering to get pants nicely side by side on this one.
I’m also considering a few hooks for camis and/or hoodies on this short wall:
And there will be two laundry bins on this wall. (One for whites and one for everything else, because that is the extent of laundry separation that goes on in this house. I’m a little more Bob Vila than Martha Stewart you know.)
Finishing Touches
Other than actually putting my sleeping bag clothes in the closet there are a few things I’m keeping an eye out for to finish everything off in here.
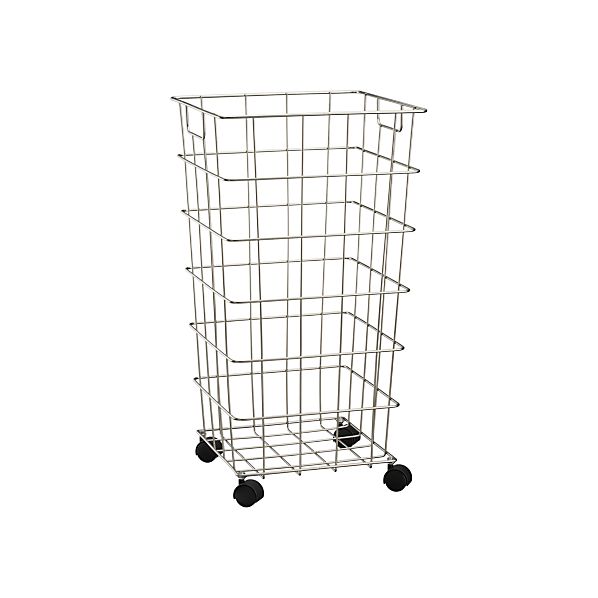
Dark wire laundry hampers, which I haven’t been able to find. But I’ll resort to spay painting a couple of these from Crate and Barrel if I have to:
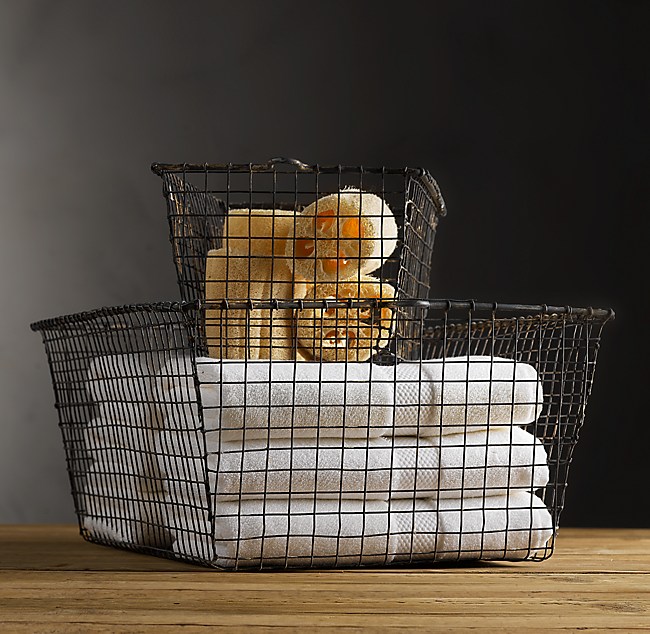
The top shelf of the closet will also be storage, since I’ll need a step ladder to get up there. These wire baskets from Restoration Hardware will be the perfect fit, but I’m still shopping around for something less pricey.
And, of course, I can’t have a bunch of white plastic hangars all over my new dark industrial style shelves so I’ll also shopping around for some cheap wood (or black) hangers.

So that’s the story of the closet that is nicer than the garage I live in.
If we’re not actually moved in to the house in a couple of weeks, you’ll know where to find me. Do you think I could fit a futon in there?
2016 Update: Hey guys, I get a lot of questions about the specifics of building something like this (parts lists, prices, dimensions, etc.) Unfortunately I built the house this closet is in with a wonderful dude, who is now one of my wonderful ex-boyfriends. And this was like 4 years ago… I bought a farm and have built a lot of shit since then so I can’t give you a whole lot more on this particular closet. However, I did recently build some gas-pipe wall shelves for the laundry room in my current farmhouse that are similar in build and give you a idea of different dimensions. You can find a little more detail on parts and sizes for that project here.

109 Responses
Olá! Adorei o armário e estou vendo a possibilidade de fazer um tbm. Só estou com dificuldade para identificar o tipo de encanamento que vc usou. Poderia me informar?
This looks amazing. Love it!
This looks excellent. Could you tell me where you purchased the round threaded bracket pieces that secure your frame to the wall and ceiling?
Thanks
Those fittings are usually available at the same place you purchase the pipe (in my case, at Lowes!)
Hi there
Thanks for inspiring to such an extend i am ripping my cupboards out!!!!!!!!! yayyyyaaaa!!!!! It is totally awesome. I will source around for all those gas fittings. In SA and hope i will be able to get it all. Thanks again and go go go!!!!
Christelle
@ Jasmine..those are called FLANGES
if I’m not mistaken ..round , screws to floor, walls, ceiling.plus they share threaded
How is the top shelf connected to the corner shelf? What was your total cost of the piping and why gas pipe?
Top shelf and corner shelf are connected with dowel joints. You could also use pocket screws. I built this 4-5 years ago so I don’t recall the price, but you can price out materials at your local big-box.
Hi, great work!
I didn’t get how didi you connect the corner shelves with the others, since only the those ones are transpassed by the pipes.
Can you tell me?
Many thanks
Do you have a materials list?
Hi,
I’m doing a similar style project in my closet, and had a question about the plywood: did you put any caps over the vertical edges or just stain? (Can’t tell from the picture) If it’s not stained, were the individual segments of the plywood visible?
Thanks.
Unboxing videos have ended up being a mainstream outlet for customers to get a hands-on video presentation of the item.
I freaking love this. I just moved into an old farmhouse with my boyfriend…built in 1900, it’s his family’s homestead. The old barn is coming down so we’re repurposing the wood from that for shelves, table tops, etc. and I’m going nuts with iron pipe. Great post. Thanks!
This looks just like what I am looking for 🙂
Could you tell me what is the length of the pipe you used on the shelf please? Are the corner ends put on the (wall side) shelf pipe just to keep the shelf level? Could they be left off the pipe?
Thanks
What size of pipe did you use?
What kind of flooring this this?
You probably already have the hangers for your closet that you want. But if not you should try huggable hangers by Joy from HSN. Now don’t laugh. They have a very slim profile and a special velveteen coating that keeps all your clothing from slipping off, and they are color fast so they wont stain your clothes.They also come in a ton of colors. That way you can pick a color that goes well with your closet.
Hey can you tell me how you got the longer shelves to lay flush together i mean that cant be one piece
For example the 2 long rectangular wood pieces that join in the corner shelf
Dowel joints (or you can use a kreg jig and pocket screws.)
If anybody needs some help with a black pipe project like this I’m happy to oblige. I sell all the iron pipe stuff, already cleaned and degreased and stove painted and still cheaper than Lowes or Home Depot. Even if you don’t buy from me I can help you design and spec what you need.
https://www.blackfriarsironworks.com or https://www.etsy.com/shop/BlackfriarsIronworks
How strong are these shelves? I mean you didn’t have backside stands, they’re supported only by horizontal pipes – how much weight can the withstand without deformation? Did you use them for anything heavy?
I have a similar set of shelves in my current laundry room and i use them to hold the typical utility-room items (several jugs of detergent, baskets of misc items, laundry, etc.) and they hold up just fine. The wood shelves themselves are supported front and back, and the “backside” of the pipe is attached to the wall… The shelves would fail at the point that the back support pulls out of the wall OR the metal itself bends…I haven’t found that point with any of mine yet!
This post inspired me to build pipe and wood shelves in my bedroom. It took me a while, and a lot of lessons learned, but it was worth it! I designed them for an alcove that will hold a tv, books and other knock knacks, so the dimensions were different. Great base for a start though! Just finished this week! Thanks!
Try Hobby Lobby for your wire baskets. They have lots and you can usually get them on sale if you’re just a bit patient.
Bravissimo!
Hi, can you tell me how millimeter is the thickness of the pipe? Also, is that 1 inch pipe or 3/4 inch pipe? Thank you
I believe I used 1″ pipe in the closet, and 3/4″ in the laundry room (I don’t know the thickness… it’s standard gas pipe.)
when your closet is nicer tan where u live: WOW…….I mean WOW. this is what i have spent 6 months searching for Thank you for this wonderful DIY
How did you measure to drill the holes so all the shelves would line up? BTW…it looks awesome!
I’m installing similar shelves in my retail space. My colors are white and gold. My question is- the spray paint you used. Since I’m wanting to do gold- will regular gold spray paint work? Or will it peel off, metal hangers scrape the gold off??
Did you have to cut and re-thread the pipes? How did you do that?
can i have contact of the guy who does those shelves?
Hello!
Love this closet!! I would like to copy it, so I have been studying it, but can’t figure out how you attached the shelf to the left of the corner to the corner plywood pieces. Since the corners are supported by the pipes, it looks like the longer shelves to the left of the corner are just glued together, but I’m sure you did something more substantial!
thank you!!
Great blog! Do you have any tips and hints for aspiring writers?
I’m hoping to start my own website soon but I’m a little lost on everything.
Would you advise starting with a free platform like WordPress
or go for a paid option? There are so many choices out there that I’m totally confused ..
Any recommendations? Many thanks!
Comments are closed.