Interior work brings with it the joy of figuring out how to attach two pieces of wood in a slightly more elegant manner than banging a few nails in and being done with it. I both love it and hate it, and you can usually assess which side of scale I’m on based on whether or not I’ve thrown a tool across the room in the last few minutes.
For the Pottery Barn Inspired Vanity I used dowel joints, which give a flawless finish inside and out. For the master bath vanity I’m using a Kreg jig to install pocket screws– it does leave holes in the work piece, but using this kind of jig is faster and easier than doweling and clamping everything which means fewer dents in the drywall from flying hammers.
Setting the Jig Up
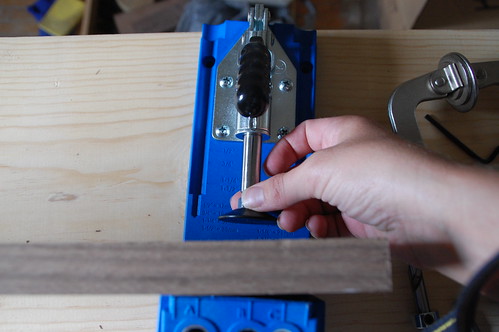
The jig itself is fairly simple. It’s got a clamp to hold the work piece in place, and guides for drilling pockets with a special bit.
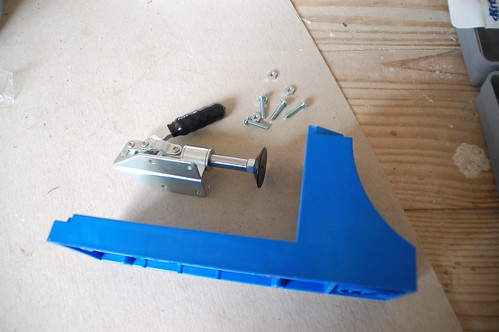
Just screw the clap part in place, and the jig is ready to use.
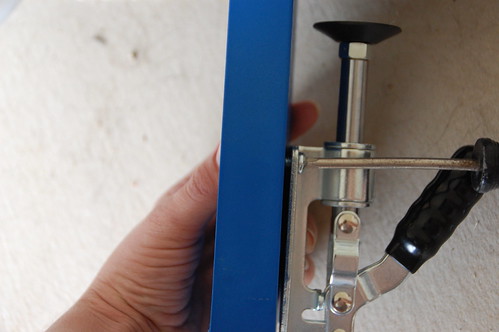
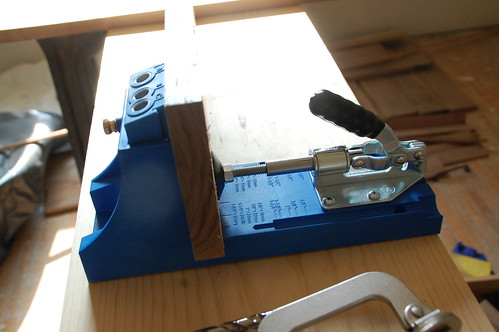
Once I have a work space that doesn’t change from day to day I’ll be attaching this to my work bench, but for now it worked well in a more portable state.
The really nice thing about these jigs is that it takes all the math and guesswork out of joining two boards together. You simply move the drill guide to the mark that indicates the depth of your piece (I was using 3/4″ stock)…
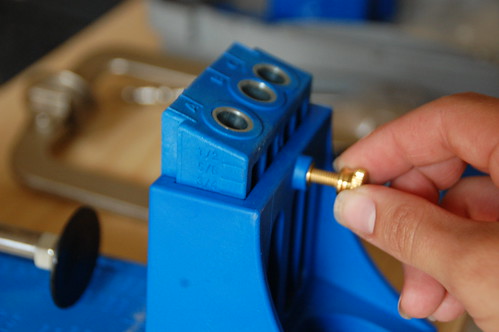
Then set the drill bit into this handy slot, with the end of the bit (not including the smaller pilot hole section) at the same depth…

And then tighten down the depth gauge.
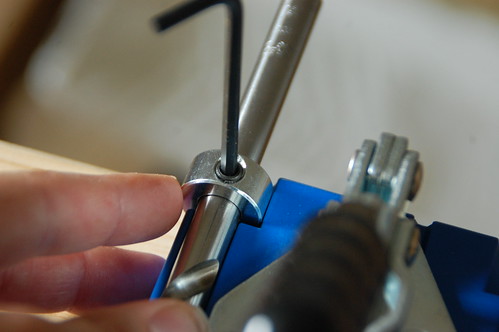
You also want to spin the end of the clamp until it’s the appropriate length to clamp the piece tightly.
Using the Jig
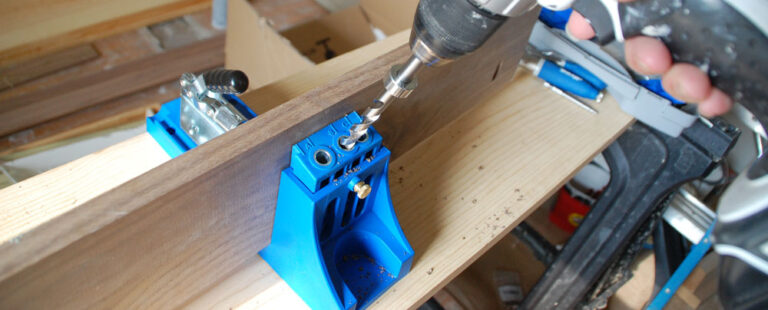
Everything is set up and ready to go, you just need to determine where the screws should be placed. Since these leave ugly pockets (which can be filled with special plugs, but still) make sure you’re drilling into the side of the board you don’t want seen.
There are all kinds of ways you can attach boards with a pocket screw– at a 90-degree angle, or face to face. Either way, you start by drilling the pockets.
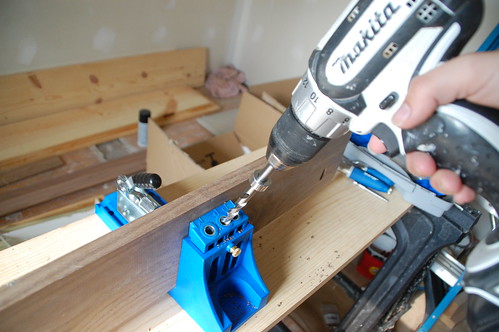
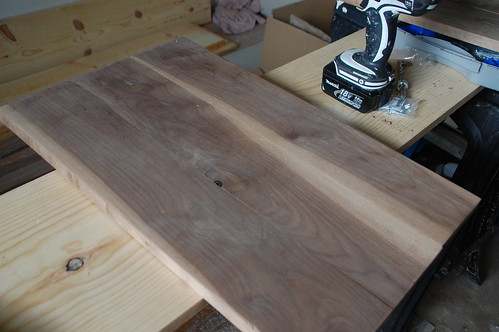
It’s quick and easy. I was putting together three 6″ pieces of wood to use as doors for the master vanity and I used 3 screws for each piece of wood.
One you have the pockets, clamp the piece and drive the screws.
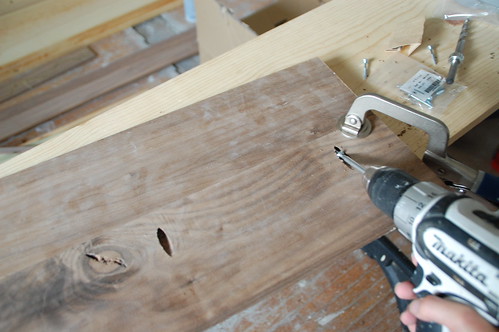
That’s all there is too it.
I would call this a must-have for the work shop. I can’t believe I didn’t own one earlier… but then again I hardly ever do anything the easy way.
Have you build anything awesome with pocket screws? Leave a comment and let me know.

20 Responses
The first thing I built with Kreg pocket screws was a jig for it. With this jig I can easily put together face frames, cabinet walls, and the like. It’s a poor man’s version of what I would have gotten by paying something like $700 for one of the more sophisticated Kreg pocket screw setups. I can’t justify that kind of expense for the way I wanted to use pocket screws, so I built the jig.
I tend to use biscuits and glue and clamps for my work, but pocket screws do have a place in my workshop, and I like them a lot.
One thing I would recommend to those who might be contemplating this is a dedicated drill. By now you have had to spend quite a bit of time adjusting the collar on the bit to get the bit to drill to the desired depth. Remove that bit from your drill, and you will start the process all over the next time you want to use the Kreg. The advice I got from the guy who gave me the plans for the jig was to get a cheap drill, chuck in the bit, make the adjustments and leave it that way. Now whenever I use the Kreg, that’s the drill I use, the one that’s already set up and ready to go. It’s a $20 corded drill that I absolutely would not use for regular work, but it saves a lot of time when I want to use the Kreg, so it has more than paid for itself. And because I use this drill ONLY for this purpose, its cheap price doesn’t matter a damn. It will hold up just fine.
I’m curious about the dedicated drill. Obviously I love to have an excuse to buy another tool, but with this jig it all seemed pretty simple to me… just tighten down the depth gauge collar using the markings on the jig and pop the bit into the drill. You do have to swap out the drill bit for the driver bit the same way you would with pre-drilling a hole and then setting a screw, but that’s about it.
If you always use the same thicknesses of stock you can just keep the bit set up with the collar, so you don’t have to mess with it when setting it up.
Maybe I don’t do enough of this to see how it could be a pain eventually!
Sounds like Joseph might be a bad influence on your wallet 🙂
I’m *doing* a little jig after reading this post. Does that count?
You won’t get the bit back in to the same depth. You want those holes to be consistently drilled to the same depth. It took me a while to get it where I wanted it, but now I’m done with that part of things. As I said, I made a jig for it which hangs on a nail in my shop. The dedicated drill is on top of it, and whenever I want to use it, I bring down the jig, clamp it to a work table, grab the drill, and I’m good to go. It’s kind of like the argument I used when I made the jig. I could get along without it, but once I had the jig finished, I no longer had to do all that fussing to line up the Kreg to drill holes in the proper places. If it takes thirty seconds to drill “x” amount of holes with the $700 device, I can do the same number with my jig in forty-five seconds, and all it cost me was a bit of MDF and a few hours of my time.
Is Joseph using his without the stop collar?
Do you use Kreg screws for these joints as well?
I use the stop collar and Kreg screws. The setup I use works like a champ, which is why I recommend it. From the moment I decide to drill the holes to actually drilling the holes is about sixty seconds, and I will drill those holes right on the money evey time, no fussing at all. That’s why I recommend that method.
I LOVE my Kreg Jig–I’ve got the same set-up that you have. I’ve done quite a few projects with it, the most simple being an entryway bench and the most complex was the twin storage bed you mentioned in your ADD post.
I do like to use our cheap, plug-in drill along with my Dewalt cordless drill when I use the jig. One I set up with the drill bit and the other I use to drive the screws. Saves a little bit of hassle with changing out. I’m sure this is nothing new to you, but perhaps it will give you a reason to purchase… :)[img]http://pinktoesandpowertools.files.wordpress.com/2011/06/img_3910.jpg[/img]
Oops–sorry for the gigantic picture. I thought all my pics were resized, but apparently not…here’s a more appropriately sized photo![img]http://pinktoesandpowertools.files.wordpress.com/2011/07/img_4310.jpg[/img]
I love both projects (that hallway table IS gorgeous)! The kreg jig has definitely been a game changer for me… sooner or later I’m going to build myself a new desk.
Thanks! I can’t wait to see what you come up with for the desk. I couldn’t help myself today–I bought some rough lumber to make some of your pallet bins. I’m going to sneak them in the middle of the projects already on the to-do list. Hope they turn out as great as yours.
I especially like the walnut hall table, Pink Toes.
Thanks Joseph!
Thank you for the kreg jig tutorial
I have had and used a Kreg Jig for several years and love it. Once you set one up and try it you will love it. Oh, I don’t work for Kreg.
Curtis
I used my Kreg Jig to build a new bed frame. Worked like a charm with the butt joints I used.
Hi all. I’ve been tinkering with DIY recently and have successfully built a few bed frames with my husband. Since hurricane sandy wiped us out we’re looking to build new furniture. From everything I’ve read the kreg jig can prove to be useful but I’m a bit confused about it. I see some giant sets that are über expensive and others that are very reasonable. I don’t want to buy the reasonably priced one and miss out on necessary pieces so my question is what am I looking for the kreg jig to have in order for it to fit my needs? Thanks!
Joseph has the right idea. If you find yourself using the jig often, and getting interrupted to do another task often enough, you’ll soon tire of resetting the drill.
Hi, great information on the site. I’ve done plenty of bigger DIY projects around the home (new floors, tiling, wall removal, etc.) but I am now getting into the smaller more detailed stuff (cabinets, mudroom locker, bookcase, etc.
What is the jig you are talking about? Is this to hold the two pieces of wood together or something else?
Thanks,
Eric
I don’t understand Joseph’s reasoning for a dedicated drill motor. I use the the Kreg jig 3 or 4 times a week and 90% of that is on 3/4″ stock. Once the depth collar is set for 3/4, nothing changes. I chuck the bit into one of my cordless drills and go to work. Thereis no need to adjust anything if you are using the same thickness stock. Even if you aren’t, it is a 30 second adjustment to change from one thickness to another and a second drill motor doesn’t help there at all.
I guess if you have the cash laying around and want to collect tools, you can use this as an excuse.
What a wonderful and informative article you shared. I have learned many information about the Jig setting from your post
that I didn’t know before.
Thanks a lot for sharing such an informative article.
Hopefully. Waiting for your more article in the future.
Comments are closed.