
I’d like to pretend like I was a total badass this weekend and finished ALL OF THE THINGS. But. Ah. If we’re going to be honest? A lot of my weekend looked like this…
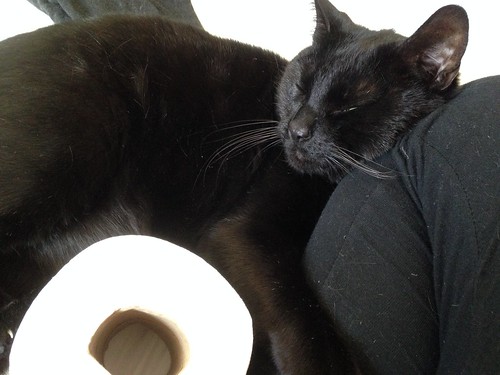
Yeah. One of us was not feeling well, and oddly, it turns out it was not the cat. However, Bubs can always be counted on for taking sympathy naps and/or religiously guarding the tissues from possible theft when someone else is feeling poorly. (And by “tissues” I obviously mean toilet paper, because we are super classy like that on the farm.)
Being sick sucks, but it sucks even worse when it’s the prime time and perfect weather to be working in the garden but you can’t keep your eyeballs open for more than two consecutive hours. I was mostly a cranky, sniffling, unproductive asshole this weekend, but that doesn’t mean that I didn’t make any progress in the gardens.
This is 100% thanks to my mom, by the way, who decided that all she wanted for Mother’s Day was to come up to the farm and build tomato cages. (Swear to god I don’t coerce her into this stuff… she came up with the idea herself.)
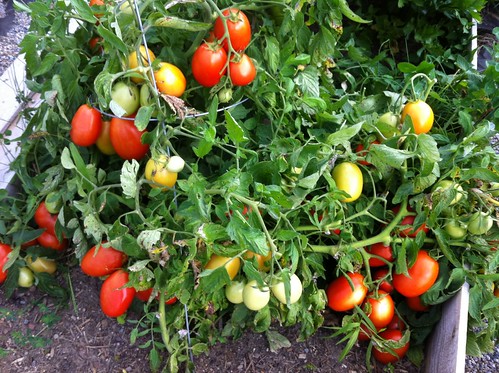
My mom was adamant about doing this project because– and here’s something we can all agree on– those little wire tomato cages with three measly hoops on them that you get from the Garden Center? Those things are shit, and we all know it.
My tomato plants crushed those thing last year.
My grandmother, the consummate gardener, told me that her father made her some tall, sturdy tomato cages out of concrete reinforcing wire that she still uses today. That means those cages are older than I am and still going strong. So, my mom and I both felt that upgrading the tomato cages this year was necessary, and on Sunday afternoon she showed up on the farm with a big roll of welded-wire fencing and the determination to build some damn tomato cages.
So we did.
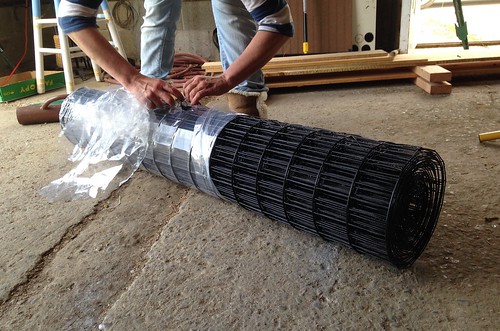
We used coated welded wire fencing (like this) which, granted, is not concrete reinforcement, but is still pretty hefty. The roll was 48″ by 50′ long, which will make about 10 cages.
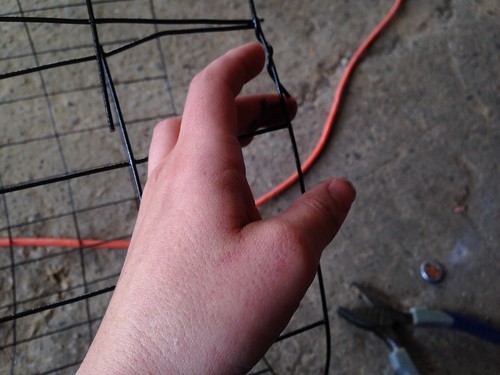
Here’s how it went down. Basically, I sat on my butt trying to stay awake, and my mom prepped the materials, which include, uh, really just the wire. and some wire snips.
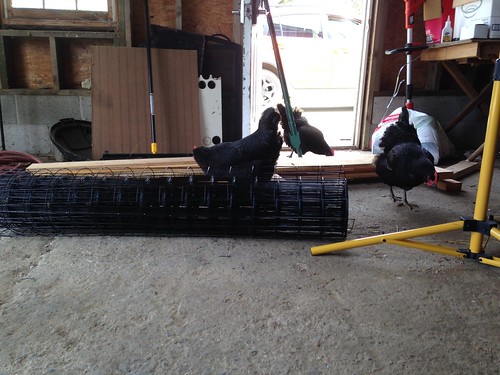
This was my mom’s show. She and my grandmother figured out how to assemble these things, so I just followed orders. The Nuggets, however, did not follow orders. Because that’s not what chickens do…
To make the cages, we counted out every 30 rows, used wire cutters to snip a section off, curled it into a cylinder, and then twisted the wires over each other in a spiral fashion on the top and bottom to secure it…
All of the other wires just got folded over the other side to hold the thing together.
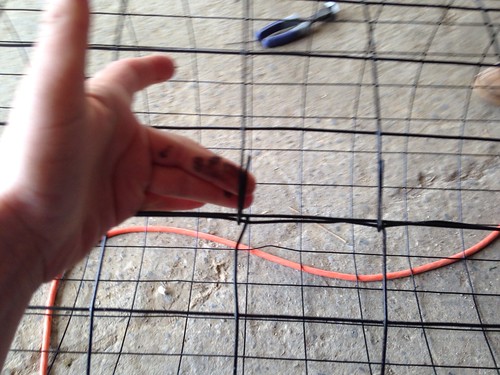
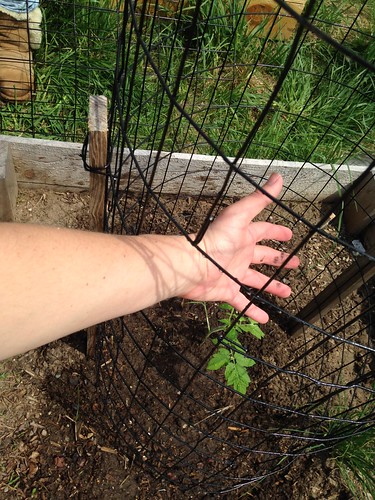
Super easy. We also cut some “windows” in the wire at various heights so that we can reach in and collect the tomatoes.

Then we planted a couple of tomato plants to see how they would work.
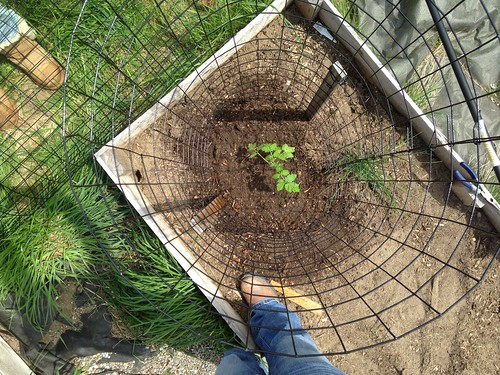
The cat decided to take over for the chickens and help during this part.

Clearly.
I had a couple of tall garden stakes left over from last year and after some debate we used two per cage to fix them in place…
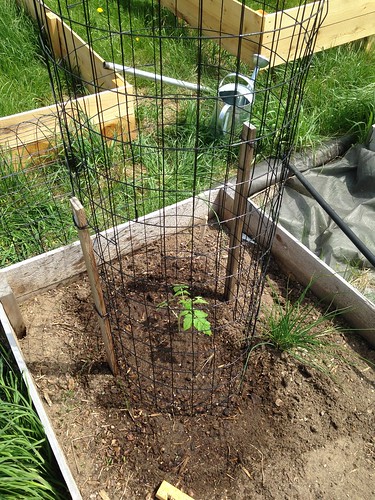
A couple of pieces of wire held everything together, and let me tell you, these won’t be blowing over in a light breeze.
You can see how the windows will work for picking the tomatoes.
We also decided to use a couple of these cages for my bean plants. See, I thought I planted bush-bean seeds, but as the plants got bigger they started doing things no proper bush should do.
Turns out they are probably pole beans, because I guess I’m not good at reading seed packet labels. Weird.
So, we put up a couple of cages and then planted a dozen bean plants around each one.
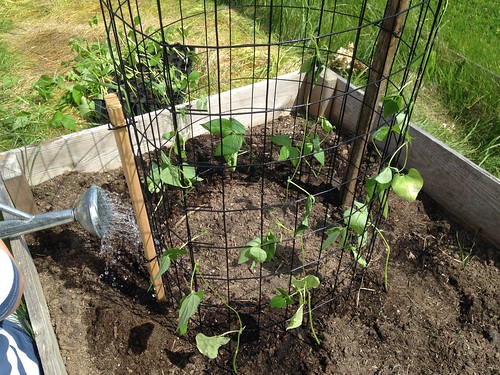
Not entirely sure how this will work, but it was an easy solution that didn’t require additional time or materials, which was imperative because these seedlings were trying to strangle the crap out of each other indoors.
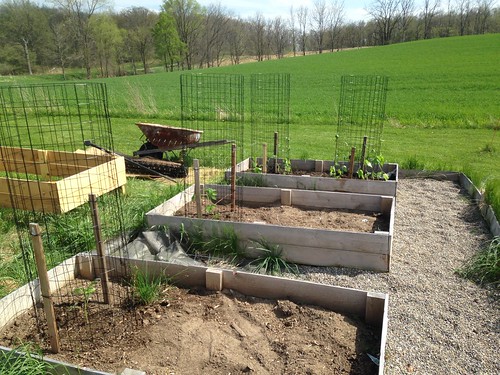
Here’s how the garden looks now. It consists of:
- 2 beds of garlic
- 2 beds with tomato plants (and soon to have eggplant and kale)
- 1 bed with beans
- 1 vertical bed with cucumbers
- 3 beds that need dirt
But the really exciting part is happening on Friday when I have a couple of guys coming over to help me install all of this…
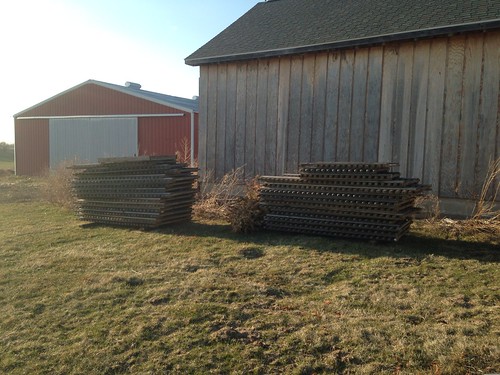
That’s fencing that my family salvaged from a house they were contracted to tear down and will give me a good 40’x 80′ fenced off garden area. (I’m pretty sure that’s larger than the entire lot my first house sat on.)
After the fence is in, I’ve got another push of building to get through that includes:
- Renting a sod cutter and removing the grass inside the fence
- Finish installing the cedar edging for the “outside bed” that will run along the inside of the fence
- Put in the rest of the garden paths.
- Build structures to hold peas and hops
- Build one more vertical bed
- Build a series of strawberry boxes
I’m hoping to get a lot of that done next weekend. (Don’t laugh.) (Okay, fine… laugh. That’s a lot of shit to do.)
The good news is, I have a week off from my day job coming up where I can finish some of these miscellaneous garden projects (and hopefully get started on one larger outdoor project that I’ve been planning for since last year) and get the rest of my plants in the ground, which include:
- Peas (already started)
- Acorn and spaghetti squash (already started)
- Eggplant (already started)
- Kale (already started)
- Sweet and “glass gem” popping corn
- Berry bushes (Blackberry, raspberry, mulberry)
- Strawberries
- Rhubarb
- Radishes
- Spinach and lettuces
Good thing I got all of my allotted naps for the year out of the way last weekend…

19 Responses
Sorry you were sick. It is no fun especially when you have an extra long to-do list!
We have made our tomato cages exactly the same way for a few years now. Much better than those spindly little cages!
You are going to have the most beautiful garden ever after you get done!!
Wire fencing for tomato cages…DUH! Moms are the smartest.
The credit has to go to my mom, though! (Otherwise known as “Mamie”)
Wow, girl, who is going to be harvesting and then cooking all of that food? Surely, you will be sharing your spoils with family and neighbors, right?
I hope you have good luck with those tomato cages. I used those for a few years until I got fed up with trying to harvest tomatoes through them. I could never get enough access holes cut and then kept scraping my hands reaching for the tomatoes. Then I built a set out of concrete mesh like my Dad uses, and like your Grandma uses. Those things are the bomb! If you cut off the bottom row of wire that leaves a bunch of wire spikes sticking out the bottom that you can just push in the ground. That almost eliminates the need for stakes. Depends on your wind. Good luck with the garden. Sounds like fun.
In the fall, I’m gonna MacGyver some pounded posts and heavy duty line from one one of the bed to the other. HATE the circular cages.
Those new cages look great! Full sympathy on being sick – was out of work all last week with some virus that seriously kicked my butt. Finally feeling some semblance of normal yesterday.
I love that you’re carrying on family tradition.
Another option that I’ve used successfully for tomatoes is twining them around a string. I’m not sure if I can explain this clearly, but here goes. Hammer tall stakes (about 5′ tall) into the ground at either end of your row of tomatoes. You want about 4′ of the stakes sticking up above the ground. Run a long 2×2 or other scrap piece of lumber along the top of the stakes. Screw it in place. Tie pieces of string to the 2×2 at every tomato plant. Tie the other end of the string to the plant just above the root. Tie loosely because your plant will grow. As the plant grows, wrap it around the string. This keeps the plant (and most importantly your tomatoes) out of the dirt.
I also religiously sucker my tomatoes, so they grow tall, rather than bushy.
These are very sturdy tomato cages:
http://www.gardeners.com/Tomato-Towers/8587041,default,pd.html?start=5&q=tomato%20cage
I don’t have any trouble reaching through to pick tomatoes in them.
They do need to be tied to something so that they don’t fall over when the plants get six feet high or so and it’s windy. I usually have them in rows so I can tie them to each other (spaced apart) and then tie the end cages to something.
They are nothing like those wimpy cone cages.
p.s. They fold flat for storage.
If the cut holes are out to get you, you might cover then in something, plasti dip comes to mind. However I’m sure there are a better ideas then that one. The one time I used the product I wasn’t impressed, though garden gloves might do well to protect your hands.
Very impressive! It’s good to get the sickness out of the way…now you’ll be good for the rest of the year…question, I love garlic, but two beds seems like enough to sell to your local grocery! Will you use that al yourself?
You should do rhubarb
I SHOULD do rhubarb!
What a fantastic idea.
I’m totally doing this. THANK YOU, MOM!!
Smart move to cut the ‘windows’ the middle and bend up the left over wires!
You can also use some sticks, cut longer than the diameter of the cage, stuck all the way thru to hold up the branches so they don’t slide down inside the cage.
The sticks work even better with two parallel runs of welded wire fencing, about a foot apart, on tposts.
Diligent suckering essential!
I hope you planted your garlic last fall.
Can’t wait to see that outer fencing up!
No fun at all being sick, more so spring or summer when you have plans made during winter while staring out at all that snow and projects to implement, hope your 100% soon.
I like Mamie’s tomato cages with access openings easily made where you want them. Also what works well is a heavy ( about 3/16″+ ) wire temp gate, gate length by about 4ft. high, farm temporary confinement or gate sections…hmmm? not really sure what they call them but there used for many things on the farm. The kind you see bent in an arch in the back pickups heading home to a live stock farm etc. They’re so stiff n heavy they’ll ride that way fine.
They’re cut into sections to make a triangular stand what ever your desired size may be, wired together at the corners. Have square holes about 6 X 6 for easy access anywhere, would no doubt need to be staked down but being triangle makes them fairly sturdy. Best of health and good progress on the upcoming projects.
I have found that coated welded wire fencing has worked great in all kinds of gardens.
I wonder if your “glass gem” popping corn is the same stuff we had as kids. The kernels were all pretty colors but the popped corn was normal white. I have not seen it in many years!
Comments are closed.