Work on the upstairs bathroom has begun! This deserves an exclamation point because Baths! Soon! Anyway. It’s also nice to be making a mess inside the actual house again… that was the whole reason I bought this property, originally.
The one thing I needed to get done before Thursday was tearing out the old tile floor, which, you might think, “Hey, this is a small bathroom, that should only take a couple of hours.” Right? I might have thought that two before I remembered I’ve been tearing houses apart for a decade and shit is never that easy. Which is why I had a beer and took a nap before I started this project. (Actual Real Truth. I did that. You know, so I wouldn’t lose my shit and throw a hammer through a window or something.)
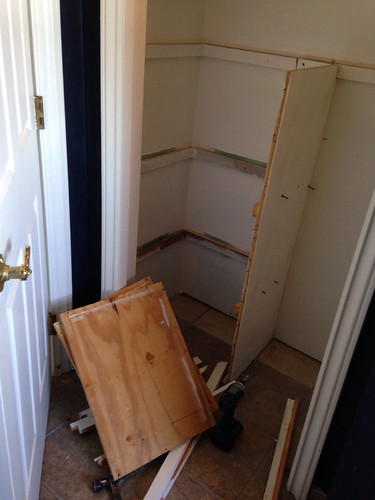
So, after my nap and preemptive-beer, this is where things started:
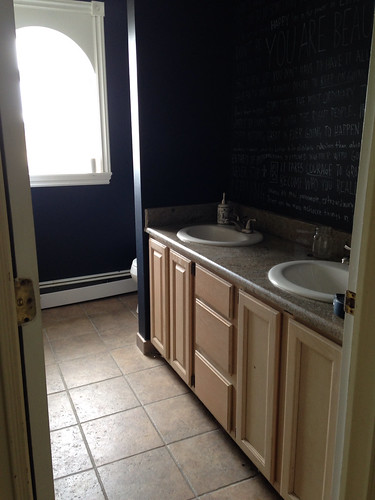
Aw. That’s sweet. And clean. Okay then, where’s my hammer?
I wanted to dive right in and just start tearing the tile out (prepping is never my strong suit), but since the trim and the shelves in the closet were built on top of the tile, all of that stuff needed to come out first.
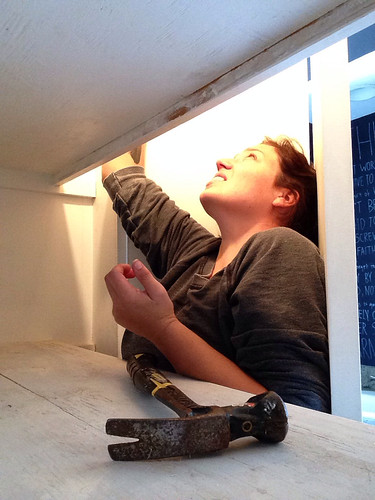
Turns out the way the closet was constructed, the only way to reach the screw to release the sliding door, was to wedge my entire body into a little cubby…
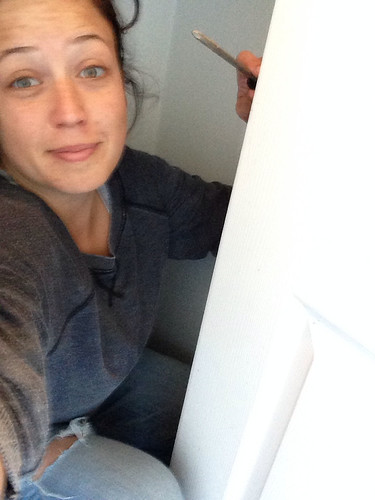
Then shut myself inside the closet, partially open the door back up, and stand up inside the little triangle shape created by the partly open door.
Good thing I had that beer first, or I may not have been limber enough to get in there.
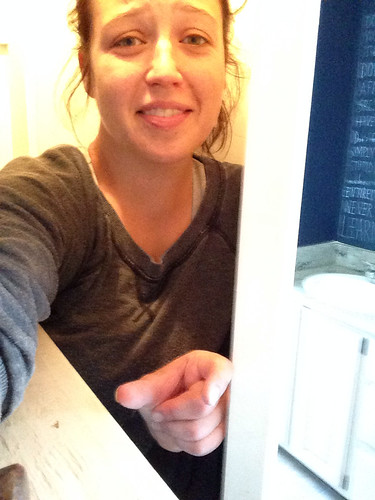
I also may have panicked when I got stuck.
This thing that I’m doing? Trying to correctly remove the door? That did not work. But I did manage to spin myself 180 degrees in that tiny space, and then painstakingly remove the screws from the hinges so that I could at least get out of the closet.
Problem solving skills: I has them.
Anyway, up until this point I wasn’t sure if removing the whole closet would be worth the work for this quick update, but since I had to tear all the shelving out anyway, I decided to take the whole thing out.
An old builder once told me that with enough patience you could take a whole house apart with just a hammer and a flat-head screwdriver. From what I’ve seen, that’s the truth. Although a good drill never hurts.
With the necessary closet shelves out, it was time to move on to the part where I get half my body covered in toilet water. I mean this is a bathroom remodel, and I’m the girl who got stuck in a closet for 15 minutes. So let’s not pretend to be surprised.
If you’ve never taken a toilet out before, first things first. Resolve yourself to the toilet water thing. Then get to business and shut off the water at the valve (almost always behind/below the toilet.)
Then, when the water is off, flush the toilet to empty the tank. It won’t refill, because the water is off.
Still, you have to deal with the water in the toilet bowl, which means you need a bucket, a cup, and if you’re going to be squeamish about the toilet water, some gloves. Or a hazmat suit.
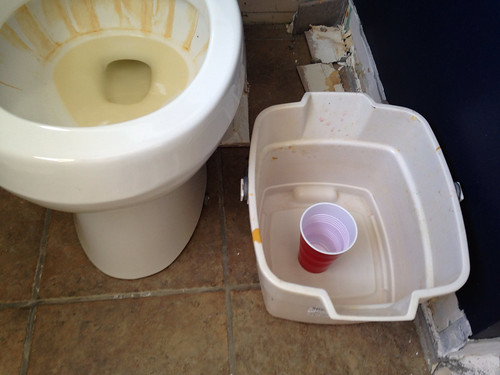
(That toilet looks disgusting but the bowl is actually clean, it just has iron stains. You can see why I’m replacing it.)
So you have to scoop as much water out of the bowl as you can with a cup (you won’t get ALL of it, but you should get as much as possible.)
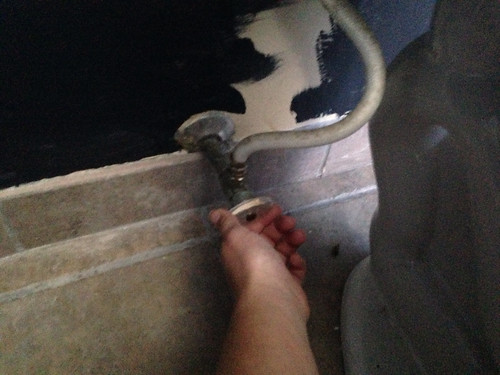
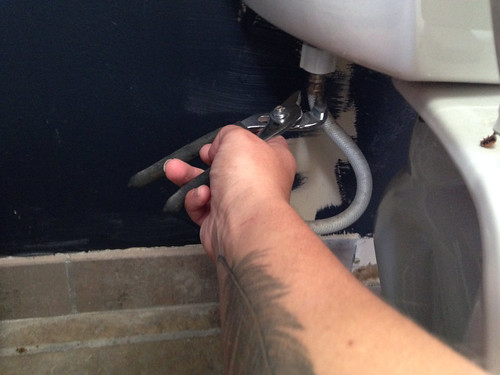
Then, disconnect the water line. (Funny story, I took this picture and then was like, why the hell can’t I get the pliers to grip on the nut, which is when I took a closer look and realized this had a plastic nut so you could hand-turn it. So, you know, you may need pliers or you may need to just pay a little attention to what you’re doing.)
And unbolt the toilet from the floor. You may have to pop the bolt covers off with a flat screwdriver. (Also, I may need to clean behind the toilets in my house more. Or… ever.)
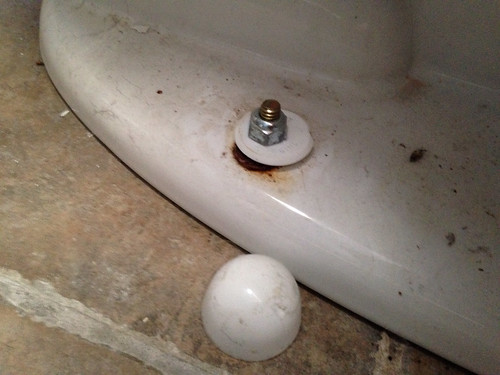
Now, a toilet should be bolted down pretty tightly. This one was not. The bolts were only hand tight, which was a bit surprising to me at the time, but totally explains what I found later… just wait.
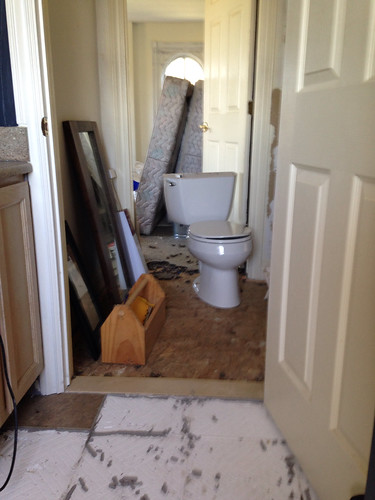
As far as the toilet goes, now that it’s unbolted it is free from all earthly constraints. You just have to wrap your arms awkwardly around it with your face smashed up against the tank and try to maneuver it out of the itty-bitty alcove in the bathroom and into the hallway, where it will stay… indefinitely. If you’re me, the bottom half of you will end up covered in toilet water during this process.
Then you’re going to want to pretty immediately shove some old rags in to the waste pipe for the toilet, because you do not want the sewer gasses coming back up in your face. Right? Right.
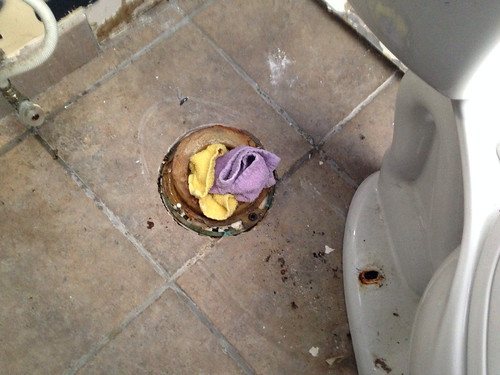
Notice how the wax ring isn’t really smushed down at all? That’s also a bad sign, but at this point in the demo I didn’t see any glaring issues, so I just shrugged and continued on my merry way. Which means it was finally time to actually tackle the tile removal.
It’s weird, but at this point I’ve done so many things on and to houses that I basically assume I’ve already done everything at least once. Especially something as simple as removing floor tile. It didn’t even occur to me until the morning before I planned to demo this that, well, I’d never actually demoed a ceramic tile floor all by myself before. That’s weird, right?
My response to that was: Huh. I should probably go buy a new tool.
I didn’t buy a new tool, but I DID buy a chisel attachment for my big hammerdrill.
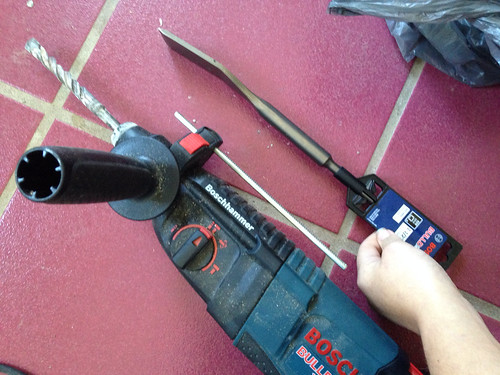
My biggest concern, having never done this before (apparently), was where to start. Luckily, when I removed the closet shelves I had easy access to a starting point. (Plan B was going to be to smash a tile up with my sledge.)
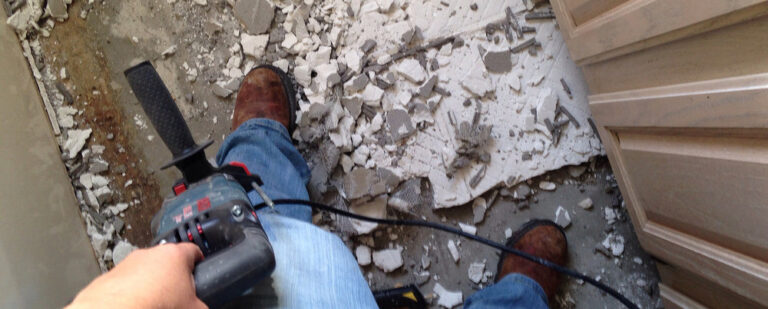
I had no idea how this thing was going to work, but it turns out that it worked great. Almost all the tiles came up in one piece.
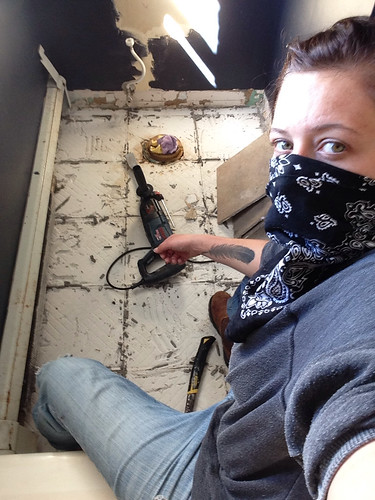
I did all of this in under 2 hours, wearing my obviously OSHA-approved dust mask… uh…
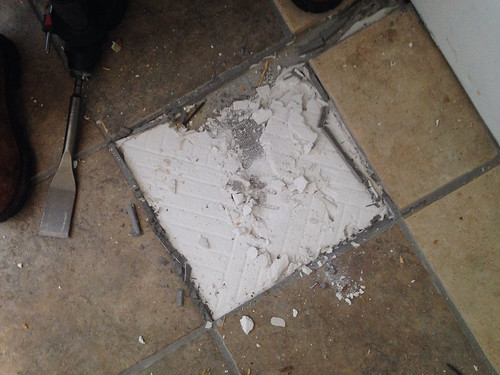
It looked like smooth sailing from here. I just needed to tear up the old cement board (that had all that white mastic on it) and call it a day.
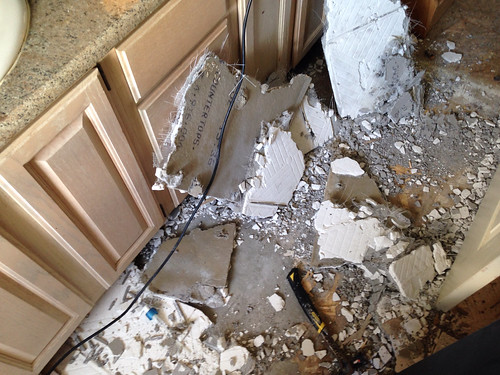
The hammer drill worked marvelously for this as well. I just chiseled a furrow through a section and then got my fingers under it and pulled a large chunk up.
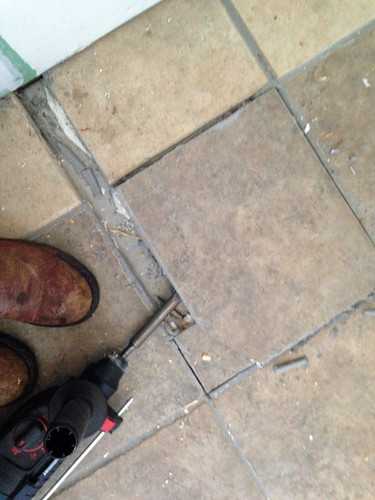
But then I got to the area around the toilet and noticed something odd…
Uh, Houston? We have a problem…
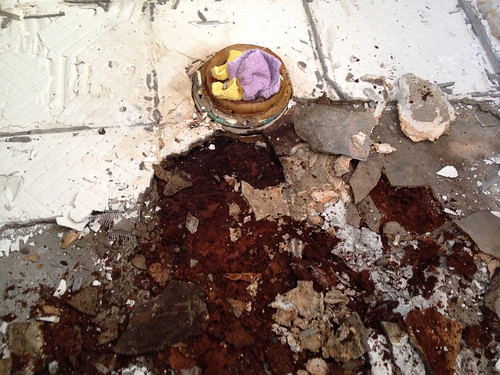
Apparently the toilet has been leaking water out into the subfloor for a long enough time that the plywood (under both the tile, cement board, AND a layer of thinset) had turned to absolute mush. Here’s a video of just how destructive water can be on a house…
Welp. There you go… it almost never goes as planned. This is why I started with beer.
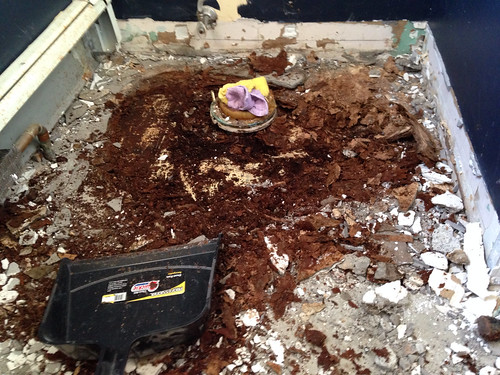
While kind of crazy, this isn’t that big of a deal. Looks like there are at least two layers of linoleum under the mush that were intact, and another layer of subfloor under that. It kept the leak pretty well contained to this section of plywood, and with nowhere for the water to go, the wood just disintegrated. It pretty much smelled exactly like compost dirt too. (I mean this is just a little bit of water that leaked out with each flush over years of use, so it’s pretty dilute. It wasn’t like someone was just peeing on the carpet next to the toilet for years or anything… that was in the master bath.)
What probably happened is that when this tile floor was put down, the toilet flange ended up lower than it should have been (under the level of the tile.) Then the toilet never sat properly on the wax ring, and was never able to be tightened down properly, which is why the bolts started to loosen up after use.
So… after cleaning up the mess I’m going to need to put a small section of plywood down here, then thinset over the top to level it out with the rest of the floor. I’m going to use a thinner cement board under the new tile and may need to put a spacer on the flange to get it to the right height. (If you want to know more about how that works, check out this video.) Considering the kinds of things that can go wrong, this is a pretty easy fix. The really good news is that it doesn’t affect the new tub going in later this week, so I’m not under any pressure to have it done immediately.
As it is, not bad progress. I’ll be continuing cleanup this week, then the new tub is going in thurs/fri, and then tiling (followed by long, hot baths.)

25 Responses
It truly never does go as planned, does it?!? I’m glad that in the grand scheme of things, this was a relatively easy fix without any massive damage.
And I don’t know how you’ve gone this long without a tub. I can only imagine how much you are looking forward to a nice looooong soak.
Try a Mr. Clean Magic Eraser on that toilet bowl.
I always use the king size wax donuts, doesn’t matter how far the flange is below the top of floor and the extra just oozes out.
This is why plumbing scares the hell out of me. I really want to put tile in my bathroom. There’s a new plywood sub under the linoleum right now, but I would still have to add cement board on top of that, THEN my tile… that’s a lot of extra lift. Not to mention that it’s my only bathroom.
How about you come do my teeny tiny little bathroom floor and in return I’ll come paint your giant wooden kitchen. Not kidding. I would take ladders over plumbing anyway.
Ha! That would be a good trade. However I have a couple of ideas on that tile for you. The first is that you can use something like this durock tile membrane in place of cement board. It only ads about 1/8″ of height, so you can save yourself a little that way. Also, check out the video I linked to about adding a riser to your toilet flange. It’s super easy, and the flange should end up about 1/4″ OVER the top of your finished floor!
You’re an angel, thanks for the tips. I’ll bookmark all of that for when I finally get the cojones to start that project. But I will add that I live in Vermont (where my house and said bathroom is located) and it ranks second in the country for most craft beer breweries per capita. Just putting that out there. Did I mention I’m amazing with a paintbrush? Eh? Ehhh?
Nice mask. Where are the safety glasses?
“An old builder once told me that with enough patience you could take a whole house apart with just a hammer and a flat-head screwdriver.” Possibly my first diy project, when I knew zero, was taking down a chicken coop, with…a claw hammer and a screwdriver. What did I know? Nothing 🙂
Awesome progress already, demo tear out pretty much behind you. Yes, into a new bathroom 18″ cognoleum tile floor job needing a tool is when I purchased the vibrating changable blade cutter for adjusting the floor ends of the wood door trim while on the wall to compensate for the increase thickness of the new floor. I have since used it for many things, very handy tool.
Enjoy your blog Kit, great info, soh, inspiring. I may just have picked up another bit of info about my Big-Assed Bosch Hammer Drill which is identical to yours. I will check it out but it would lift up old tile handily if the chisel bit didn’t turn when in the hammer setting. I remember it turning, hammer drilling in concrete anchors. I’ll check it out, maybe even read directions, and learn something…ha!
constant growth…
🙂
Mine has a dial with three settings on it… drill, hammer/drill, and hammer. So you can have it just turn, turn and hammer, or just hammer. Hope that helps!
Yes, great new feature for doing what you were doing. Mine is an older gently used model w/o the hammer only setting but I had to check…
thnx for the info, good luck on the tree planting.
🙂
I am so excited to see you tackle this bathroom! And thanks for the tips on removing a toilet…the 4 y/o “flushed” a marker down one of ours and it’s stuck somewhere in there…hanging everything up and no amount of plunging and auguring has loosened it.
Cool advise though. I am happy to know different ways to beautify your bathroom tiles. Great post!
good thing you decided to removed that tile or you would’ve never known about the problem. Our house had bad water leaks under every source of water, sinks and toilets and tub. The leaks had gone on for so long it rotted through the 3/4″ hardwood floor under every sink. (we suspected that by the way the vanities and kitchen sink cabinet looked when we bought the place. How many years does a sink leak take to rot away 3/4″ hardwood? Not to mention when I flush the upstairs toilet the water came from under the toilet and also through the ceiling downstairs like a shower LOL We lived without plumbing for two weeks while demo’ing and install. And I will say I did it all myself (which is why it took a bit longer)
Sani Seal Toilet Gasket. They’re awesome. I won’t use anything else. You can even double them up if you have to. So much easier to use.
Check it out – http://www.homedepot.com/p/Unbranded-Toilet-Gasket-Flexible-Waxless-Seal-Universal-Fit-BL01/203564758
Exciting for in house projects!!! Absolutely no renovation goes without a suprise I tell ya! Not one
I had the same leak in my bathroom, without the safety of multiple floor layers and the added fun of a “creative” wooden flange extender. The rot had weakened floor joists and the tub support. Things were much less bouncy in there when we finished.
I’m curious why you’re not planning to pull out the extra layers down to the original subfloor? Seems like now would be the time to do it?
I know where you’re coming from with the bathroom redo…I’m working on a basement bathroom project that started out as replacing the shower stall. Every supply line was leaking, just drip, drip, drip inside the walls, not enough to leak out, but enough to damage the insides of the walls. After replacing ALL the plumbing, 1/2 the drains & wiring, putting in new walls, leveling the floor, building a custom shower pan, connecting the exhaust fan that was just vented into a dropped ceiling, I’m now waiting for the tile we ordered, because what we had originally started with from Home Depot has since been discontinued, and they no longer do inter-store shipping. Fun, fun, fun, I feel like I’m on Candid Camera(The older readers will understand). I LOVE your blog! grew up on a farm, and loved it!
Just as future reference….”The Works” toilet bowl cleaner removes rust stains….like whoa!
And as always enjoy reading your blog!
Seeing this really makes us applaud you. Especially with the toilet matter, it can be difficult and not to mention, quite unpleasant. Unexpected problems arise too. Anyways, good job so far!
Great job, I agree with MilfordIpswich, this can be a real tough job and not nice for anyone! Keep up the good work!
HELP: Were you able to get the toilet by yourself? I don’t have a “helper” and need to repair the subflooring area around it prior to putting in a new floor. Just keep putting it off for some weird reason. Blaming it on winter – and not wanting to pay someone for the work!
OH, by the way, saw one person’s video who sucked out toilet water using a shop-vac (instead of scooping)!
Get the toilet “out” – skipped the primary word!
I was able to. It was awkward, but doable. And I just maneuvered it into the hallway, and then the guys who installed my tub carried it down to the dumpster for me. Also, the tank can be removed from a lot of toilets which makes it much easier to carry in pieces, so check for that.
This bathroom tiles remaking is very fun to do. I guess I will tell my wife to look at these nice thoughts. Thanks for posting!
You’re an Awesome, thanks for the tips Anyway .. Learned so much….Carry On
Comments are closed.