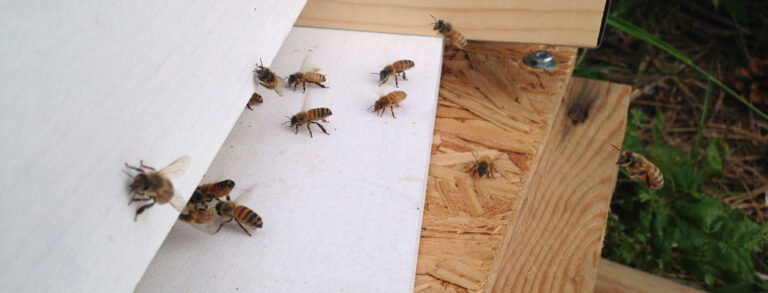
I’m just going to ruin the suspense of this post and tell you guys that, no, it does not end with me pulling a bee stinger out of my neck. So, we could say that beekeeping has become significantly less, ah, exciting, since the first day I brought the bees back to the farm.
Still, it’s been a fun little adventure so far. Here’s a little breakdown of what my first month of beekeeping has looked like:
Pre-Bees: Building the Hives
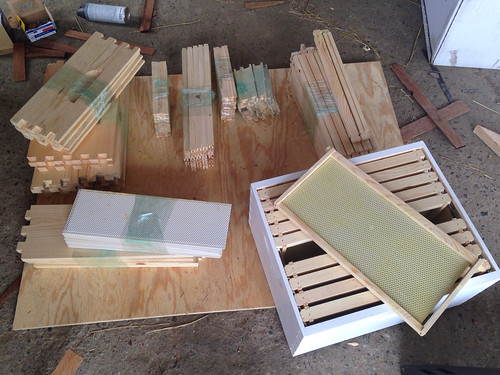
Half of my hive components came pre-assembled, but I took an afternoon to assemble most of the boxes and frames myself (despite my gentle fingers.)
Day 1: Install First Package
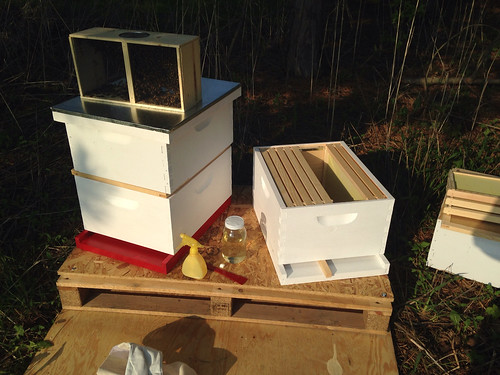
Since my hives are located right next to each other the beekeeper I bought my packages from suggested I install one of the packages first, put an entrance reducer on the hive (so it’s easier for them to defend their territory) and let them get used to their spot before installing the second package (so the bees didn’t get confused and all end up in one hive.)
Well, we all know how that went.
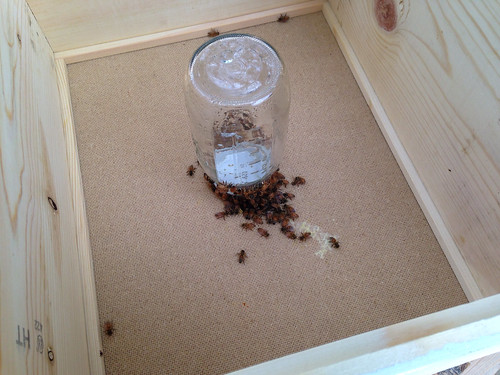
Because the queen had been in her cage with the package bees for several days, I put a marshmellow plug in the cage on the same day I installed her, and expected the worker bees to release her pretty quickly.
Day 2: Install Second Package
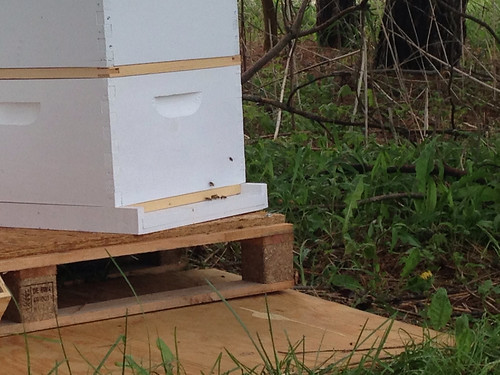
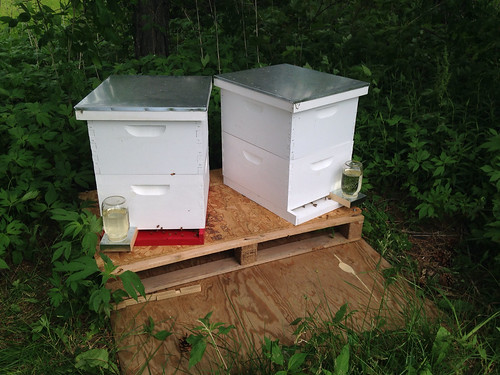
This installation was by-the-book, by which I mean zero bees ended up inside my bee suit. The “installation set-up” for both of my hives was a set of 10″ frames on the bottom board, then the inner-cover to the telescoping lid, then an empty bee-box with the feeder jar set directly on the opening/handle of the cover, then the lid over the top of everything.
Day 4 and 5/Week 1: Remove Queen-Cages/Fill Feeders
On Day 4 I checked on Hive #1, and removed the empty queen-cage (if she hadn’t been released for some reason I would have done it at that point.) And the following day I checked on Hive #2 and removed that empty queen cages. No issues with that in either hive. I also refilled the feeders in both hives.
Day 10/Week 2: Checking for Queen Activity/Filling Feeders
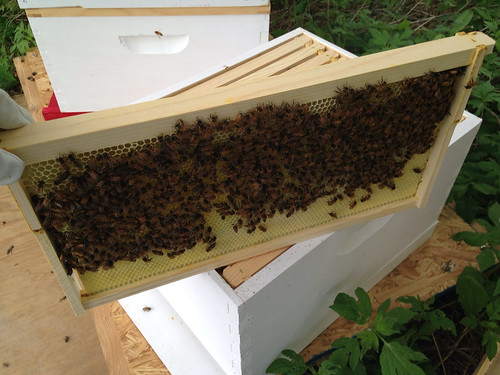
On Day 10 I checked both of my hives for queen activity. Namely, eggs (one per cell) and growing larva. Both hives looked good, and are going through sugar-water at an epic pace.
Week 3: Fill Feeders
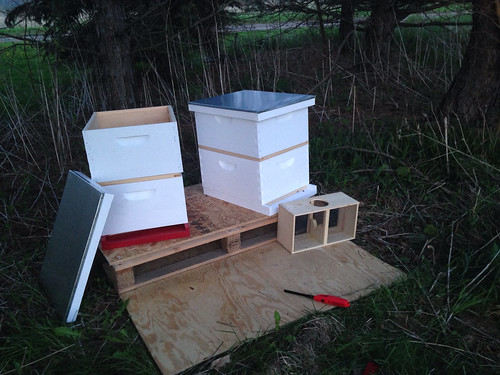
Week 4: Expand the Hives
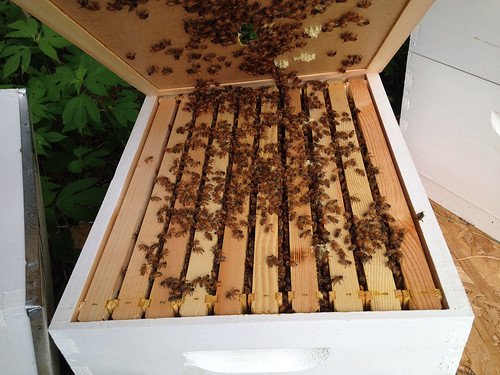
Over the weekend I decided to check on the hives and see if they were ready for what I’ve been calling a “Stage 2″ hive configuration, meaning a second box of 10″ deep frames and the feeder moved down to the entrance.
There were quite a few bees on top of the frames (which I hear is a sign they’re ready to expand) and activity looked great. So I went ahead and removed the inner lid of the telescoping cover, and put the 10” boxes back on, full of frames. Then I transferred full feeder jars to the front of the hives.
Also, side note, this is one of the fascinating things I’ve learned about bees in the last month. I noticed every time I would disturb one of the hives, pretty quickly bees would start gathering at the entrance with their butts up in the air (facing out), rapidly fanning their wings…

Turns out bees do this to release pheromones that direct any lost or disoriented bees back home. Seriously. Bees are amazing.
Next Up for the Bees:
Other than keeping their feeder jars full, I probably won’t disturb the hives for another 2 weeks. Then I’ll add my queen excluder (a grate that keeps the queen laying eggs in the brood boxes and out of the honey supers) and 8″ honey supers to the top of the hives. Unless my girls are overachievers they probably won’t make much more honey than that this year, as they’re pretty busy building all of the combs and growing their numbers.
Next Up for the Beekeeper:
Other than weekly or bi-weekly checks to make sure everything in the hive looks kosher, I’ll mostly be leaving the bees to their business… but that doesn’t mean there’s not work to do. I realized in this process that I’d love to have a “bee cabinet” in the garage to store unused bee boxes and frames, plus some organization in the house for my bee suit an other equipment.
And, of course, there’s planning for honey harvest. I’ll be leaving a lot of honey in the hive for the bees over the winter, but there should be a little left over to justify a.) buying more equipment, of course, and b.) practicing my honey extraction.
Note: Just so we’re clear, I’ve had bees on my property for about a month. I’m not an expert, and I don’t know if this is exactly what the first month of beekeeping should look like, but it’s what seems to be working for me…

3 Responses
Oddly enough, I found myself thinking about you over the weekend, specifically wondering how it was going with the bees! Thanks for the update! 😉
That’s the bee dance – remember, we learned about it from Linda Penn at Toledo Botanical Gardens when you were little. They do a little dance to tell the others where to come!
Hi,
I’m sending you a link to another site about this guy’s trials/success with bees. But when you scroll down to the bottom, he reports his bees died that winter.
Link:
http://jonpeters.com/?s=bees
I enjoy reading your website!
Have a good day.
Bill West
Comments are closed.