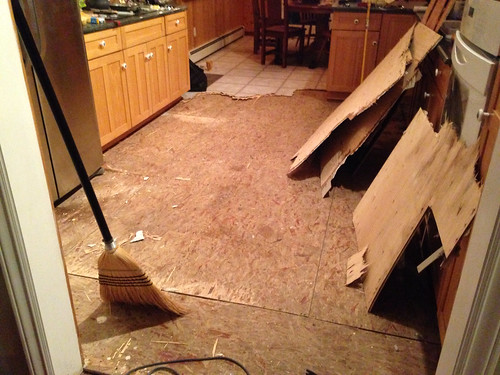
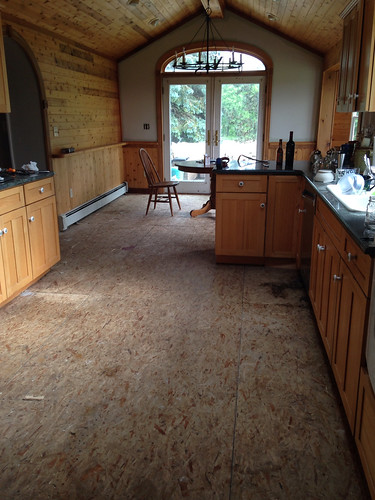
I’ve had bare subfloor in my kitchen since one day back in 2015 when I was definitely not starting my kitchen renovation, but also happened to have a dumpster and my house and was probably drinking beer and decided to indulge in my favorite beer-drinking sport… hitting something with a hammer.
Which is how this happened…
All I’m saying is, it has been some years since I’ve had an actual floor in my kitchen. But, interestingly, not enough years that my friends and family have given up hope. Like, for five whole years people in my life have asked very often and very optimistically if my kitchen is done yet.
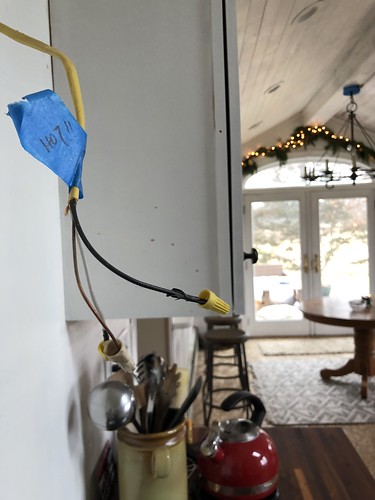
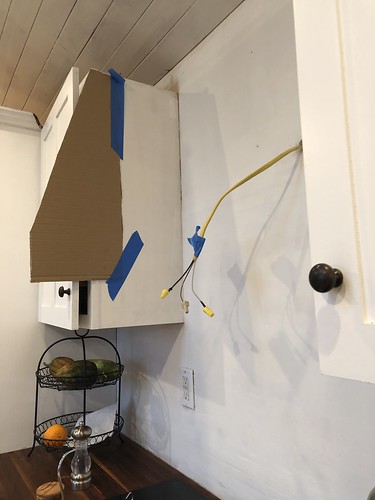
No. No it is not. Because I like hosting holiday parties with this fully hot wire just hanging out of my kitchen wall waiting to zap someone. Because I am fun, goddamnit.
Also, listen, this house is one hundred and sixty years old. Just to put that in context, zero people on this planet were alive when this house was built, and, also, there is a zero percent chance any project in a house that old will go as expected.
Mostly irrelevant side-note: I don’t think I’ve professed my love for the book The Architecture of Country Houses by A.J. Downing (circa 1850) lately, but it was the de facto authority on building country houses in its day (i.e. the day this house was built) and absolutely worth the read for anyone living in/dealing with in an old house. (You can find the whole book on Google books, but used copies are still available today and cheap.)
From the book:

Preach, Mr. Downing.
Anyway, in the spirit of Mr. Downing’s “blunt and honest expression of the truth”, all “small” projects in this house are not fucking small. They are an epic uncovering of pain-in-the-ass and sometimes disgusting shit.
Like this…
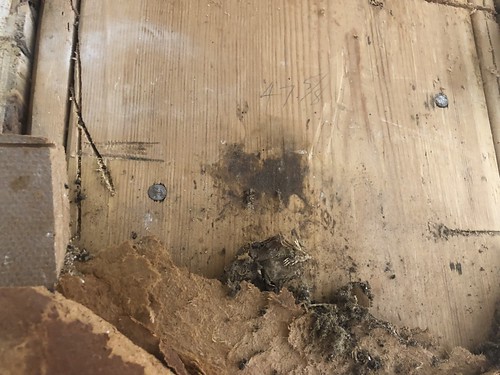
This is a mummified mouse I found in my kitchen wall.
But, wait, I’m getting ahead of myself.
No, I do not have a kitchen floor, but, in the early days of quarantine I decided to tackle a couple of kitchen projects I thought were isolated enough to handle in a weekend or two without devolving into utter madness. (Ha.)
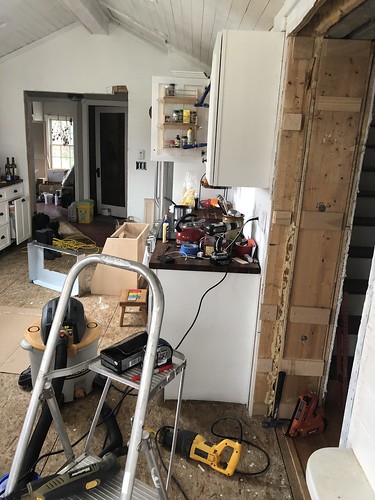
One of them was the opening between the kitchen and the rest of the house…
It used to be an arch. I can tell I hated the arch because in 10 years of living in this house, and taking pictures of this house for things I write on the internet, this is the best picture I have of it. (On the left.)
Anyway, I know people love arches, but I’m not a fan of the two that were added on to this house when it was remodeled in the 90’s.
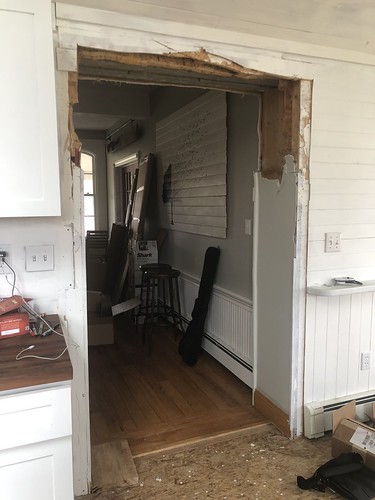
So I tore the kitchen arch out, and then lived with it like this for some years…
I have no shame.
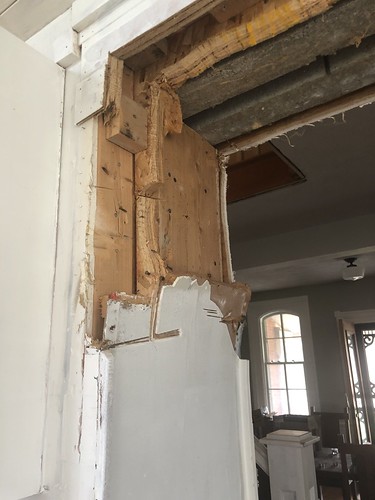
Let me just state for the record, this was a solidly built arch. These walls are 16” of masonry and there were several layers of ¾” ply as a support, and then two layers of a flexible fiber board (which was then skim coated) to make up the arch, and it was an epic pain in the ass to demo. Epic.
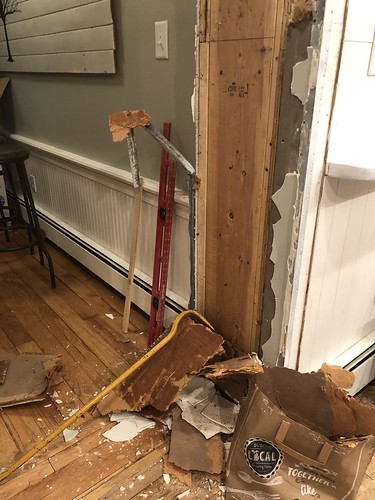
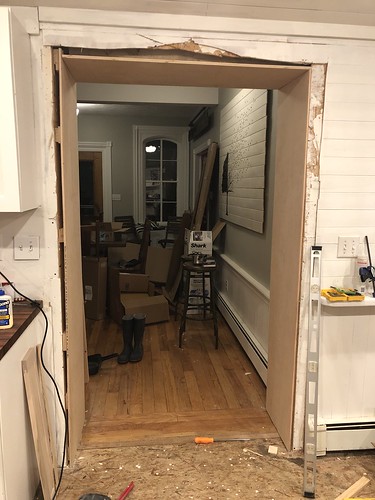
Also, to make things even more fun, even once I sawsalled the shit out of the arch structure, the underlying “framing” boards around the opening were not plum, level, square, or otherwise in sync with each other.
And there was a lot of mouse poop behind them…
A lot.
(Also that mummified mouse that I mentioned.)
Once I fully decontaminated myself and the kitchen, there was a whole lot of creative shimming required to get the sides straightened out…
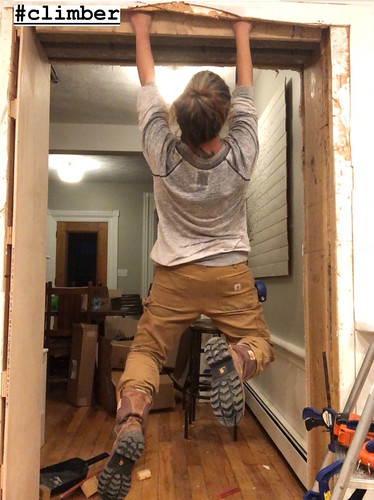
Also, there was a whole lot of beer required, (and a sharpie) which will probably be evident to anyone who tears into this opening in the future…
I used my tried and true method of determining how many fasteners needed in the blocking…
Totally legit building practice. It didn’t fall… so it must be good.
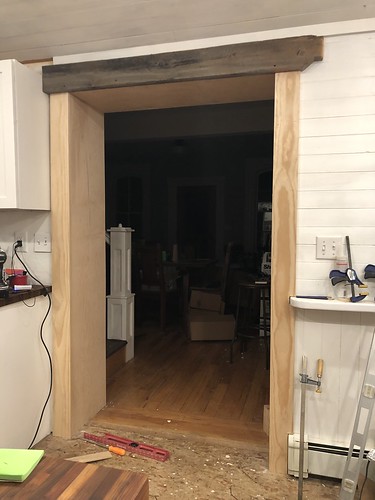
Then I trimmed the whole thing in (on the kitchen side)…
And used some old barn wood as a fake lintel because I’m fancy.
I did prime the whole thing but still haven’t painted it (eight months later). Not mad at how it turned out… and it’s much better than having the tangled mess of metal/drywall/wood/mouse poop that was there before.
And since I was on a roll removing potential hazards from the kitchen, I decided to get this shit straightened out as well…
I purchased this range hood from Lowe’s that supports a custom-built cabinet. (Side note: A couple of years ago I asked someone in the store about kitchen exhaust fans that take a custom cabinet and the person looked at me blankly for some period of time and then told me they don’t sell anything like that. Then I went down a rabbit hole of trying to buy just the blower and build the whole contraption myself, so thank god for Daniel Kanter’s Instagram stories, because he used the exact type of unit I was looking for in a kitchen remodel last year and I was like, Ah-fucking-ha! I knew it existed somewhere!)
I did also have to purchase separately the stainless trim kit for the fan box, which wasn’t evident until I got the fan and looked at the instructions. (Given that almost all instructions are available online, browsing through the building specs first would have saved me some time.)
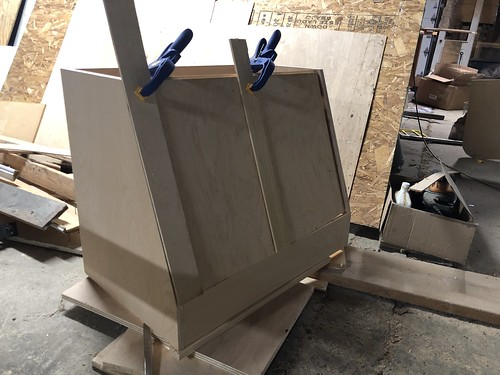
Then it was just a matter of–you guessed it– drinking beer and building shit…
I did have some help from the troops…
Some were less helpful than others…
Most of this was just figuring it out as I went along…
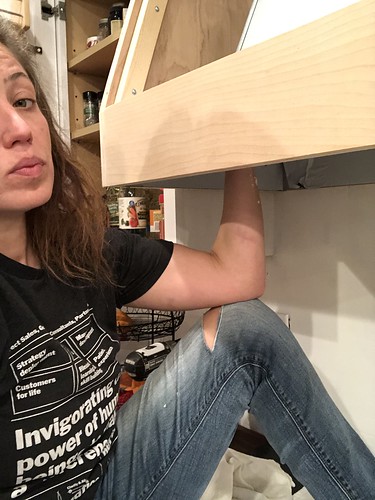
There’s nothing more fun than trying to install a range hood into a cabinet by yourself, while sitting on a stovetop burner that may or may not have accidentally gotten turned on during installation…
Despite the lack of amusement in my expression, I maintain that this is 100% easier than doing it with a partner. (Been there, done that, did not murder anyone with my tape measure, but I thought about it a lot. I’m just not cut out for that kind shit, you guys. I’ll take the burnt ass cheek over team work any day. )
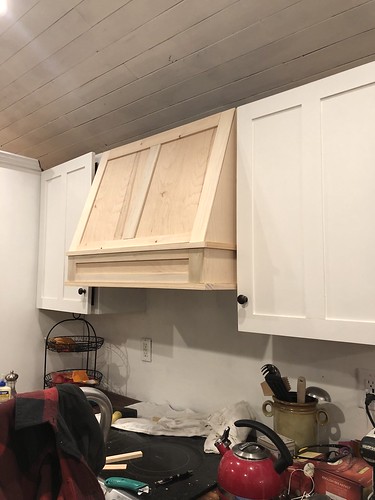
Anyway, I built this thing with a removable panel on the face so that I can access the fan (and finish the duct work to vent the damn thing outside at some point.) So I had to get a little creative on installing the trim…

I love how much trim can change the look of something from “boring, weird box” to, like, “actual piece of cabinetry that looks like it belongs there.”
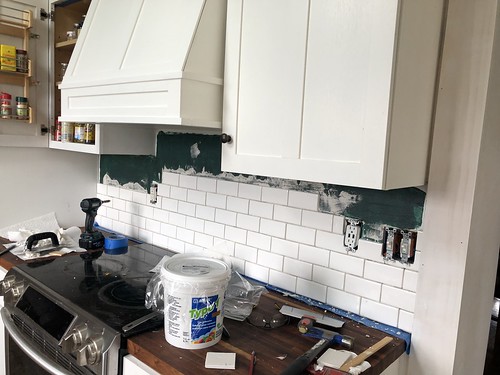
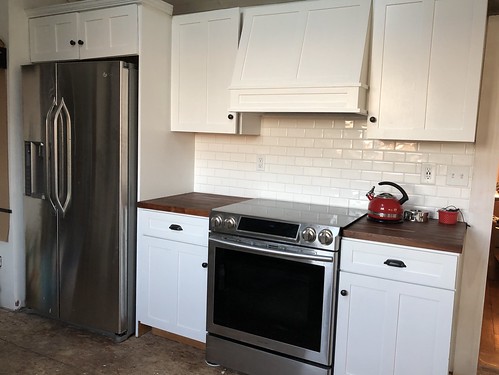
Here she is, all built and painted.
The green on the backsplash was not a design decision. I just like to roll on a coat of waterproofing membrane before tiling over drywall. Do you have to do it? Probably not. But also, have you ever seen a piece of drywall get wet? It basically just disintegrates. And tile thinset/mastic is… wet. At least a little wet. And you’re relying on the structural integrity of wet drywall paper to hold everything up. (By “everything” I mean the very expesive hand-glazed tiles I bought for this backsplash.) The waterproofing membrane seems like some easy insurance against tile-tragedy.
I purchased the tile for the backsplash some time ago. (Years? I don’t even know. What is time anymore anyway?) So when quarantine started I had literally all the materials needed on-hand to finish this.
It’s actually the same hand-glazed tile from Winchester Tile Company that I used in the tub surround of this bathroom. (But in white and subway tile sized… although I kind of wish I’d used the 4×4’s for this. Whatever, it’s too late, and I do like how it turned out regardless.)
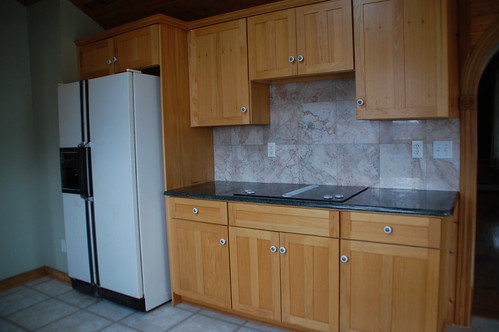
Only took five or six years to upgrade it from this…
Listen. I’m not ever going to be bragging about how fast I overhauled a room in my house. I’m not even sure anymore if the point is to get it done, or just to have something to do when the world shuts down for a year…
Either way, it does look better. I’ve still got one more opening to fix/frame/trim, and then a ceiling to finish painting, and yes–eventually– there will be a floor.
I’ll get there.








19 Responses
We just bought a house that had been “flipped” in 2018. I don’t know if the young couple who bought it from the flipper didn’t notice the poor quality of the work or just didn’t care, but it’s netted us a good deal now that they’re selling and moving on to bigger and better (with their first baby on the way).
Reading this makes me want to go back through your entire blog from day one (with a bottle of wine, probably, on a cold rainy winter day) and make notes for the epic amount of remodeling and renovating we’re about to do.
And it’s a good thing to be reminded often that nothing will go as fast as you think it will! 🙂
Oh man, I do not know if I recomment re-reading this mess from the beginning! Ha. But I will say that I love just about everything I wrote in 2013… that’s a good year to review with a bottle of wine sometime. (Also, yes, nothing will go as fast as you think. There will always be at least one more trip to the store than you planned for. And that shit will always get worse before it gets better!)
I’ve been reading since about the time you first started this kitchen. You have no idea how often I reference your unfinished kitchen to myself when a project goes sideways in my life. “XX weeks behind isn’t too horrible, Kit hasn’t finished her floors yet, you still have time.”
Please don’t hurry.
Hahahaha. This brings me so much joy. We’re all in this “unfinished projects” world together!
I am so glad I am not the only one that doesn’t like arches. I also don’t like bullnose corners on walls (so no new construction for me, ever, I guess).
I’m so glad I’m not the only one living without kitchen floors (or any floors really, except in the bathroom)
I love your writing so much! I can’t tell you how many snort laughs this gave me.
I hear ya, sistar! Don’t want to rush into things. Bought a house, out in the country, 27 yrs ago (sold 4 yrs ago). The kitchen had indoor/outdoor carpet, which we left for a few yrs until we couldn’t stand it. I ordered click cork flooring and as we all know it needs to be acclimated. Well, it sat there for 5, maybe 7 yrs.-WELL acclimated. We lived with the exposed subfloor, after tearing out the carpet.
Don’t even get me started on how I was going to replace our stove hood/fan-thinking it would take 45 min-an hour. Ended up taking 3 hrs! Ah, the life of being a homeowner.
You’re not kidding… I have wood flooring upstairs that has been acclimating for 9 years now! Ha!
Flooring is highly overrated.
WOW!! Looks great. 🙂
Love the new blog branding. Delighted to read this post. [Going on 9 years of no floors in…well, most of our downstairs.] Pantry shelves this weekend. And maybe some trim. God, I love staining and finishing trim – probably because it signals that we’re close to the end of that room. Also, I learned how to use a track saw last weekend. Total awesomeness.
Looks good!
It looks great! Maybe those improvements will give you the nudge/desire to finish the kitchen completely- Ha! Hopefully without anymore injuries! So glad you are back to writing on the blog.
Love your stories!
I’ve followed you for 5+ish years now. I think it’s been longer. As a house flipper turned dairy goat farmer. I currently have 3 bottle baby goats stashed in a playpen in my dining room and am contemplating retiling my kitchen back splash this winter/spring… with 12 more girls due to kid. I hoped the picture of chaos would deter me but now I’m all motivated and I’m almost positive
My other half just considered divorce and has no clue why. 😂
Things that aren’t finished yet don’t bother me near as much as things that are wrong. Good call on nixing the arch, it was way too fancy dancy. And, that is a very handsome vent hood.
great. look at the before after look. superb work. I liked the flooring.
Looks really great! How I wish I can do it on my own.
It looks really good, lol just like Taffee said , hopefully you get the desire to finish the kitchen completely without anymore injuries.
Comments are closed.