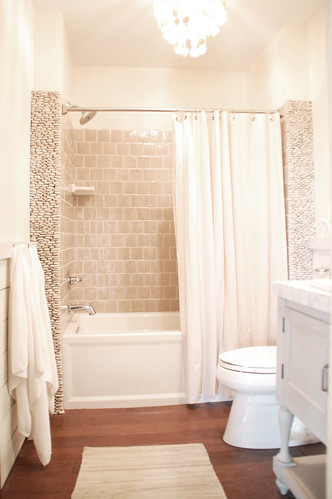
This room deserves at least one exclamation point for being the first (and currently only) room in the house that can be considered “complete”. Which, in this case, means it doesn’t have a door knob or door trim, but does contain finished tile, flooring, and has working fixtures.
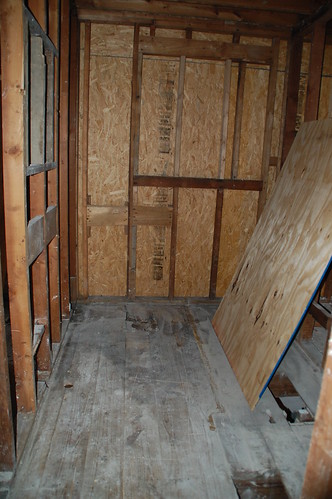
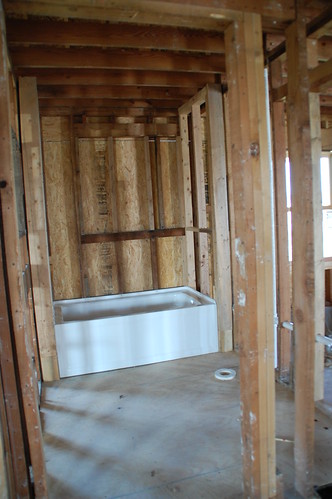
For anyone unfamiliar with how this bathroom started out… yeah.
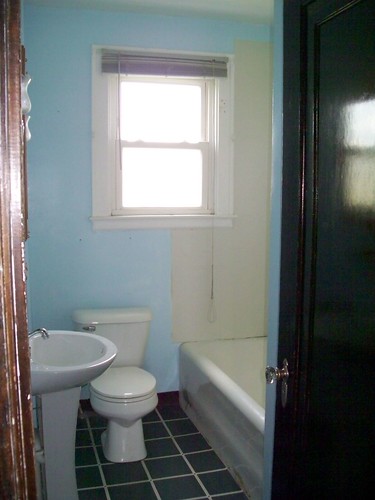
Let’s let that be the last time I have to post that image on this website, so I can stop involuntarily shuddering from disgust. It was significantly worse than it looked, and I’m sure it beat my personal best for “years gone without a cleaning.” The only bathroom I’ve actually personally owned that was worse that this one was the prison bathroom in the Station before it became the ultimate man-cave hideaway. (That one was well past “shudder” and far into “dry-heave” territory.)
Okay. Enough about dry-heaving, let’s talk about how I could spend the rest of my life in this bathroom if I didn’t have seven other rooms in this house to finish.
The Style
The look of this room was something new for me. It required, you know, a theme… instead of picking whatever color struck my fancy that day and slapping it on the wall.
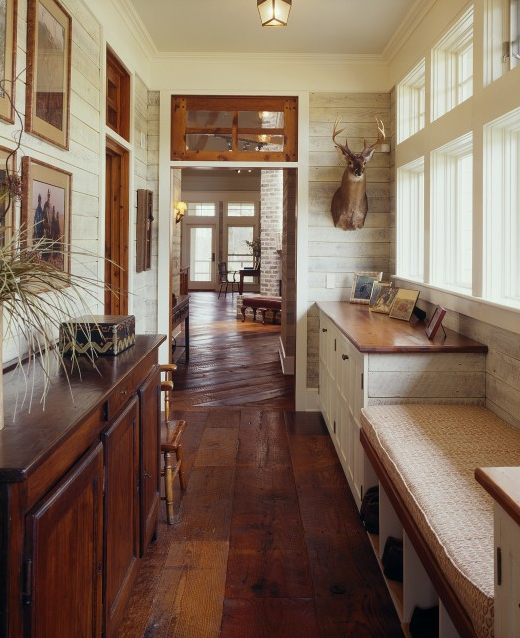
Right around the time I was pondering the many mysteries of a rustic but not cave-like bathroom, I was introduced to Leyla and Kevin’s blog The Lettered Cottage and the fabulous wood wall in their dining room. Shortly thereafter, Robin from Three Acres–sent me this inspiration picture she had bookmarked… (which I cannot for the life of me find now. But if I do, I’ll post it here.) and was kind enough to resend to me when I couldn’t find it. I don’t know what I would do without internet-friends.
 (via)
(via)
I wouldn’t normally have said I’m a “beachy” kind of girl. (Can you use power tools at the beach?) But having one lighter room in a house full of what will eventually be wood ceilings and industrial accents was appealing.
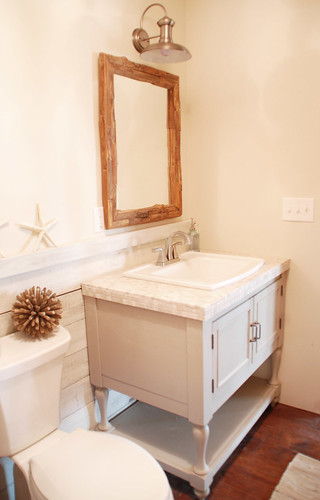
I started with some leftover wood flooring and a teak mirror from Viva Terra that reminded me of driftwood… and a lot of drinking pondering later came up with a color scheme and plan.

Colors
- Benjamin Moore Valley Forge Tan – Base for the vanity and “weathered” wood
- Benjamin Moore Soft Chamois – Top coat for weathered wood
- Benjamin Moore Maritime White – Walls
- Olympic Granite (diluted with clear glaze) – Top coat for vanity
Materials
- Mannington Heritage Hickory flooring
- Winchester Tile Company hand-glazed tiles in Canvas
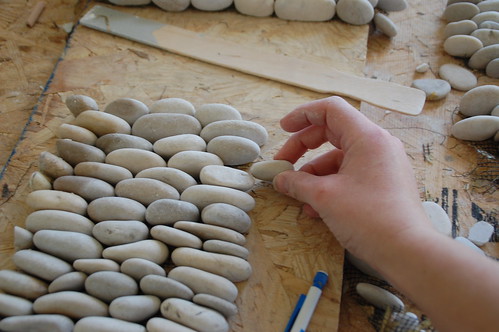
- White standing stone “tiles”
- 3/4″ travertine mosiac tiles for vanity counter
- Kohler Archer tub
- Kohler Archer sink
- Capiz hanging pendant from World Market
Extras
- Pottery Barn Vintage Ticking Stripe curtain
- DIY vanity (see how I built it here)
- Urban Outfitters gray rag rug (but if I had to do it again, I’d probably get the white one)
- Viva Terra Teak Mirror
The Build
When it comes to renovation instead of building from scratch, “the build” really starts with “long and grueling demolition of previous bathroom”. Let’s just say there was a cast iron tub that did not make it out in one piece.

Since the closet for one of the original bedrooms was taking up a lot of valuable bathroom space, some studs had to come down too. Then we put another sheet of OSB plywood on the floor since the old subfloor had rotted through in several places.
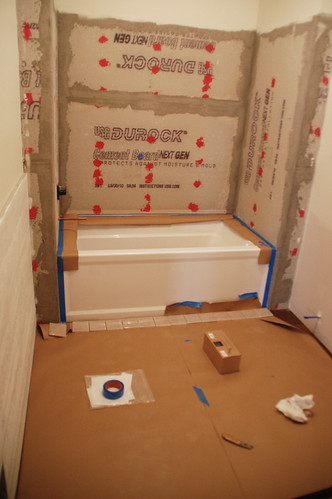
After that I got to loll about and drink umbrella drinks while someone else installed the tub (which I wasn’t going to attempt) and hung the drywall (which I could have done, but am really glad I didn’t have to). And by “loll about” of course I mean “helped frame the rest of the interior walls.”
When the tub and drywall was in and the walls had been painted, the first “finished” thing that went it was the floor. This is an engineered hardwood which will make it more durable to the moisture in a bathroom. I wouldn’t have done this in a more frequently used bathroom, but once the master bath is done, this shower will probably only be used sporadically when we have guests.
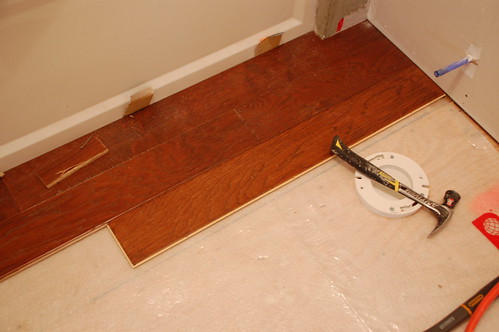
(For more info on installing engineered hardwood using this room as an example, check out this post.)
I might have picked a less-red wood for in here, but I used a leftover box of flooring from my old kitchen and definitely don’t mind the color when considering the $500 I saved on materials.
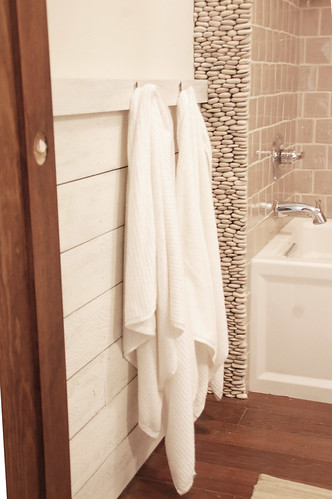
The next thing I tackled was the weathered white wood on the walls. These are actually new rough-sawn cedar 1x planks that I painted with a base coat of gray and a white top coat. More info on how I created the weathered look and installed them here.
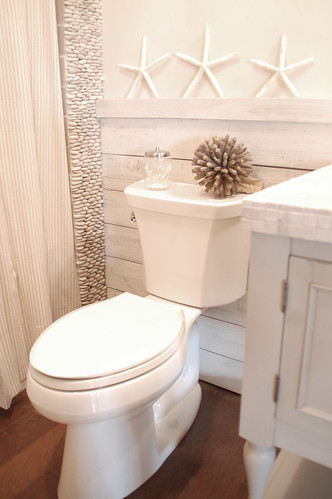
Originally I intended just to put the wood on the wall opposite the toilet and vanity, but I liked the look of it so much I decided to carry the wood behind the toilet and also integrate it as part of the sink backsplash.
For the tub itself, I’ll cover the tiling portion completely as I finish up the DIY Shower series, but here’s how it went down (pictorially):
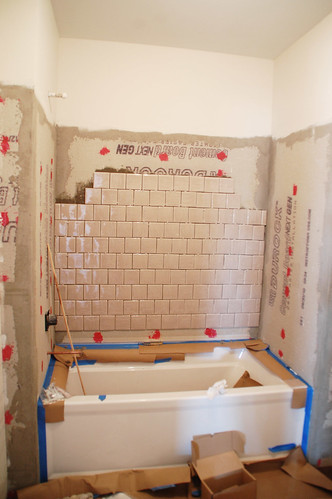
Tiling the surround was quite the project, and it makes me glad there are only two bathrooms in this house.
At this point the only thing stopping us from having a working bathroom was getting the vanity built, and since I couldn’t bring myself to pay $1499 for from Pottery Barn, I took a couple of weekends and built it myself. (Step-by-step instructions on how that went down here.)
Finishing Touches
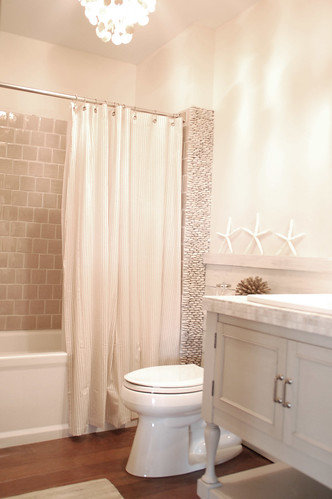
There were a couple of finishing touches that needed to be included for the bathroom to be functional. The Ticking Stripe shower curtain was one of them, and then having somewhere to hang the towels. I used a couple of cheap single robe hooks from target for an informal look, instead of a towel bar.
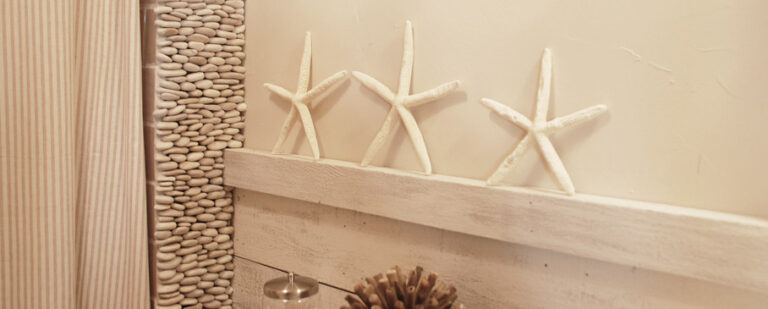
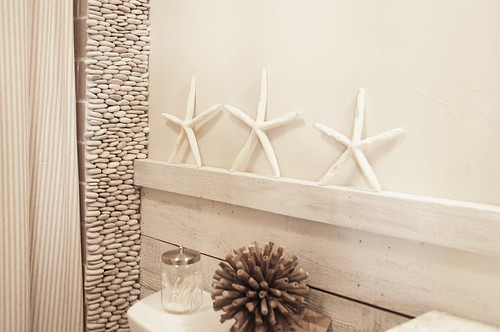
I tried not to be to overt with the “beachy” theme. No shells on the shower curtain or soap dispenser or anything like that. But I couldn’t resist a couple of starfish and this driftwood ornament that was a birthday present.
There are still things that need to be done in here like creating some art for the blank wall, and getting baskets for under the vanity, but it’s usable so it will have to stay as it is for a while since I need to move on to other more pressing projects so that we can actually move into this house.
Until that happy day arrives, if you’re ever looking for me, it’s a sure bet I’ll be soaking in this tub with my eyes closed pretending the sound of a bulldozer in the front yard is actually ocean waves crashing against the shore.

40 Responses
Wow. Just wow. I can’t imagine the sense of accomplishment you have looking at this room. It’s stunning and worth far more than one exclamation point. Revel in this victory for a little bit before you throw yourself into the rest of the house. Damn … you’re my hero.
Every time I take a bath in there, it’s like my own personal celebration. And I’d love to take a break but it’s on to the bedroom floor so that we can actually move in the bed in there one day. (Hopefully one day very, very soon.)
I’ve been spying your redo for a while and as always am most def impressed. Great look. I just might copy your wall treatment!
It looks amazing. I love the juxtaposition of the wood walls and the different kinds of tile.
MUCH. CLAPPING. OF. HANDS.
I am TOTALLY, COMPLETELY, UTTERLY psyched for you! It looks amazing and you should be SO PROUD of your work! I am tweeting this right now.
Yippie!!!!!
Gorgeous. Simply gorgeous.
I love this!! So fun and classic 😉
Love it! Doesn’t it feel good to complete a project and present the reveal. I wish I could do the same! …maybe soon.
Congratulations!
Your bathroom is amazing. I love the standing stone accents. What a clever idea. It looks like it would be difficult to do.
They weren’t the easiest or the hardest thing to do, it just took patience. The stones come on a 12×4″ sheet, and I just had to cut them down to size and then make sure the ends looked nice. You can read more about it here if you’re interested!
Girl – this is looking amazing! Love the blog redesign too. You are an inspiration!
Oh my gosh, I can’t BELIEVE how this all came together!! That first photo made me gasp, and it boggles my mind that you did all this yourself. Rockstar for sure!!
Your comments about “years gone without a cleaning” cracked me up! I am about to begin a total remodel on our master bath. So, I know that feeling. I have refuse to clean it!! Great post! Turned out awesome!
Katie
acreativeinterior.com
Gorgeous! You rock.
I am so very, very impressed! It looks GORGEOUS! So peaceful. I’m sure taking a bath in there is heavenly after all of your hard work. The standing stones are to die for. Your patience and perseverance are to be commended!
Which picture? I sent you so many. LOL you’d loose your head if it wasn’t screwed on!
I’m thinking it’s this one with white washed wood walls:
http://www.veranda-interiors.com/2010/12/simply-stunning.html
It’s a beautiful space (your bathroom that is)! I love the mirror and the soft color scheme. It really turned out great.
So true Robin. You can’t imagine what I have to go through every time we need a pencil to mark something in the house… I have dreams of better organization though!
You’re absolutely right, that was in the picture. I love that hallway. I can’t thank you enough for all of the inspiration pictures.
Someday when you have you know a finished house then you can stress about being organized. Until then just focus on the basics. Are you guys sleeping in the house yet?
BTW we’re searching for some good priced hickory HW floors similar to the ones you posted about when you bought your walnut flooring. Finding unfinshed 4″ wide select grade is turning out to be harder than it sounds. I suggested to Flannel Man we just take a road trip to MI and he said he would but only if we stopped to meet you two! LOL, FM the guy who didn’t even own a computer until I gave him my old one in 2005 now wants to meet fellow bloggers?
Ahhhhmazing! Your bathroom project has turned out absolutely beautiful! Love the stones and planks on the walls and I’m drooling over the vanity you built. Very impressive!
Kit, this bathroom should be in a magazine…actually you should be on HGTV with your own show! You did an excellent job and, I hope, are very proud of yourself!
I live on the New England shoreline and for the “beachy” theme you nailed it well….matter of fact it’s more beautiful than most out here in the average beach cottages I’ve seen!
The only “beach” thing missing is a little dish or jar of “beach” glass which many of us grew up combing the local beaches for when we were kids. Now you can buy it in craft stores!
If I spy a nice piece of driftwood, I’ll let you know in case you want to convert it to wall art!
Again, this bathroom is beyond awesome!
You really have done a hell of a nice job with this bathroom. I like everything about it.
Hopefully you’re reading this comment while taking a nice long, well-deserved soak in your amazing bathroom. It is beautiful, unique, and just beachy enough. Well done!! This has even more excited to see the rest of your rooms finished.
You must be totally enjoying a soak in that tub – such a peaceful & serene room.
Hi, Beautiful job! Could you tell me what company and model # your tub is. So elegant!
Hi Kristina – It’s a Kohler Archer style tub (I don’t know the exact model number, but if you look up Kohler Archer, you’ll find it!)
I just found your website through a link on Pinterest and I must say… I read a ton of DIY blogs. And this bathroom is just… Wow. It is one of those most amazing transformations I’ve ever seen. It looks absolutely incredible. A+!
amazing work on the bathroom
plumbingdenvercolorado.com
you are my idol! gorgeous!!!
To die for!
Love everything about this! Where is the light over the mirror from? I might just have to copy! 😉
Love it. What happened to the bathroom window in the first picture?
Love your bath! May I ask what brand of bath tub this is and the size? Thanks!
Kick A!
This looks beautiful!!!! Could you estimate how much the tub/shower part cost?!
Thanks!
Tess
Your Bathroom in amazing……could you please provide information about the gorgeous beige tile used on the walls in the tub/shower. It’s exactly what I’ve been looking for. Thanks!
Comments are closed.