Installing a hardwood floor in the kitchen of my first house (almost six years ago–don’t mind the buzz cut) was one of those Aha! moments where I realized I could repeatedly swing a sledgehammer at a nailer hooked up to an air compressor barefoot and not loose a toe.
And since I just use some of the leftover flooring from that same kitchen to finish off the bathroom in my new house, I figure it’s a good time to spread the fun.
So let’s talk about hardwood floors.
Types of Hardwood
First of all, I’m not talking about laminate, I’m talking about actual wood. And I’m not talking about actual species of wood (but you can check out more here if you’re interested). What I’m talking about is the types of hardwood flooring you can install:
- Unfinished hardwood– You put this down in its unfinished state and then sand, stain, and seal it when its in place. The benefit is that you get a smooth finish on the floor, but the dust from sanding down floors and the fumes from staining any putting poly down are something to contend with.
- Pre-finished hardwood– Pre-finished floors already have the stain and protective coat on before you put them in. You have to be more careful with the installation and the boards have individual definition instead of the cohesive look of a floor finished after it’s installed, but once it’s in, it’s in.
- Engineered hardwood– Engineered hardwood is generally pre-finished, and is also usually thinner than solid hardwood. It’s made up of layers of wood laminated together with the grains running in opposite ways which provides strength and durability. The downside is that you can’t refinish it like you could solid hardwood… generally only the top 1/8″ is “finished” wood.
The one thing that is similar about all of these is that they come tongue-and-groove. Some engineered woods will allow for a “floating” floor where the boards snap together and are only nailed on the outside edges. I prefer to nail each board down regardless.
The Tool
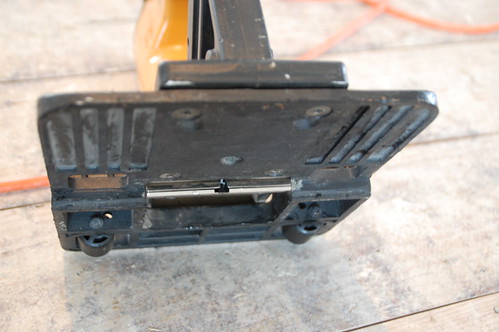
There are a number of tools that installing a floor requires, but this is the big one:
The guys at Lowe’s once tried to tell my aunt that there was no such thing as a floor nailer that hooked up to an air compressor, but let me tell you something, there is. It’s at the Home Depot rental place. (I love Lowe’s, but seriously dudes.)
Here’s how the nailer works. It hooks up to the compressor, the nail comes out of the hole by the notch there when you whack the top of it with a nailer, which is absolutely as much fun as it sounds like.
It installs the nail through the tongue of a board at an angle so that the next board can still slide over the tongue. Like this:
 (If that graphic looks familiar it’s because it’s just like installing a wood ceiling, but upside down.)
Installation
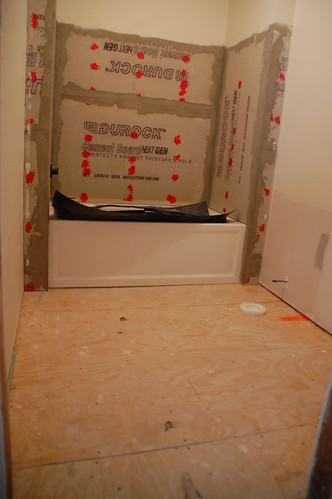
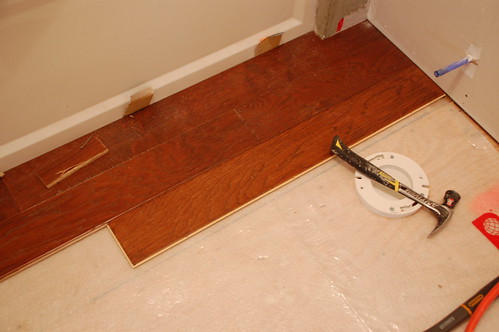
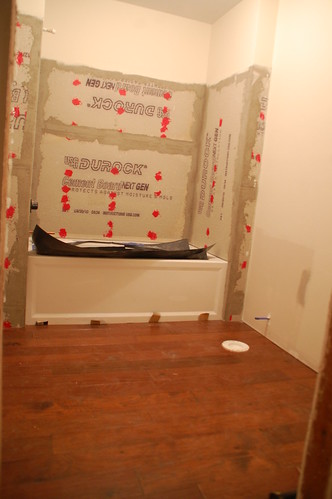
This is my bathroom, and it needs a floor. And like, a toilet, but first things first, okay?
Here’s what I used to give it one:
- Hardwood underlayment
- Stapler
- Engineered hardwood flooring
- Miter saw
- Jigsaw
- Pneumatic floor nailer
- Pneumatic stapler
This is how I did it:
Step 1 – Subfloor & Underlayment
In newer construction subfloor is usually 1/2-5/8″ plywood that is nailed down to the joists. You can attach your wood flooring directly to this, but not to particle board which is different than plywood.
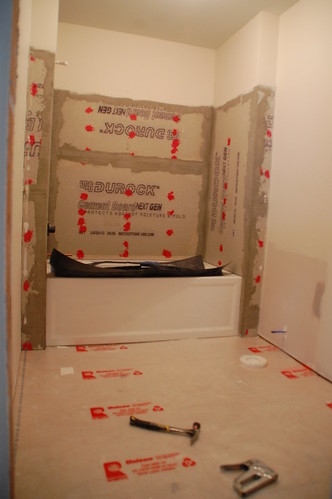
The underlayment provides protection for the hardwood against moisture (small joke there since I’m living dangerously and installing this in a bathroom, but just go with it). It will also add some cushioning to the floor and help prevent squeaks.
I used a hand stapler to fasten it. This particular underlayment is probably better for laminate, but it’s what The HD had so I used it. I’d be a little more concerned about getting something specifically for hardwood on a larger area.
Step 2: The Dreaded Beginning
It’s not dreaded for no reason, it took me two hours to get the first two boards in, and only a two more hours to finish the rest of the floor.
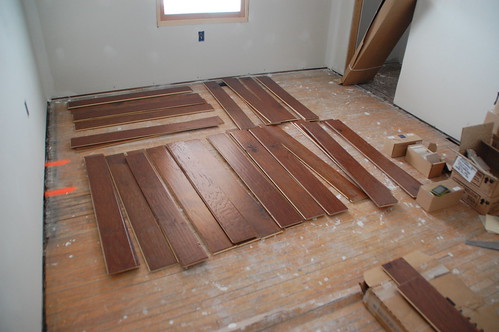
It starts with the laying out your floor. For maximum strength and durability the flooring should run perpendicular to the floor joists. (Check out which way they run in the basement or by sticking your head in the crawl space.)
Also, you’ll likely have several boxes of flooring and particularly if it’s pre-finished you should mix them all up ahead of time, or risk having different colored stripes in your floor.
One of my boxes was leftover from when I installed the kitchen (6-ish years ago) and the other was new which posed another problem since the tongues weren’t exactly the same size, but nothing a hammer and little determination couldn’t fix.
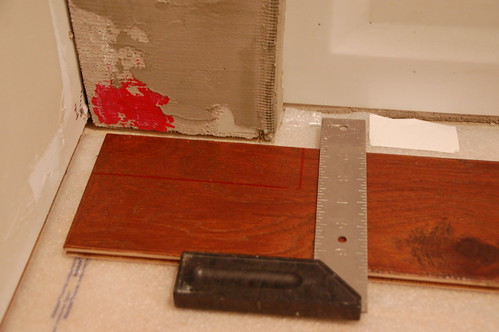
The first row had to be cut to fit around the tub in my case, but most times it will just be straight.
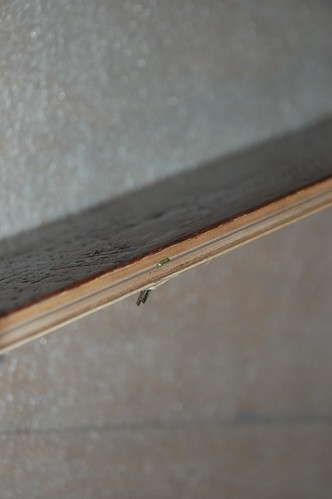
You won’t be able to use the nailer on the first row because there isn’t enough room, so I used an air-stapler to nail through the tongues at a 45, and my finish nailer to secure the side closest to the tub.
Here’s how I stapled through the tongue:
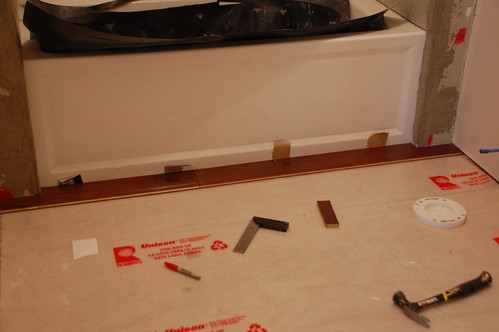
You get to see this hand shot because I started with the wood directly up against the tub which was a bad idea for the squeaks, so I pulled it out and put those cardboard shims in.
While I went tight against the tub because there will be no trim there, you should leave a 1/2″ gap or more around the walls (it will get covered with baseboard) to leave room for expansion.
You’ll also have to use another nailer or hand nail with your final boards of the room as well.
Step 3: Rows 2 through Infinity
As you’re laying the boards you’ll want to work in the direction of the tongues. This sounds like something biblical, but it just means tongues out… from right to left in this example.
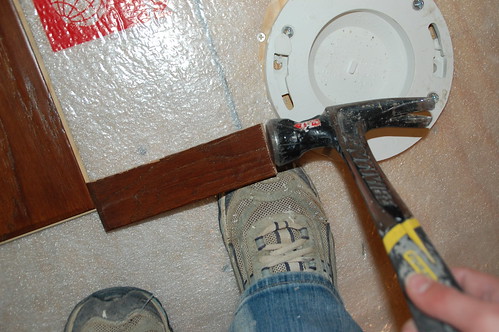
Those boards to not just slide nicely into place over the previous row, which is while you’ll need a Banger.
I use small scrap pieces. The objective is to fit it over the tongue and hammer the board into place so that the tongue stays intact for the next piece to slide over. Boy, I just used the word tongue a lot.
If you’re using wider boards like these you may be able to use the floor nailer by the second row. Nails should be spaced every 6-8″… the rule of thumb is put the nails closer together the wider your boards are.
When you come to the end, I find the easiest thing to do is flip the next piece around and measure it, then cut with the miter saw to fit it into place.
The flipping around part is key so that you get the grove on the right side of the board.
Also, you want to start each row with a different sized board. having seams that have too much of a pattern drives me nuts, so I’m always pretty aware of where I want my first board to end and where the subsequent seams will be.
Step 4: Special Cuts
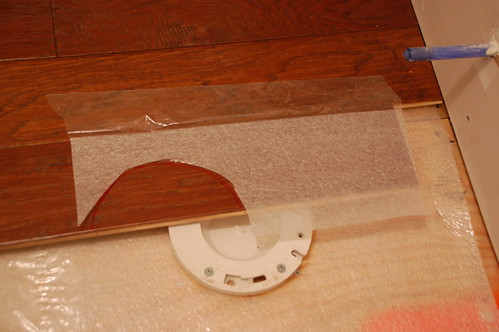
You may or may not run into this around stairs or if you’re crazy like me, in the bathroom.
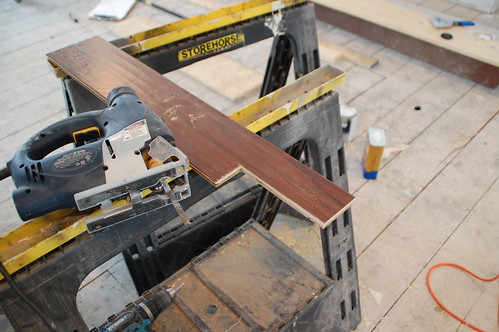
I found that making a template with some spare underlayment was the easiest thing to ensure a nice tight cut, which I made using the jigsaw.
Step 5: Voila!
And here’s the after.
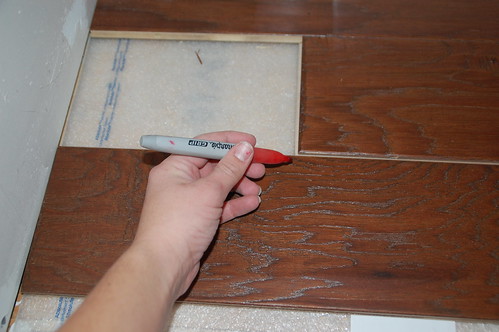
You’ll want to be pretty careful with pre-finished boards, but if you do end up dinging the sides hammering a particularly difficult board in place (not that I would know) those wood crayons do wonders.
Also? First “finished” floor in the new house, so I totally did a little happy dance on this when it was done.



21 Responses
That was an excellent lesson in how to install hardwood floors in your bathroom. It looks great. One question – did you consider using some kind of water resistant underlayment? Maybe something like this: http://www.usg.com/fiberock-aqua-tough-underlayment-panels.html? In any case, you deserve a happy dance – good job!!
That underlayment is supposed to act as a moisture barrier, but I’m curious about the product you linked to. It looks like a guypsum product, and my first thought is that you’d have to get non-standard flooring nails (longer) that can go through the gypsum board and far enough in to the subfloor? Hmmm….
Not a fan of using the Graphite or an old rubber hammer to hammer those boards into places instead of a banger piece?
If I’m right about this the non-rubber side of the mallet they give you to whack the nailer is graphite, but I wasn’t exactly “gently tapping” those boards… I don’t think if I’d used that directly it wouldn’t have beat the heck out of the tongues which were only 1/8″ thick.
Maybe it works better for thicker flooring?
Probably best then to use the banger for such a small tongue. I’ve only used a rubber hammer/the rubber part of the same Graphite hammer in the tool pic to “tap” the boards into place. Adding another hammer or even flipping the hammer to hit with a specific side had always seemed as another nuance but I’ve also mis-hit boards with rubber part of the Graphite hammer and create “nice” dents with the non-rubber side so I guess to each his own or her own.
Looks great!
Was just curious how you decided on running the boards parallel to the length of the tub?…
Well, there were a couple of reasons… running them parallel to the tub means that they are parallel to the floor joists, which is not ideal but didn’t worry me much in this small space.
Aesthetically I’m putting 6″ cedar in horizontal rows on the walls and I wanted the floor planks to run in the opposite direction. It also occurred to me that if there is water damage around the tub I can contain it to 2-4 boards instead of the ends of 12 or so.
Okay….beginner here. Built my home with Habitat and the subfloors are pretty thick MDF (Definitely not plywood as I know plywood)and is nailed to the joists (I KNOW – didn’t give us nail guns and learned quickly the best/proper way to handle the hammer!) . What do I need to add since you say the wood should not be nailed into particle board (same as MDF?)? Would love to do wood in my whole house, but willing to start with bathrooms!
So the problem with particle board (and also MDF) is that it doesn’t have good “holding power” for the nails, particularly when they get wet. It’s recommended to add a 1/2″ layer of plywood over the MDF and then put your floor down, which, depending on the type of wood you use could raise the floor 3/4″ to 1-1/2″. The engineered hardwood I used is pretty thin (1/4″ to 3/8″) so that’s probably the way I’d go if I had to put an additional 1/2″ plywood down!
Having a hard time with the floor nails on my hardwood floor. Its a very hard wood floor and its into plywood for a subfloor. I am using a pneumatic floor nailer with two inch nails. I’ve tried to up the pressure but still no luck. Is there a way to adjust the set of the nails?
I don’t know ed, is it just that they aren’t going in far enough? I had the pressure set at 120 psi. I did notice if my aim was off and I didn’t give the nailer a good enough whack the nail wouldn’t drive in all of the way, but I have a feeling you’re driving through heftier stuff.
Is it a Bostitch nailer?
Great tutorial, and I can relate to your Lowe’s comment. I hate the blank stares I sometimes get when I ask about specific product info. Home Depot almost always has more experienced folks who can answer questions.
Thanks for this. I may be naive in saying this, but it does’t look so hard. Or maybe you just make it LOOK easy.
One question, there is some old paper and glue still stuck to the subfloor from when I removed the old tiles. As long as it’s flat, can I just leave it or do I need to sand it off?
I think getting it set and those first pieces down is the biggest challenge, the rest just takes a long time, but it’s really not that hard!
I don’t think the old paper and glue will be a problem for you. One other thing to watch out for in an older house is starting that first course “square”. Here’s an article that may help with the square-ness issue.
How are you dealing with the space between the flooring & the tub? Once the shims are pulled out, won’t there be a gap?
I wish I had run across this article sooner! These tips are so great and would have alleviated so much unnecessary stress this winter when my (poor) fiancee and I installed our living room flooring.. Many frustrations and months later we are still engaged and have a (close) to perfect floor! Thanks for sharing all your wisdom 🙂
Wow, supoerb blog layout! How long habe you been blogging
for? you make blogging look easy. The overall look of your web
site is great, let alone the content!
I know this website provides quality based posts and other information, is there any other site which presents these
data in quality?
This paragraph is genuinely a pleasant one it assists new net visitors, who are wishing in favor of blogging.
You have no idea how long my wife and I have been looking for an article like this! We’ve looked everywhere, and asked around, and only been given vague answers. We have some wood flooring already, and have used a pretty great hardwood floor refinisher in Orange County, but we’re thinking it’s time to replace it all and start from scratch. This helped us out so much, thank you!
There are different types of hardwood flooring options are available such as: unfinished or finished, solid or engineered etc. And the installation process of these types of hardwood flooring is different. And for the installation process you should first prepare the room, make a plan for this, then decide the budget. For the hardwood installation some important tools are there and in your blog you really give the best installation tips for hardwood flooring. You can refer this: http://www.hardwooderia.com/hardwood-flooring-simi-valley/
Comments are closed.