As it turns out, the steps in building a shower go pretty quickly after all of that “framing and then waiting around for an inspector to let you put walls in your house” business.
If you’re starting this journey in the middle for some reason, feel free to check out the previous posts in this series:
When we left off last time the shower looked like this:
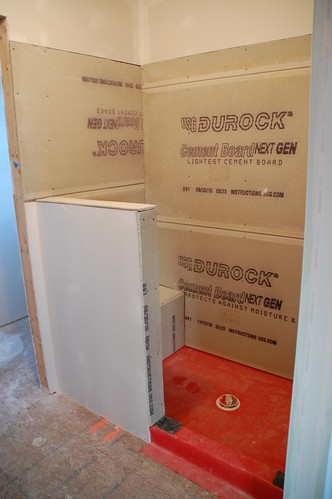
Nice, but not exactly water proof.
The Shower Pan
So, the one part of the shower I delegated to Actual Professionals was the shower pan. The plumbers put in the liner and they recommended an Awesome Tile Guy to “mud the pan” so to speak. I would have loved to watch him do this, but the timing didn’t work out. Instead I walked in one day after work, and the shower floor looked like this:
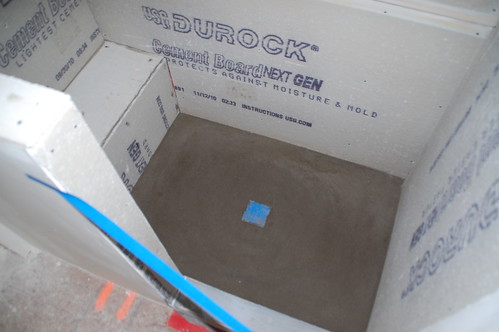
Let me tell you what I do know about it. The “curb” that runs over the edge where the door will be was one piece that was mudded in place on Day 1. The next day the Awesome Tile Guy came back to do the pan. The pan does not extend over the drain so that I can change the height by screwing it in or out depending on my floor tile. His recommendation was just a hair lower than the tile.
On the outsides of the shower the pan is about 2″ thick, and it slopes inward to the drain like a cone.
This cost me under $200, and I considered it well worth the price. Although I might try it myself if I’m ever doing a shower again, because I’m crazy like that. I’d probably use something like this Quick Pitch product to help me keep everything sloped correctly.
Patching Screw Holes
I did a lot of back-and-forth about the screw holes and the seams, trying to figure out if I should use mortar for both, or a waterproofing membrane like RedGard for both. The Tile Guy suggested RedGard ahead of time and then just to fill the seams as I tiled, but I felt better in my bones about finishing the whole shower off and making it waterproof before laying any tile.
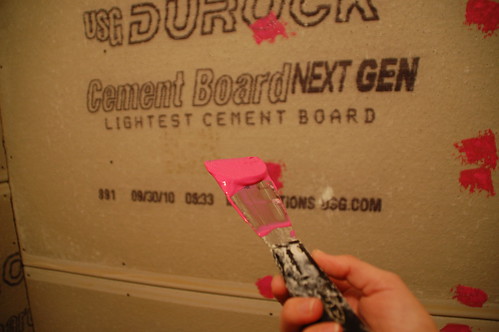
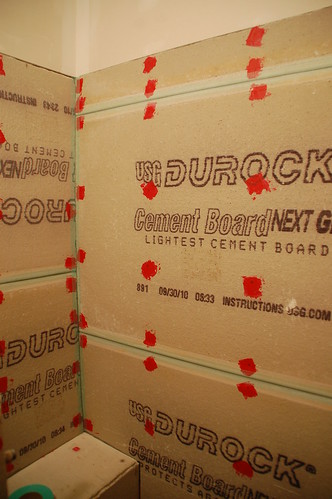
For the screw holes I used 2 coats of RedGard right off the bat.
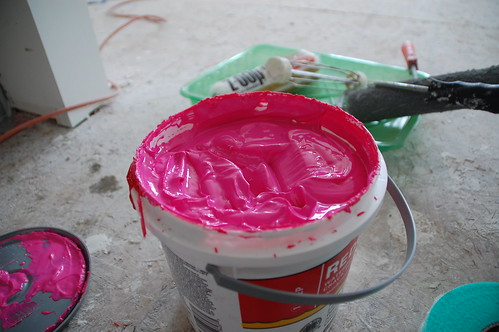
It was super easy to work with and had no smell.
I’m going to pause here to apologize for the variation in lighting on these pictures. I did one coat at 9 PM and one on my lunchbreak the next day, and there aren’t enough minutes in my day to correct the lighting to look the same.
And, back to it.

I don’t really think this requires commentary. It’s pretty self explanatory.
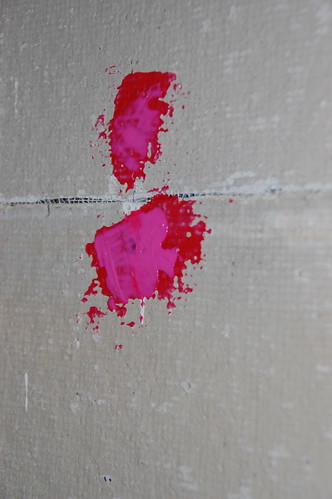
Redgard goes from bright-freaking-pink to red when its dry. Since that was a couple of hours in my case, I played it safe and let the first coat dry overnight. Supposedly this can also be used in place of the rubber liner under the shower pan, but you must use two coats to make anything waterproof.
Mudding The Seams
This was much less nerve-wracking then mudding the drywall seams. You still want a smooth joint so your tiles don’t stick up at odd angles though.
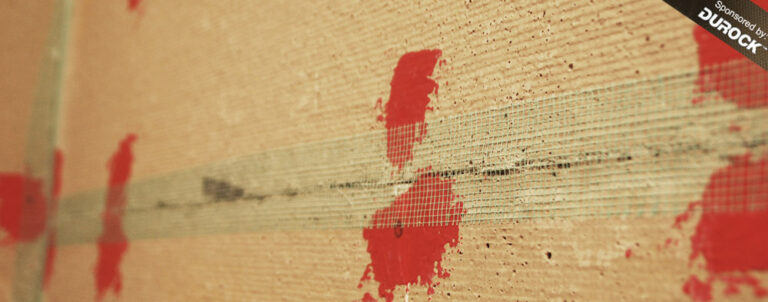
First was a layer of fiberglass mesh tape.
I used Versabond thinset mortar for the corners (available at Home Depot, not Lowe’s), which is a polymer enhanced mortar. It required sitting 10 minutes after you mix, so I mixed my first batch and then taped all the seams while I waited.
After I mixed a subsequent batch I decided this first one was a little runny.
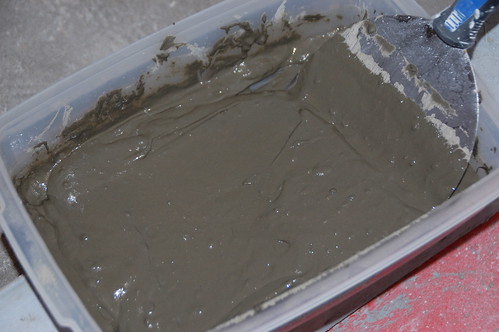
Looks way runny in the pic, but it wasn’t that bad. I used my 6″ drywall knife to apply it:
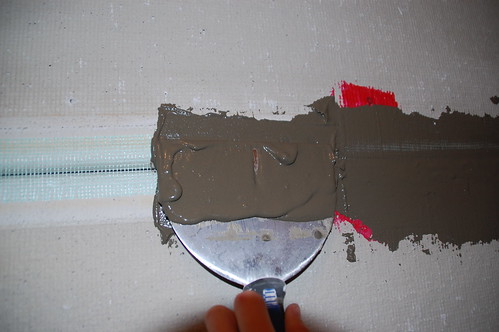
One swipe down, one swipe over.

And, hey look, I spent three hours in this shower yesterday but now that I’m looking at the picture here I see that I totally missed a spot.
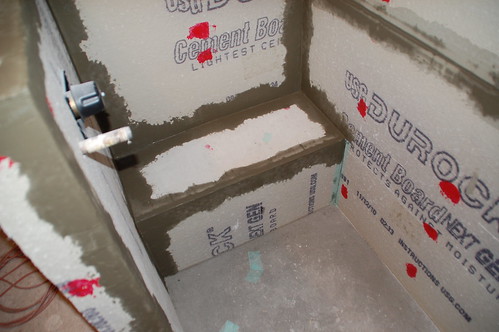
Sigh. Anyway, for the inside and outside corners I used the same knife, but you can see the consistency was much better on these seams and you don’t want to be runny if you’re doing a corner.
Also, speaking of things I didn’t do as well as a professional, apparently my tile guy had given me instructions not to put a piece of cement board on the top of the bench which makes complete sense because I had to drill through the liner to do it, and even I said that was a big no-no.
So for future reference, let you tile guy do the top of the bench, but if you get a little overeager with the tile board like I did, it’s not the end of the world. We used 100% silicone caulk on the nails and seams, then I covered them with Redgard and did the seams with thinset. I’m also considering Redgarding the whole bench again.
Another thing that gave me pause was the seam where the tile board meets the drywall. I couldn’t figure out if I was going to run mortar over that or not… in retrospect I might have just run the tile board all the way up to the ceiling, but I don’t really like the look of tile-to-ceiling showers.

I decided to set the tape over it a little low so I would just take the mud an inch onto the drywall, and so far the Earth hasn’t stopped spinning on its axis.
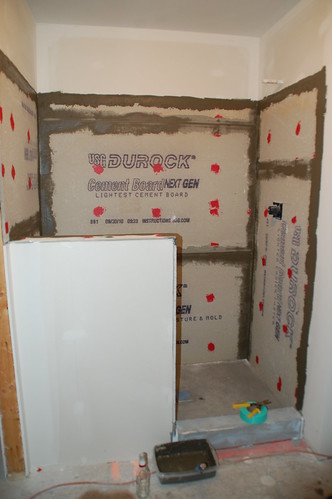
And basically at this point we’re ready for tile, though I’m planning to tile that outside wall of the shower, so there will be another post on installing the Durock tile membrane to prep that side. There is 90 square feet of tumbled marble sitting on my front porch right now though, just waiting to be put on those walls.
Special thanks to Durock for sponsoring the DIY Walk-In Shower Series


38 Responses
Taking notes…
I can’t wait to see how this turns out!
I just re-read this post because we are now at the point in our bathroom remodel where we have the Hardi-backer up around the tub. This post answered some of my questions … what to do with the screw holes and how to seam between the cement board and dry wall.
You da bomb!
Why would you Redgard just the screw holes and not the entire cement board? If you didn’t use a vapor barrier behind the board water will still soak right through those cement boards. Water will soak through tile, grout, the cbu, then to your studs. Cement board is very water thirsty and although they wont rot from water, they are not waterproof at all.
No step 4? I’d love to see the finished product!
can you email me photos of finished product? you made it look easy. thx
Will you email me pics of the finished project? We did one very similar to this one but we think the floor leaks…
Can you email me pics of the finished project?
Wow, this paragraph is good, my sister is analyzing
such things, therefore I am going to tell her.
Thanks for one’s marvelous posting! I quite enjoyed reading
it, you’re a great author. I will be sure to bookmark your blog and will often
come back later in life. I want to encourage you to continue your great work,
have a nice holiday weekend!
wonderful submit, very informative. I ponder why the other experts of this sector
don’t understand this. You should proceed your writing.
I am sure, you’ve a huge readers’ base already!
My developer is trying to persuade me to move to .net from PHP.
I have always disliked the idea because of the expenses.
But he’s tryiong none the less. I’ve been using
Movable-type on numerous websites for about a year and am nervous about switching to another platform.
I have heard very good things about blogengine.net.
Is there a way I can import all my wordpress posts into it?
Any kind of help would be greatly appreciated!
Oh my goodness! Amazing article dude! Thank you so much,
However I am experiencing issues with your RSS.
I don’t know why I cannot join it. Is there anybody else getting identical RSS issues?
Anybody who knows the answer can you kindly respond? Thanks!!
The best way to do about this would be first understating how
the real ones function so that when you come across a fake one,
you will be in a position to possibly use the software program or abandon the software.
At the end of the day FIFA 14 on the PS4 and Xbox One doesn’t make huge
improvements to the PS3 and Xbox 360 versions, but they’re certainly more appealing to
look at and provide a bit more realism to player and ball movement.
If you have another console, search for MLSFI in Pro Clubs and you’ll find the other MLSFI iterations available.
Thankfulness to my father who shared with me on the topic of this webpage, this weblog
is actually amazing.
Thanks for the post. It inspires me to pick up some tools instead of waiting for my husband to do these things!
What’s up, I log on to your blogs like every week.
Your humoristic style is witty, keep doing what you’re doing!
Excellent blog! Do you have any tips for aspiring writers?
I’m hoping to start my own website soon but I’m a little lost onn everything.
Would you suggest starting with a free platform like WordPress or
go for a pai option? There are so many options out there that I’m totally overwhelmed ..
Any recommendations? Thanks a lot!
Awesome! But where is step 4? I couldn’t find it anywhere on your page. Eagerly awaiting the final product. Considering doing a similar project (or 2) at my mother in law’s. Thanks!
A package is perfect but a container that’s a hat works as well.
Your shower looks to be the start of a nice design, but The use of these products are the way to go, youtube has video on how to put it together for water or steam tight proofing. LATICRETE® products
HYDRO BAN® & Linear Pre-Sloped Shower Pan
Thanks in support of sharing such a good opinion, piece of writing is good, thats why i have read it fully
That is absolutely the wrong way to do a tile shower. You will have problems down the road. Sometimes it’s best to hire a contractor that does tile showers for a living. There expensive for a reason.
*They’re expensive
And no, it is not absolutely the wrong way to do a tile shower. “Absolutely the wrong way to do a shower” is like fucking supergluing tiles to gypsum board and expecting it to be watertight. What this is– a permeable layer like tile-board, over a non-permeable layer like tar-paper, that is installed in such a way as to direct the water that seeps through the grout to places other than the wall cavity behind the shower– is an acceptable way to create a water drainage system in a shower. Creating a fully waterproof enclosure with something like a kerdi system is another way to do this. There are, as they say, many ways to skin a cat, or, in this case, to create a tile shower surround. I welcome intelligent discussion about all of them, but your comment doesn’t qualify.
Kit, show me that this is an approved installation method in the TCNA handbook. TL;DR: it’s not there. So, there’s no need to degrade your audience with crude f-bombs and holier-than-thou grammar corrections. The gentleman is correct. This is not a TCNA-compliant installation and although it may last for some time, why take chances? Spend a few more bucks and RedGard the ENTIRE inside of the shower with two coats of product, to a finished, dry thickness of 30 mils, per the manufacturer’s instructions. Do the job right, rather than helping others be cheap and ignore proper techniques.
This made me laugh so hard I thought I was going to burst a vessel in my eye. Well defended.
Go home, Doug. You’re (or for you, ‘your’ drunk).
How did this turn out? I am really wondering about placcement of the shower head. I am builing a house and would like to know how this worked out.
You have brought up a very fantastic points , regards for the post.
There needs to be a water proof coating put on the entire concrete backer surface. The “red” product is NOT the way to go since many have reported a color bleed into white grout.
There should be a water evidence covering put on the whole substantial sponsor surface. The “red” item isn’t the best approach since many have revealed a shading seep into white grout.
There should be a water confirmation covering put on the whole substantial sponsor surface. The “red” item isn’t the best approach since many have announced a shading seep into white grout.
That is totally the incorrect method to do a tile shower. You will have issues as it were. Now and then it’s ideal to enlist a worker for hire that tiles showers professionally. There costly on purpose.
Comments are closed.