We’ve come to the second part of the DIY shower adventure, and it’s only taken me four months from when I framed in the walls to get here. Hey. Don’t judge… things will be moving much quicker from here on out, which means I might get to shower once this year.
Hey, I’m kidding. Like Queen Elizabeth I, I bathe once a month ‘whether I need it or no. ‘
Let’s talk about the shower, shall we?
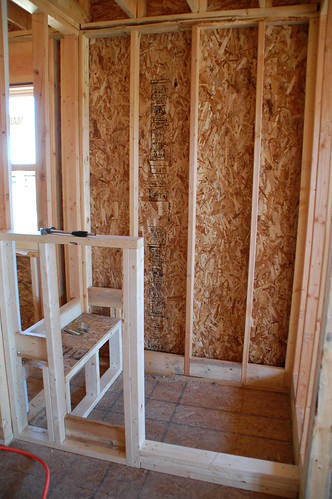
When I was done framing, it looked like this.
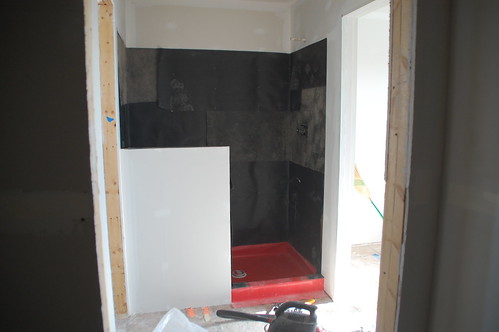
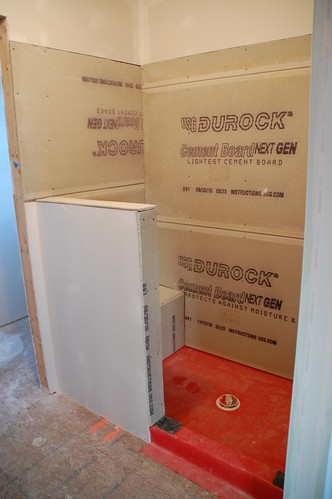
Since we had the drywall installed professionally, I marked the tile level for the drywallers, and they left it like this:

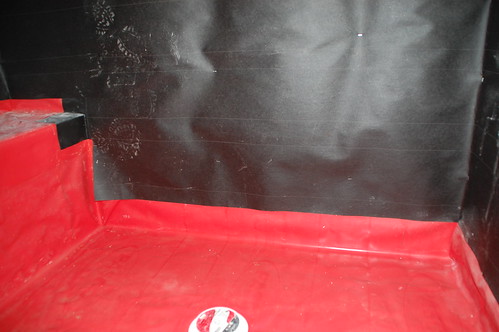
You might have noticed the addition of the pan liner in this image. It doesn’t necessarily need to be done before the drywall. We’re working with some awesome plumbers on the house and they installed the liner for us. (They are all about letting me DIY, but they strongly recommended that I let them to the liner and have a pro do the pan… but we’ll get to that later.)
Regarding the drywall, we talked to our installer about needed to use green-board or anything special around the shower. As a DIYer, I’d have done it with the green-board, but he deemed it unnecessary. I’ve read up a bit on green-board (essentially gypsum board with a wax coating) vs mold resistant drywall, vs plain old wall board, and here’s the thing… It’s a personal choice. We may regret it, but we do trust our drywaller so we went with his recommendation. A tile guy I talked to said even if he wasn’t going to tile to the ceiling, he’d still probably just use cement tile board to the ceiling and then finish it off like drywall at the top.
So there are some options out there, and I think it’s a good idea for everyone to make their own informed (or in our case, sleep-deprived) decisions about what materials to use around a wet space.
Shower Pan Liner
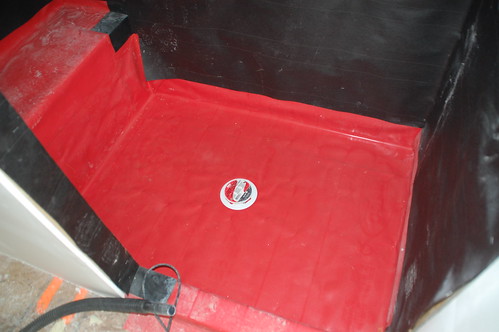
The shower pan liner is essentially a piece of thick rubber that is attached over the subfloor and will be covered by a mortar shower pan. Everything I’ve read on showers suggests that even if you have a concrete or otherwise “water impervious” floor do not skip the shower pan liner, or you will experience leaks.
If you’re building a standard sized shower, there are some pre-made, ready-to-tile options out there. For a custom sized shower (or one with a seat, like ours) using the rubber liner was necessary. Here’s a version from Oatey that can be purchased online.
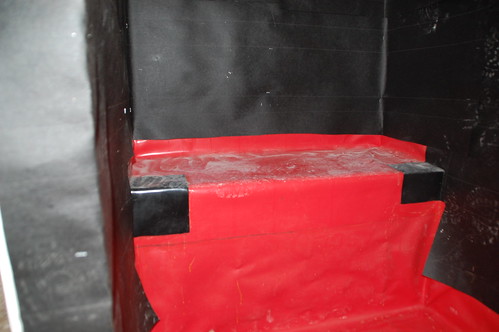
As you can see, the plumbers used one full piece for the entire pan, including the bench.
Adhesive was used to secure the liner to the subfloor, and any corners were reinforced with something I can only refer to as “heavy black sticky material”.
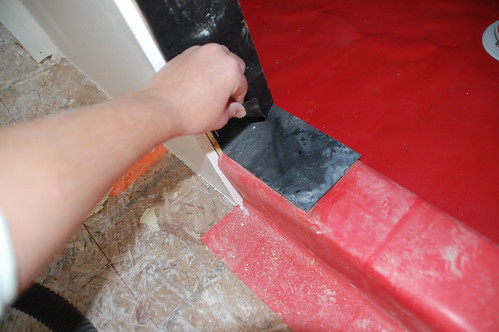
I’m assuming it’s similar to these dam corners sold at Home Depot.
The corners of the liner were folded a lot like presents, and I’ll tell you, it really added to the thickness in those spots, which was challenging during the installation of the tile board.
The last thing to keep in mind about the liner is basically what the plumbers drilled into my head after they installed it: You DO NOT poke holes in the liner. No screws, no staples, no shooting lasers out of your eyeballs, okay?
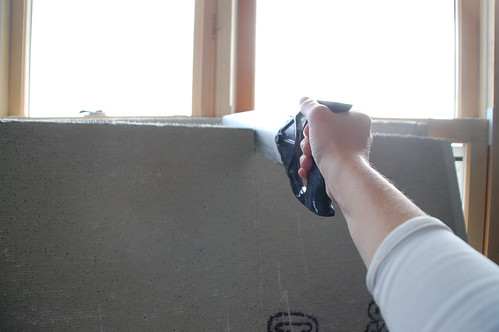
Layer 1: Tar Paper
I’m going with a three layer system here… tar paper, tile board, and then a Durock tile membrane. Overkill? Maybe. But then again I don’t want my shower to leak and eventually collapse through the floor into the basement because if you haven’t heard, I plan on living in this bathroom when it’s finished.
Tar paper is basically your last ditch insurance plan in case anything else leaks. You can also use other waterproof membranes, but I read tar paper was the most common, and I also had some leftovers handy from the roof. Here are the basics.
- Install from the bottom up, lapping the paper like you would shingles.
- Staple to studs.
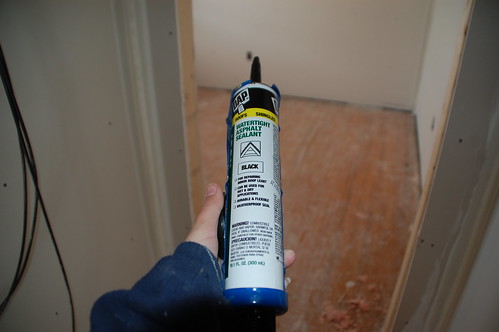
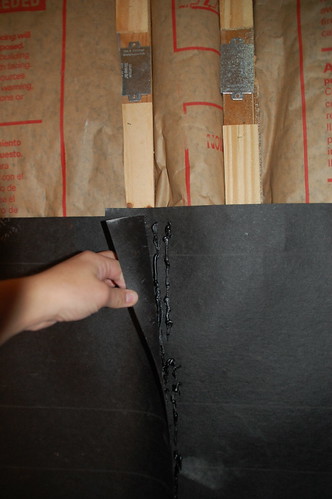
- Seal seams with roofing tar.
Here’s the first layer:

The tar I used:
And here’s a seam getting tarred. We skipped the feathering for this portion of the program.
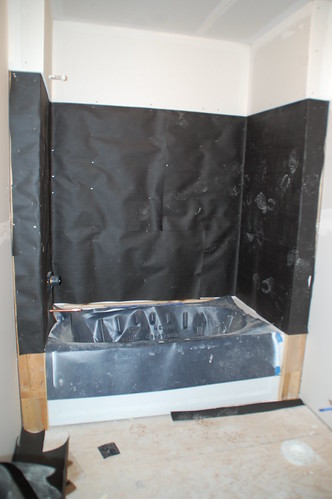
The shower with all tar paper installed. (Ignore the super dirty piece please. We ran out of “clean” stuff at the very end.)
Since we’re doing the tub surround for our second bathroom at the same time, here’s how that looks.
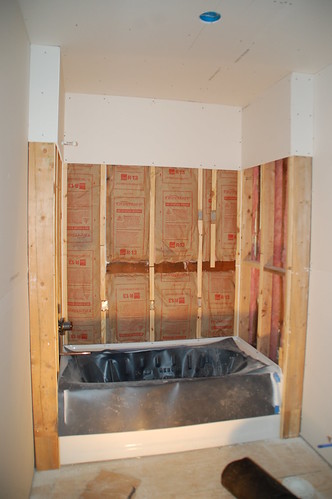
The tar paper is overlapped onto the tub nailing flange.
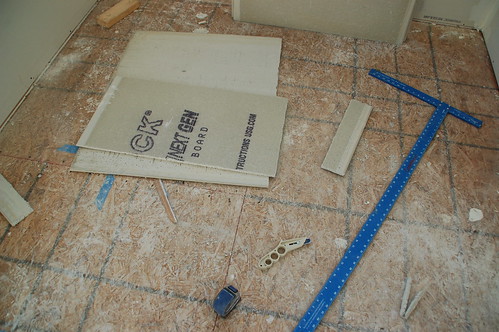
Layer 2: Tile Board (aka Cement Board)
After the tar paper is on, joy of joys, it’s time to install the tile board. Like drywall, this is not exactly my favorite activity, but it was a small space and it only took the better part of a day.
First off, the thickness of the tile board should match the thickness of any drywall it adjoins, which most likely will be 1/2″.
Tools needed:
- Drywall square
- Tape measure
- Sharp utility knife
- Drywall saw
- Tool for cutting holes if necessary (I used a combination of my drill and the Rockwell Sonicrafter. A Dremmel would also work.)
- Drill & drywall screws
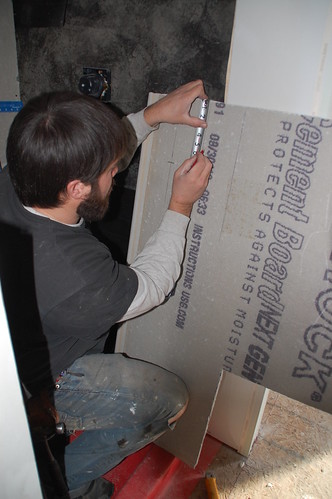
I enlisted this bearded dude to help with holding the square:
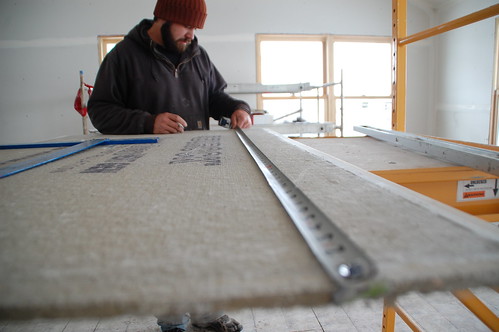
Scoring the piece:
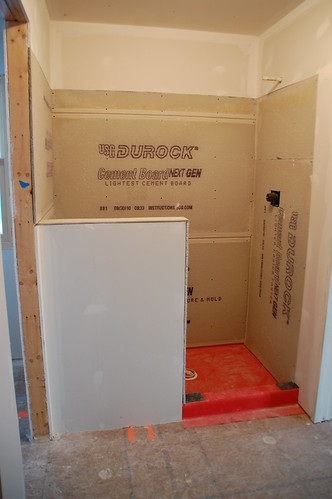
And here are the first several pieces attached to this wall. I have to say that I did this part on my own, and like the drywall incident last year, I should have had the video camera set up for getting that top board in place. Can we say awkward? Yeah.
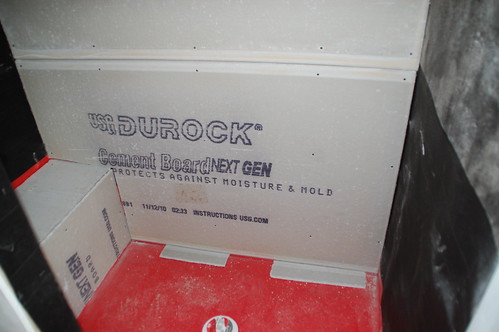
But, it got where it needed to go. A couple of things I want to mention about attaching the wallboard:
- I used as few screws as possible (less holes the better)
- No screws went where the liner meets the sides (5-6″ from the bottom)
- Spare pieces of wall board were used to shim the bottom piece off the shower floor. The guy who is going to do the pan recommended 3/8-1/2″ space.
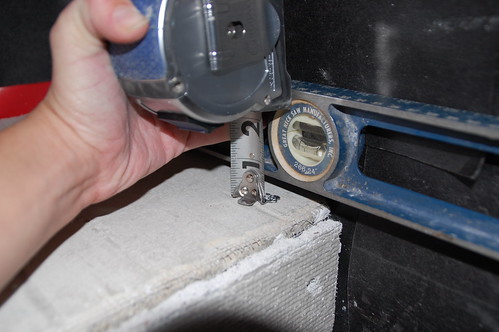
One of the trickier things was cutting the board to fit around the bench. You might remember from when I framed it, we gave the bench about a 3/4″ slope forward. To try an make an accurate cut I used a level and a tape measure.
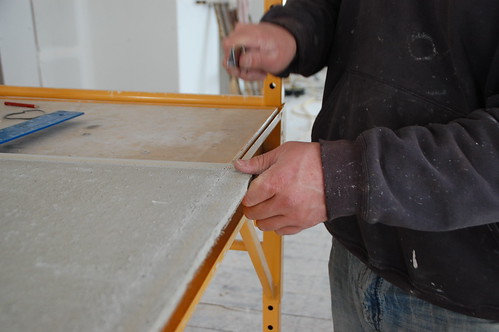
Then, since I was removing the board from two directions the whole score-and-snap method wouldn’t work, but a drywall saw did the trick just fine.
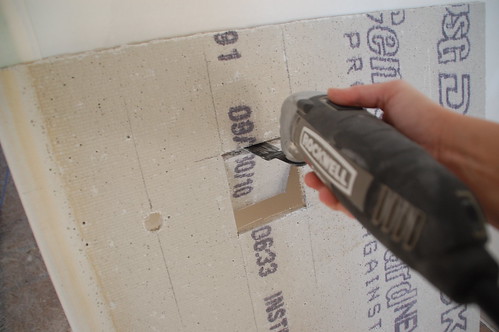
I also took advantage of the fact that I have my Own Personal Engineer and had him mark the holes for the plumbing.
Holes for pipe were drilled with a 7/8″ drill bit, and I got to use my Sonicrafter for the square holes. (Love that tool.)
And that’s really all there is to it.
Here’s how the bath tub surround looks in our full bath:

Next up: Using the Durock Tile Membrane for a third layer of protection.
Special thanks to Durock for sponsoring the DIY Walk-In Shower Posts:


47 Responses
Geez, you make it look so easy.
Having a pro do the liner helps. I found that to be the trickiest step, by far. And the adhesive when I had use to add a piece to cover the step the nastiest chemical I’ve ever smelled.
I’m storing this away for the bathroom remodels we’re doing next year. Keep it up and soon you’ll actually be using that shower!
How did you secure the cement board over the liner on the bench if you can’t drill holes in it?
I am going to building a shower in my master bath (hopefully) later this summer. Thank you for the instructions, I have been looking for something like this for a long time! These are perfect!!
Great question Tara, I should have been more specific. I did use 4 screws on the bench top and 6 on the front, but none of them were in the last 6″ before the floor.
To be honest I didn’t know how to get around that, but the bench in sloped and I’m going to use one piece of stone for the top so I’m hoping that will secure things, along with the durock membrane I’m going to install next!
Good luck with your shower later this year. (Hopefully the FULL tutorial will be up by then.)
Now that you mention, I can see them in the picture. Thank you! Can’t wait to see your house finished, especially the shower! :0)
“To be honest I didn’t know how to get around that, but the bench in sloped and I’m going to use one piece of stone for the top so I’m hoping that will secure things”
you might get lucky with having a slab material on the seat. but water gets in places you cant imagine and having nail or screw holes through a liner is not a good thing.
on your next project like this you should get some wire mesh and use a fat mud on the top of seat and down the face. it should be about 1″ thick. you should also do the wire on the curb since you probably nailed cementboard on there too. 🙂
Build benches of masonry inside the liner after the floor is tile-ready. Run liner on bench wall and sides 6″ above bench height.
You need to paint red guard over the entire shower as high as the shower head. Be sure to paint it on thick in the corners, usually 3 to 4 coats will do the trick. It’s also wise to use a paper mesh in the corners.
I uses Durock screws to screw my Durock to the studes. Then I put Durock tape over the screw heads and also corners and put 3 coats of the red guard on all the tape area and 2 coats on all the durock board.
You can drill through the ciment board and the liner, no bi deal but less screw as possible. After all you will patch the holes and borders lines with ciment patch then red guard waterproof coat.
WHERE DO I FIND “Using the Durock Tile Membrane for a third layer of protection.
Your article is very good. It is a good idea for the general reader like me. Thank you very much.
This was very interesting. Now, I have a good shower curtain but I need a ‘good’ liner. All I can get at stores in our area are the ones that stretch across bath tubs. The opening ofour shower stall is about 36 inches. The current liner is in desparate need of replacement. Looking forward to hearing from you. Thank you
S. Stoutjesdyk
I would not have done it the way you did it.
I would have used a schluter shower pan system.
I would have used cement board and kerdi over the whole shower area.
Are you going to mud the shower floor?
Very nice article, thanks for putting this together!
One question though: your red liner covers the sill step too apparently; I understand in the base, it gets covered with cement and secured that way, but on this little step, how do you secure it if you want it tiled too? I imagine you don’t want to tile right over the liner if it’s not secured to the wood underneath somehow…
Thanks!
Mathias
The “wrong way” would be to attach cementboard to the curb with screws that pierce the liner.
The “right way” would be to wrap the curb with metal diamond wire lath, nailing it first to the outside bottom front and fold it (shape it) over the curb and into the pan a little. Then use a “fat mud” to float all 3 sides of the curb about 1″ thick. This will become solid and able to be tiled one dry.
*you wire and mud the curb first and then mud the pan so that the pan mud locks the wire in you wrapped over the curb and into the pan.
Thanks Ceramictec…. did just that…. worked like a charm… 🙂
not exactly true. If you do screw the board to the curb, you can paint water sealer (red guard)) over all of it, making it damn near impossible for it to leak. Then you’ll have mortar, tile and grout on top of the water sealer. It won’t leak, I have done it more than enough to know. Never have issues.
Agree —it works well and much easy to do – never have issue neither
We are building our own shower from the floor up in the basement. After the rubber membrane and been installed on the floor, the builder installed a “floating” corner seat to the wall without boxing it in. I wanted it boxed in and after a few words, he framed it to be boxed in with tile. He said that he would put cement board around it too, and caulk it and with the tile there would no danger of moisture being trapped causing mold. I am very nervous about this and do not want to proceed until I know for sure. I hate short cuts and am worried his “correction” may be an expensive one in the long run.
Thanks for your help.
Lorraine,
cementboard nailed to studs and the tiled and caulked isn’t water or mold proof. water will get in at some point. if the builder did a pan liner with a moisture barrier behind the cementboard draped down in front of the liner, you can have him do a liquid membrane on the bench and 2′ around it to help protect it.
also, when he did the liner on the floor did he put a “pre slope” under prior to installing the liner ?
if not more then likely the water will sit on the flat liner and faster over the years, weep hole wont do their job properly.
* fester
Yes, there is pre-slop. Thanks for your advice.
Are you sitting down? You had good intentions but you’ve created a mold sandwich with your shower walls. First of all, when you use a membrane such as the durock product, redgard, or hydroban, a vapor barrier (plastic or felt paper) is unnecessary. If moisture does wick through the durock membrane and into the durock, it has no where to “go” since there’s the presence of felt paper; therefore, it remains only to facilitate the growth of mold.
You called it overkill but not having a seasoned professional install a shower like this is dangerous when the health risks are considered. In the future consult the National Tile Council for materials and methods. I don’t mean to be harsh and some things are great for DIYers to tackle but some aren’t.
Best of luck
Erich
Yay! Sonicrafter! Big fun and cheaper than Fein!
Many thanks for the tute and boo to the haters. I’m getting ready to do a Kerdi pan with permabase & redgard walls so I appreciate the info. As for the “mold sandwich” issue which everyone loves to talk about these days. Agreed, better to leave the vapor barrier off, but one thing that mold needs in order to thrive is a food source and tar paper isn’t one…….neither is cement board.
Did you lay the liner flat on the osb subfloor? No pre slope?
Exactly what I was thinking.. Not a good Idea if he did. Always do a pre slope.
Howdy would you mind letting me know which
web host you’re working with? I’ve loaded your blog in
3 completely different internet browsers
and I must say this blog loads a lot faster then most.
Can you suggest a good internet hosting provider at a honest price?
Kudos, I appreciate it!
I appreciate your work! Great step by step DIY instructions.
i love this and will be following to the finish…good luck!! it looks great
Are you sitting down? I second Mr. Storck’s statements. In addition, in wet environments like bathrooms, you always use green board. You never use drywall screws to install cement board. There were some other steps that are important that were not mentioned. Professionals say, use the correct tool for the job, and you must use the correct materials too. Take the drywall screws in the cement board…manufacture warns using drywall screws causes failure…materials in the screws and cement board “eat” into each other causing a failure of both…
i think tar paper is for roofing, siding and exterior surfaces of houses while interior water vapor isolation would have been better accomplished with poly ethylene sheeting followed by a vinyl pan liner for extra protection, then cement board over these on top of which the durock adhesive and membrane would be applied, the pan could be shower mud,the tile and all that sheetrock right above the shower is going to absorb loads of moisture anyway
The tar paper is just to avoid the wood from absorbing moisture into the wood so it’s actually recommended. As far as tar paper on the walls, not necessary. Durock, mud the seams, then seal everything (red guard) walls, shower pan, and curb. No leaks.
You know what your talking about vapors are a bigger problem then people know, and yep you don’t use exterior building products in a house…. not healthy or by code!
Although maximum site owners are familiar with these concepts, but they may lack the expertise to do it the correctly.
A VPN creates an encrypted connection to a third-party server, and all your Internet
traffic is routed through that server. Daily, even hourly, businesses can see how many individuals clicked on their ads and the traffic that is being driven to their website.
my question is, did it ever leak? How did the final outcome turn out after it has been used
Your shower pan liner doesn’t drain because there’s no deck mud pre-slope under it. potential mold issue in the future.
If you want to get a good deal from this
article then you have to apply these methods to your won weblog.
I had used, one piece shower pan for my walk in shower. But it has such a small lip and it won’t hold the curtain down. it will splash the water out side and make the floor wet. I don’t want to put the shower doors. is there I can put something so that I can have the shower curtain down so that I don’t splash the water out. thanks
It’s really difficult to say Mandy, but you may try a shower curtain with weights at the bottom (some of them have little magnets sown in) to help keep the water out.
I forgot to mention to you,
My floor is a solid concrete slab.
That is why my commode will stay where it’s at. I would like to have a corner sink so, i could have a little more room in the bathroom too but that’s later.
Putting a couple screws into the membrane isn’t a big deal. Put the screws in, then water proof it and it will be fine. There’s so many layers water has to go through to even worry about a leak. I use this stuff called red guard which looks like what they used on your shower pan, it’s the red stuff. After installing the membrane and the durock, you paint the water prof over everything and it seals everything up. So seriously don’t stress if you have to put screws in a couple spots I do it all the time.
Where is STEP 3 for the walk-in shower?
What are shower dimensions?
Looks nice but that rubber liner is a thing of the past. Use the Schluter Kerdi membrane and pan liner because it’s so much easier to do for a Do It Yourselfer. Much less complicated than that rubber liner because you don’t need to do the mortar and sloping and all that other crap. The Kerdi comes with a shower pan already slopped: just cut the outside dimensions that you need.
No finished photos? Look just like what I’d like in my basement shower area. Love the seat. I’m going to put in a niche in the half wall as well
Comments are closed.