This post is a long time coming. Almost two years, in fact, since I was invited to visit the Delta Faucet Headquarters with a bunch of awesome bloggers, and decided I was totally having one of these Delta Touch2O faucets in my future kitchen. At the time I expected that future kitchen to be in a whole other house, in a different part of the state. But hey, things happen.
So my Touch (donated by the awesome folks at Delta) sat forlornly in its box, collecting dust, waiting for the day when I would unexpectedly buy a house while sitting in a bar. Luckily that day came sooner than anyone could have anticipated, and the next thing you know, I’m wedged under a sink, installing this baby.
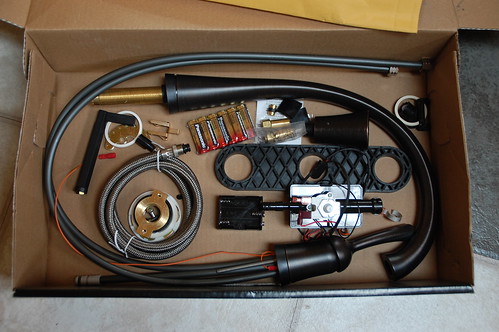
That looks like a lot of parts, but don’t be intimidated. It was infinitely more difficult to remove the old faucet (there was a hammer involved) than to install the new one. I think it took less than 30 minutes, and here’s how it went down.
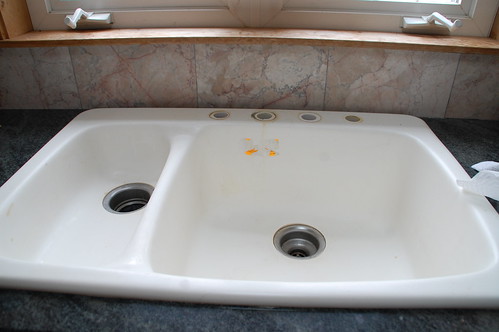
The old faucet was a 4-hole model with one for the faucet, one for the handle, one for the sprayer, and one for the soap dispensers. (Side note, soap dispensers inexplicably gross me out.) Since the Touch only needed two holes, I had to decide where I wanted the faucet and handle located.
Then I started with the installation, following the instructions.
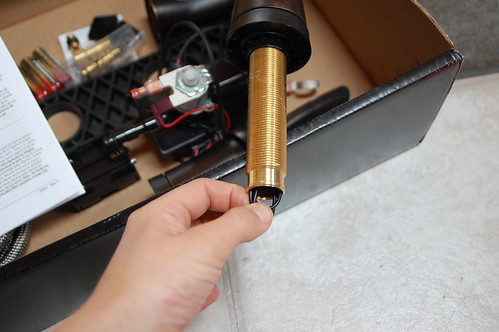
1.) Wire comes out of spout shank.
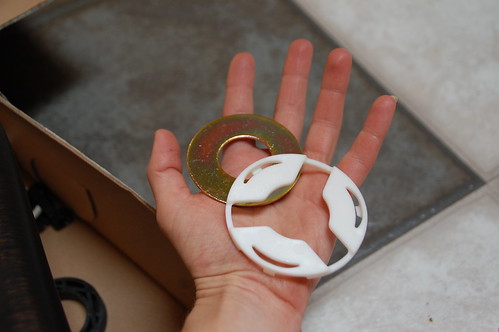
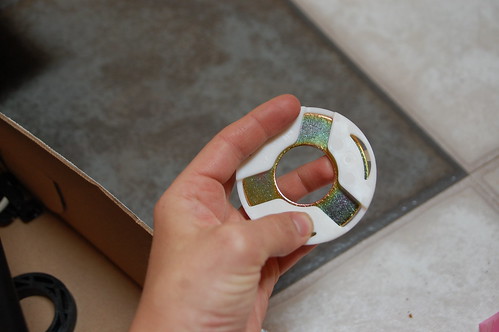
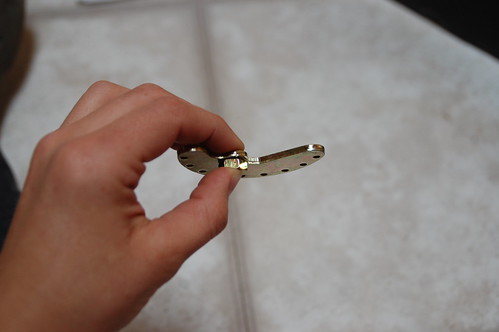
2.) Metal washer and spout insulating element get snapped together.
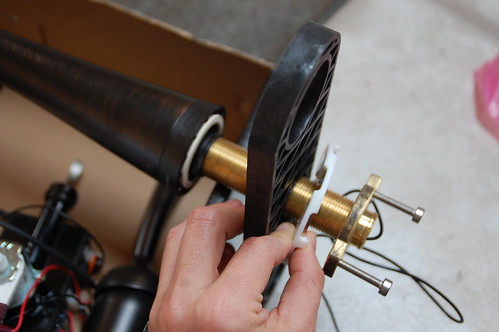
3.) Dry fit assembly. The spout and white gasket on top of the “counter”, the large mounting bracket (used for top mount sinks only) washer and insulator, and nut to be attached from underneath.
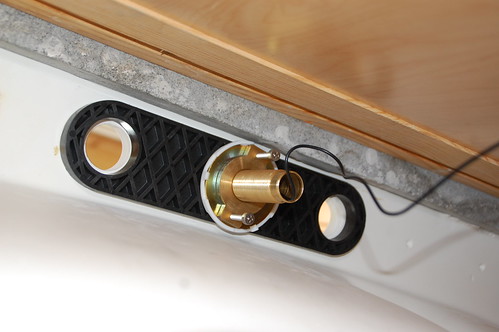
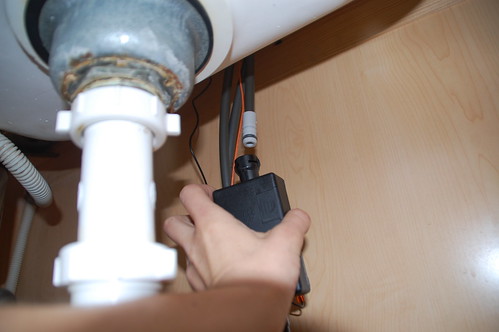
Here’s what it looks like from under the sink:
And that part is done.
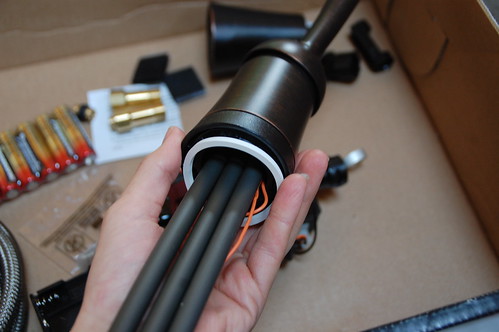
4.) Gasket goes around the valve with 101 wires and tubes coming out of it.
5.) Tubes and wires are fed through the proper hole and the the valve (aka handle) is secured with the mounting bracket. It comes with a wrench to do the job, or you can use one of your own.
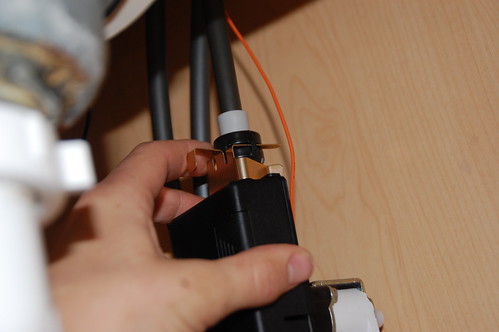
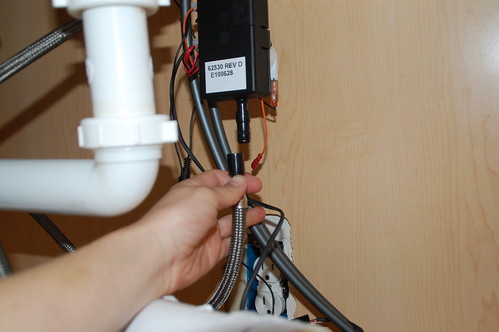
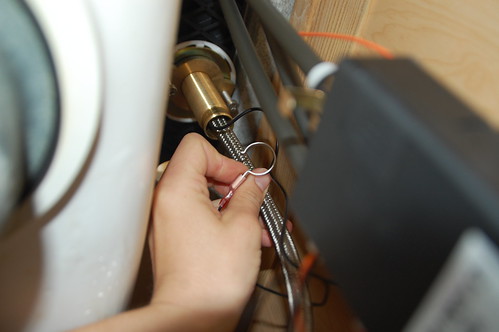
6.) This fancy thing is called a solenoid, and the metal part is the retaining clip. Of the tubes and wires that are attached to the valve, the two long ones go to the hot and cold water supply lines, the wires attach to the side of the solenoid (we’ll get there in a sec) and the solenoid itself is attached to the “short tube”.
It slides right over the top and is held securely by sliding the retaining clip in place.
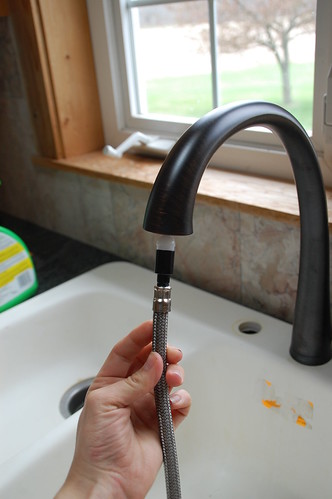
7.) Install the hose by sliding the hose guide on the leading end of the hose.
Thread the hose through the spout. You might have to give it a little jiggle or two at the end.
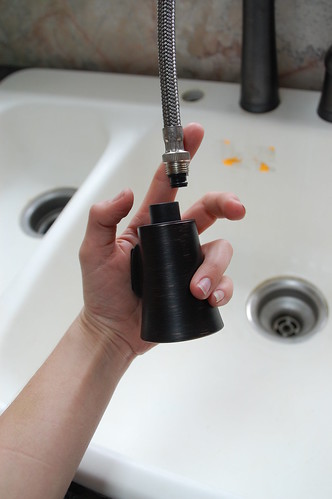
Attach the sprayer.
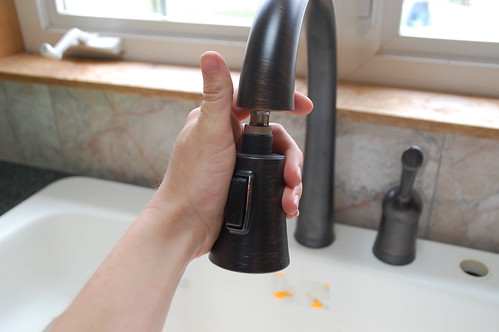
Dock it in place. (The secret is magnets!)
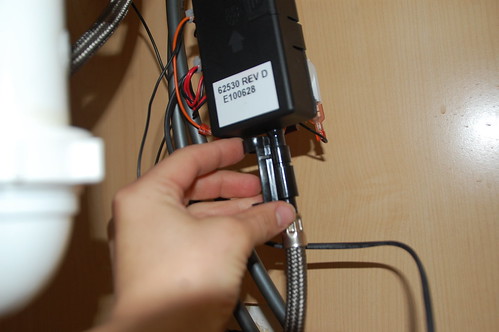
8.) Attach the other end of the hose to the bottom of the solenoid by pushing it in place.
Snap the clip over it to secure.
9.) And for the fun part… wires! (It’s not that bad.) Attach the ground clip to the bottom of the spout.
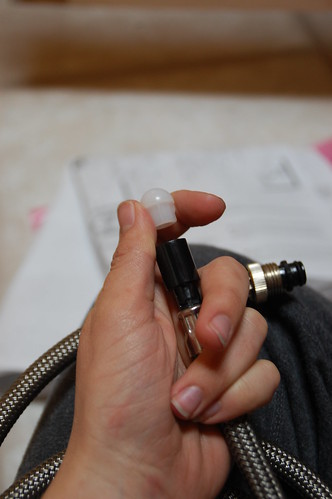
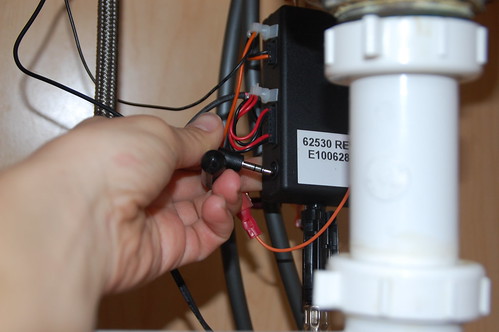
Pull the protective cap of the wire from the shank (it looks like headpones) and plug it into the jack on the side of the solenoid.
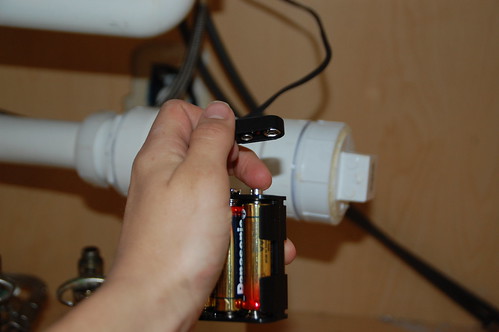
Snap the battery wire on to the battery pack. Note: Follow the actual directions and install the batteries after the wire is attached. I did not. The world didn’t stop turning on its axis, but those batteries quit working like eight hours later. It could be because they sat in the box for two years, or it could be karma for not following the directions. So… fair warning.
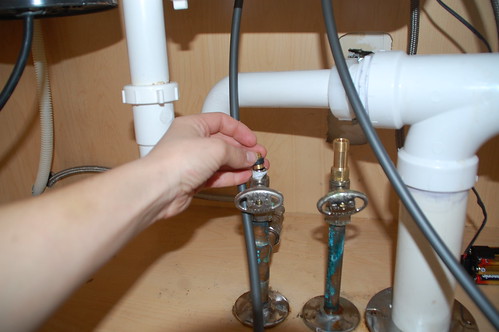
10.) Install check valves onto water supply lines. They have little pieces that go inside them… don’t forget those. Also this is the one spot where I chose to use teflon tape.
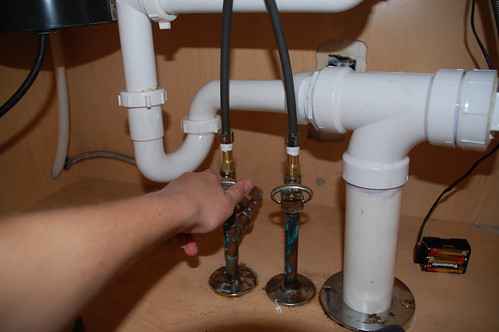
11.) Install hoses onto check valves. One thing I love about all delta faucets is that the pex tubing runs all the way through the faucet to the supply line, which means you don’t have to attach the hoses both at the supply lines and up on the faucet (which is a pain in the ass) like with most other manufacturers. For this reason alone I’d only install Delta faucets.
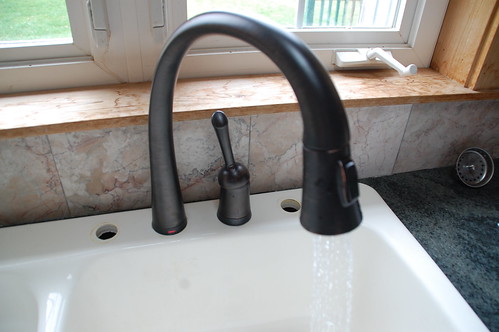
12.) Then, it’s moment of truth time, turn the water on at the supply lines. Move the valve into the “on” position, and spend ten minutes “touching” the faucet on and off and alternately giggling like a school kid and basking in your DIY plumbing glory.
It took me about a day to get used to it, and then I had that small issue with the batteries needing to be replaced, but I’ve been living with this faucet for over a week now and can tell you this: It’s way more fun doing dishes now.
Truthfully, I never used the little sprayers that come with most standard sink faucets, but I put the head of this one off the base and use it as a sprayer all the time. There’s no fighting with hoses or water pressure, it just goes nicely back into place when you’re done.
It will be a little while before the rest of this room starts moving into dream-kitchen territory, but the sink is well on its way!


22 Responses
Awesome – I’ll be waiting for the “Plumbing 102: Uninstalling the Delta Touch20 Faucet” post in the near future… I thought I wanted one of those until I did dishes at my sister’s house… it’s a PITA as you always unintentionally turn it on and off… Maybe the Delta Tough30 will be able to read your mind…
I absolutely intend to uninstall it when moving it to my new sink, sometime in the vague future. But it’s definitely staying for now! I agree that it did take me about a day to get use to the nuances of it, but it didn’t take long for the right habits to set in. For anyone who is interested:
– Touching the sprayer does not turn the faucet on or off (at first I was accidentally touching the base and it would, but I adjusted quickly)
– A “long touch” (to move the position of the faucet to the other side of the sink) will not turn the faucet on or off, so I make sure not to just knock it over with my hand
– The handle of the faucet needs to be in the on position for the water to actually run, regardless of if you’ve touched it on or off
– The faucet automatically stops running after 4 minutes to help conserve water (as someone who has left the water on in the kitchen, gotten distracted, and come back into the room 45 minutes later with the faucet still on, this is a great feature)
Like anything else though, I totally agree with you Meredith. It takes some time to get used to it!
It sure is a thing of beauty!
Great job – I love this model, it comes in handy if you frequently cook at home and are quick to dirty up pots and pans. I always feel like most people are scared of plumbing issues because in the back of their mind they think somehow, impossibly, they’re going to connect to their sewage line or get used toilet water or something. it takes time and attention, for sure. Great job, again.
Thanks, Kit. I’ve been wanting to see how these faucets work.
She’s beautiful! Thanks for the easy to understand tutorial and especially for the details about Delta faucets!
That really was an awesome trip to Indianapolis. The people at Delta were incredibly gracious. And getting to install those faucets, as we all did, was a real eye-opener. I had no idea something like that would be such a straight-forward proposition.
Cool! I’ve been wondering about these.
Couldn’t agree more about soap dispensers.
I love the faucet so cool! And as always your how-to guide is clear and easy to follow. I do have one question though. What are you going to do with the two extra holes left in your sink?
Thanks again
Kit – Sorry about the random question, but at least it is plumbing related…kind of…
I need a gas drop added for a dryer.
Do you or your blog readers have any suggestions for a good licensed plumber in the Ann Arbor area?
thanks!
Kudos to you for this step by step guide. You have done a great job with the photos makes it very easy for anyone to follow!
I’ve had this faucet for months and have loved it. Suddenly it stopped working, so I replaced the batteries. Still can’t get it to work again.
Everything I read talks about hard wiring it. I don’t want to do that, I just want it to work. What am I doing wrong?
Thanks!
Loved this faucet when first experienced it in the house we recently purchased. However it now turns on for long periods when not even touched. One would think they have a ghost living in their home. Trying to troubleshoot on the internet and see others have had similar issues but cannot find the ‘fix’ fir this problem. Any help you can give would be greatly appreciated!
My touch isnt working at this time. I thought aI would be able to manually turn on and off faucet. Doesnt work at all. Any advise?
Hello my delta touch 20 leaks after I shut it off . What could Ido next
Depends on where it’s leaking from… I’d check the seals (particularly on a faucet that hasn’t been used in a while.)
I have had my delta touch for 4+ years and I love it. However, now I have a leak and it seems to be coming from the handle and water is constantly pooled at the base of the faucet. My husband popped out the little cover and tried unscrew it with an Allen wrench and he could not get it to budge. Any advice/tips?
Thanks in advance.
Kim
Hi Kit. My faucet was already installed in my house when we bought it. The light was always blue when we touched the faucet, and now it is red. Is that a sign that the batteries need replacing. Thanks.
Yes! The batteries should be easy to replace, and are located under the sink.
My Delta Touch Kitchen faucet is about 2 years old and has always worked perfectly !!!!
We have just had new granite counter tops and a new sink installed; the plumbing was done by a licensed plumber who re-installed my Delta Touch Faucet.
Now, 3 days later, the faucet has started leaking through the spray nozzle after the faucet has been “touched” to the off position……as if the “touch shut-off valve” is leaking. New batteries were installed. It leaks in BOTH the hot & cold position. HOWEVER, the leak will stop if the lever is placed in the OFF position.
Please advise…….??
Stay away from this faucet. It’s fun at the beginning, but it’s rarely useful and having to change batteries to get water is not fun. (especially if there’s a babysitter in the house and you have to try to explain how to find the battery pack). And then wait til the first time the solenoid goes out. then you get to wait for the part to come in…no water in the kitchen until it does. No biggy – it’s just a few days. Oh but you get to save the six inches it takes to reach the handle when you can just touch the faucet – so helpful…unless you count HUNDREDS of times you accidentally turn off the water when you didn’t mean to, and have to touch it twice. NOT WORTH IT!
Comments are closed.