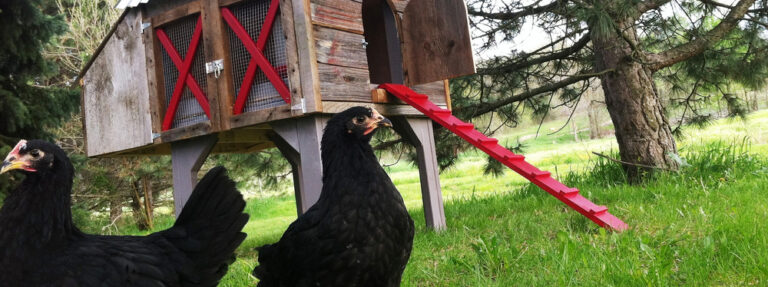
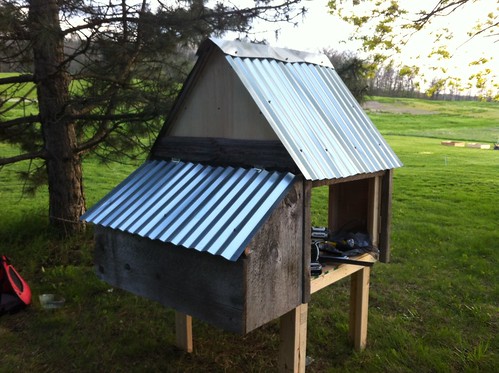
So, a few weeks ago I set out with the intention of building temporary housing for the Nuggets– a FEMA trailer of the poultry world, if you will– and instead my little flock ended up in a penthouse chicken suite. I may have gotten a little carried away.
And that might be the understatement of the year. But really, why go to the trouble of making all that sawdust if you’re not going to build something that’s at least a little awesome?
The chickens concur.
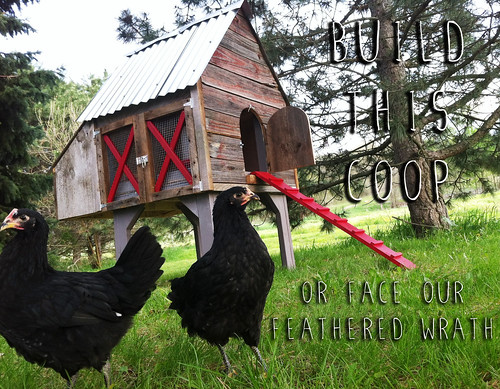
The Nugget Barn isn’t 100% complete, but it’s close enough to give you a look at how I built this baby from scratch with nothing but a picture for inspiration and a desire to use a lot of tools. (God, I love my tools.)
Anyway, here’s a fair warning before we delve into this project… I don’t have a step-by-step plan, complete with measurements, fasteners and “attach board A using screw B” directions for building this coop. My favorite part about building shit is not working from a plan, so I don’t have one to give you, but I can show you the techniques and tools I used throughout the building process– what things worked well, and what things almost cost me a finger. So hopefully that gives you a leg up if you decide to build your own chickens a small and tastefully decorated McMansion. (Really gives a whole new meaning to the term, doesn’t it?)
So, let’s dive in. Here’s a really high-level look at the materials and tools involved in this adventure…
Materials:
- 3/8″ Plywood – 1 sheet for the platform and roof sheathing
- 1/8″ luan – 1+ sheets to skin the sides of the coop
- 2×4’s – several to build the frame
- 2×3’s – several to build the frame
- 1×2 – 1 board for door accents
- 1×6- 1 board for ramp
- 3/4″ x 1/2″ trim – 1 piece for ramp treads
- old barn wood – various sizes for siding, trim, and doors
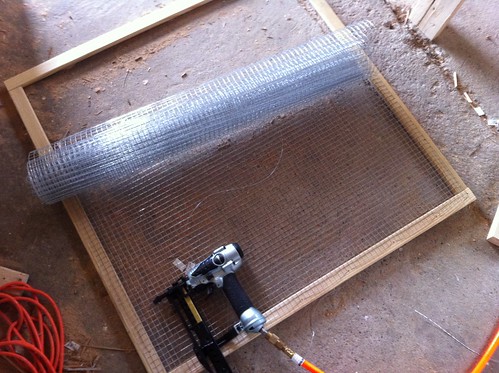
- 1/2″ wire mesh for doors
- hinges and latches
- corrugated metal roofing – 2 pieces for the roof
- 10″ metal flashing – 3 lf for the roof cap
- 20# roofing felt
- a shit ton of framing and finish nails, screws, a few brackets, and roofing screws
Tools (this is the fun part)
- Table saw
- Compound miter saw
- Circular saw (this saw was the hero of this project)
- Hand-held jigsaw
- Framing nailer
- Drill/driver
- Finish nailer
- Stapler
- Level
- Tape measure
- Chisel
- A not insignificant number of Band-aids (if you’re smart, you’ll replace this item with gloves)
Here’s how it went down:
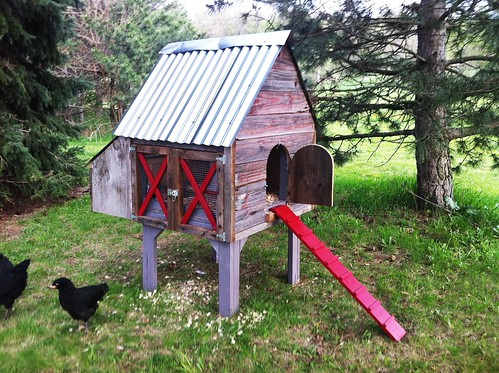
I started with this image from Williams-Sonoma (via Pinterest) as inspiration…

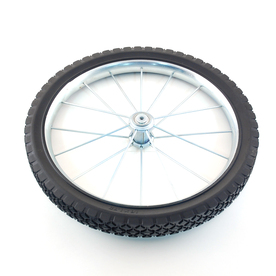
This thing costs at least $600 retail, but I spent under $200 in building materials, including the metal roof and wheels (which you’ll notice are not attached to my coop yet, but, you know, will be eventually.)
Side note: Sometimes people get a little up-in-arms about the retail price vs cost of materials, but I’ll tell you, given the number of hours I put into this baby, $600 is a fair price.
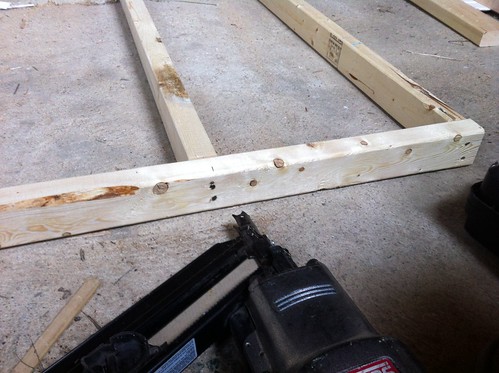
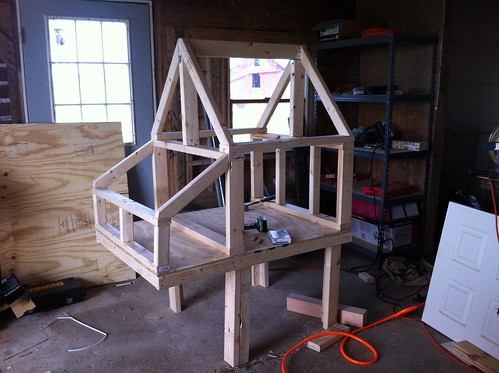
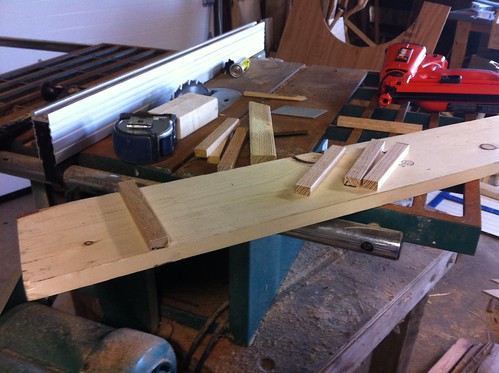
Now back to the building. I sketched this out a few times to really wrap my head around how I was going to build it, what supports would be striclty necessary and what ones I could sacrifice to keep the weight down. In the end, I started with a platform built of 2×3’s.

The platform is roughly 3′ x 4′, and I assembled it by end-nailing the boards into place, similar to how I would if I was framing a wall. (Here’s some more info on legitimately framing something, and all of the techniques can be used on a smaller scale when, you know, building a smaller house.)
Next up were the legs. I used a 2×3 and 2×4 for each…

The legs were about 18″ tall, and this was definitely the wrong spot to attach them…
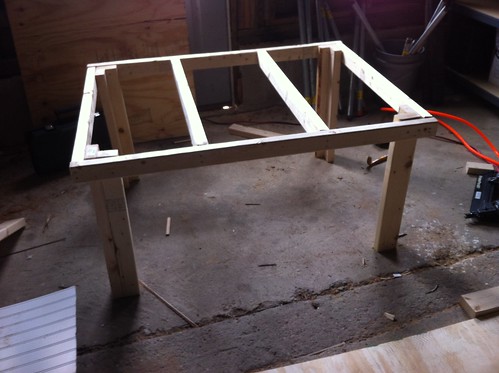
I mean, it makes a nice table, but the point was to have the nesting boxes as an overhang– this is the kind of thing that happens when you’re figuring it out as you go– but in the end, no big deal to take two of the legs off and move them to the proper spot.
There we go.
Now, at this point I should have also attached the braces for the legs, but I didn’t think of it at the time– which, in the end, meant I had to lay underneath the coop to attach them after the Nugs were already living in it. Unless you like chicken poop in your hair, I suggest doing it at an earlier stage in the build process.
Ah, well. Live and learn.
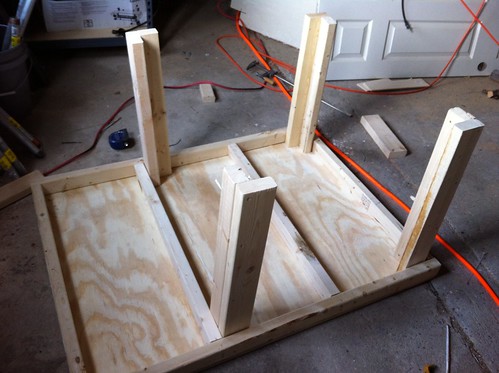
The top of the platform is 3/8″ plywood, cut to size with the circular saw and tacked down with screws.
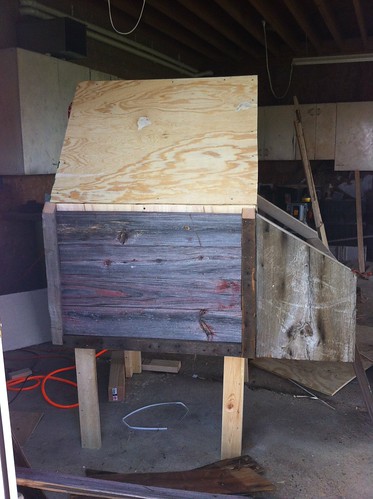
Then it was time to start actually framing the structure of the coop. I used 2×4’s for the main area.

And 2×3’s for the nesting-box “addition.”
Since I was figuring out the dimensions as I went, when it came to cutting angles I would hold the board in place and mark the cut-line with a pencil instead of making my eyes bleed with mathematical equations. I’m building a chicken hut here, not a bridge.

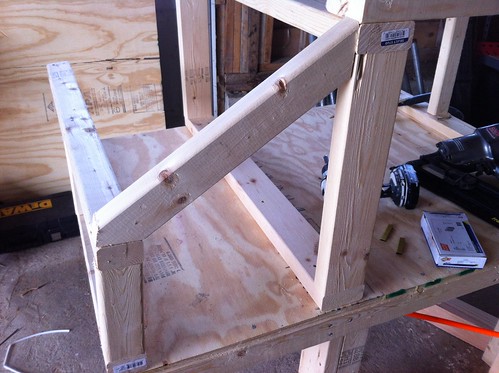
You can see the beam for the top of the roof was attached with brackets, but everything else was nailed together with the framing nailer.
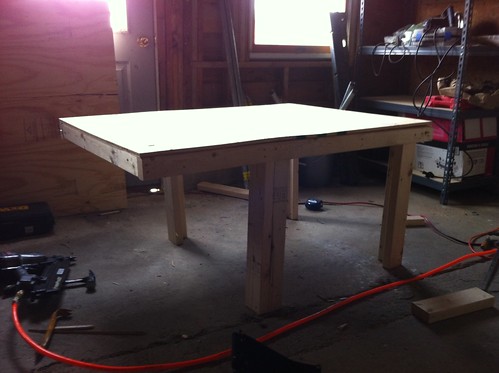
Here’s what the coop looked like framed in.
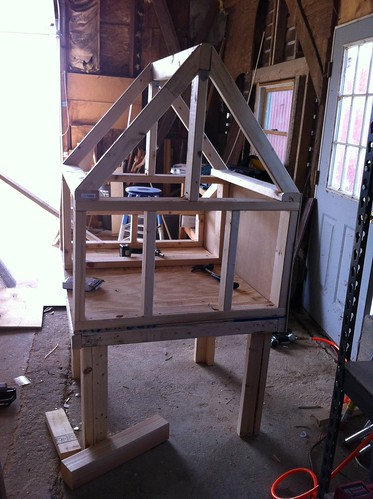
Next up was figuring out how I wanted to sheath the damn thing. There are a few things to take into consideration here, particularly the type of siding you’re using and your climate.
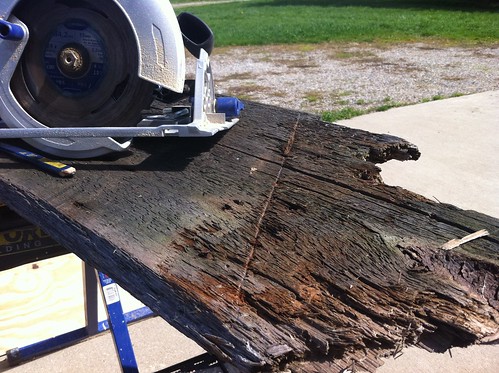
For example, if you were using something like T1-11 siding, you could probably just use 1/2″ without sheathing the coop first. I decided to use some old barn wood, however, which coincidentally, came off of the very barn in which I built the coop.
“Well hello down there. I will make something awesome out of you one day. Like….. now.”
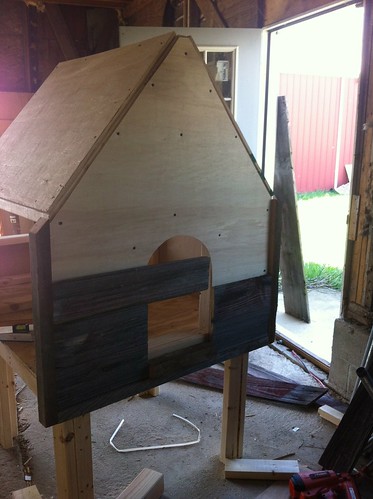
It was fairly warped and not very structurally sound, so I decided to sheath the coop in 1/8″ thick luan first, to make sure the Nuggets would be protected from the elements. I used screws every 6-8″ on the studs to attach the sheathing.

To cut that arch I first tried to freehand it, and then realized I was being an idiot and wrapped a piece of wire around a screw and my pencil.
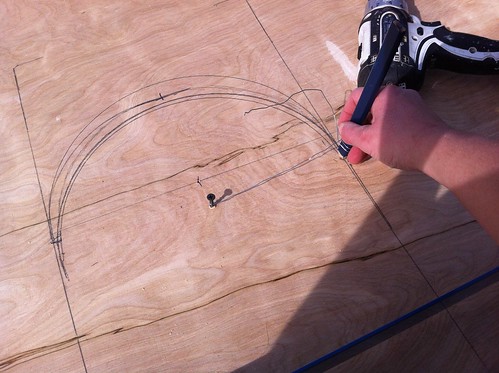
Makeshift compass for the win. (Of course, I later realized my actual legitimate compass was exactly seven steps away from where I did this, but whatevs. It worked.)
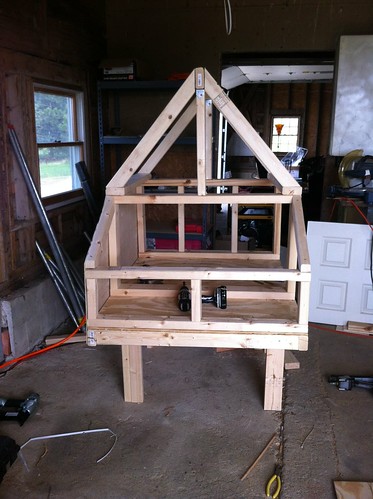
Next up was siding. For the trim I ripped down some 2×6 barnwood on the table saw.
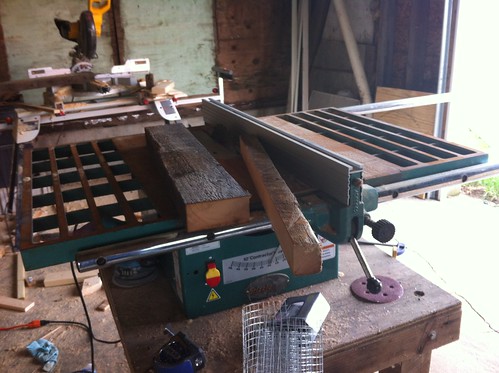
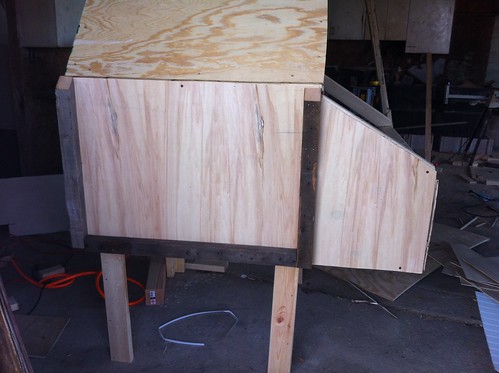
Then filled her in with barn wood.
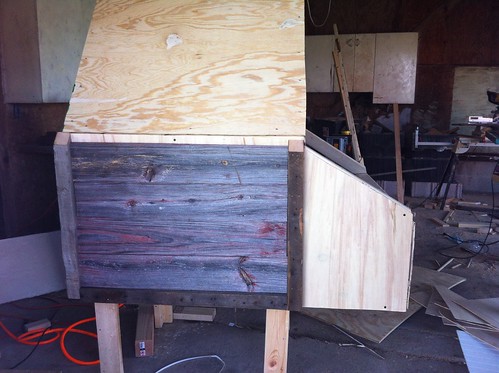
Just for fun I used some different wood for the nesting boxes.
Two tips about working with old-ass barn wood. 1.) You are going to get splinters. One of them may still be under your fingernail three weeks later…
…and 2.) Sometimes you’ll need to creatively persuade a board into place. With clamps, a hammer, and the sheer force of your stubbornness.
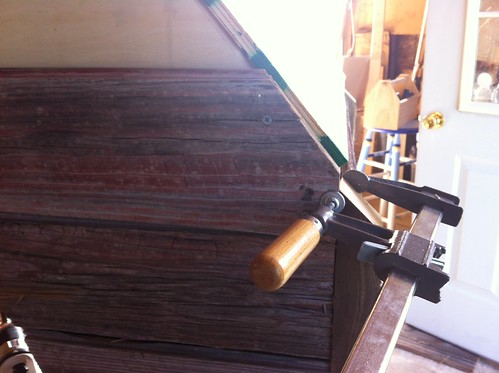
But it’s worth it.

Next up was putting the roof on. So, here’s a true confession for anyone who thinks I brazenly take on any project with the slightest hint of fear… that’s a big fucking lie. Number one on the list of projects I’ve manage to avoid in the last decade is “things that occur on a roof”, number two is “things that involve cutting metal.” So basically this portion of the project gave me enough frown lines to keep Botox in business for the next decade.
But, before you write me off as a the worlds biggest wimp, last year I had to suck it up and re-roof the donkey barn which taught me a lot about roofs and getting the eff over my fear of falling off of one. And since I wasn’t actually going to be climbing on the roof of the Nugget Barn, all I had to do was put on my big-girl tool belt and cut the corrugated metal roofing down to size.
Here’s how that part went down…
First, the metal roofing panels I got from Lowe’s were actually a lot thinner and lighter than I expected them to be, which bolstered my courage when it came to cutting them down.
I decided to use my circular saw with a metal cutting blade, which meant the wood blade had to come off…
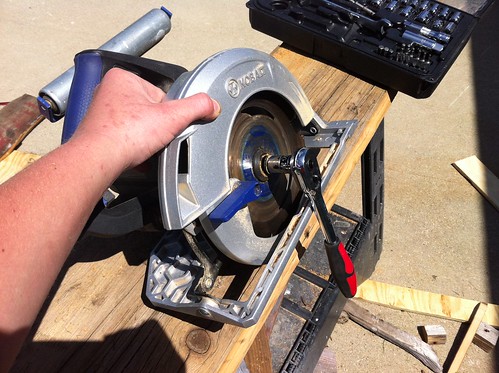
Metal blade went on, along with safety glasses (which are 100% necessary unless you want your eyeballs burned out by little flying pieces of glowing hot metal), but I did not put on long sleeves or gloves. In retrospect, sharp edges of metal roofing + gusting winds = goodbye fingertip. So. Yeah. Don’t do that.
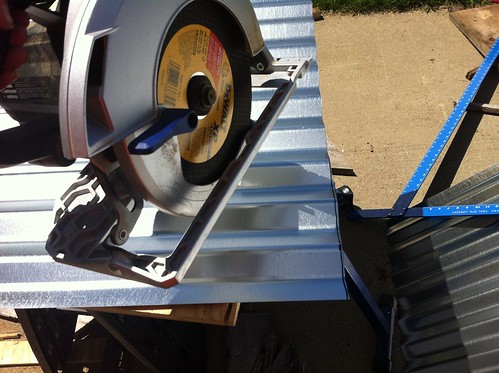
Cutting the roofing was much easier than I anticipated though, even with the wad of gauze and bandaids keeping me from bleeding out all over my new chicken roof.
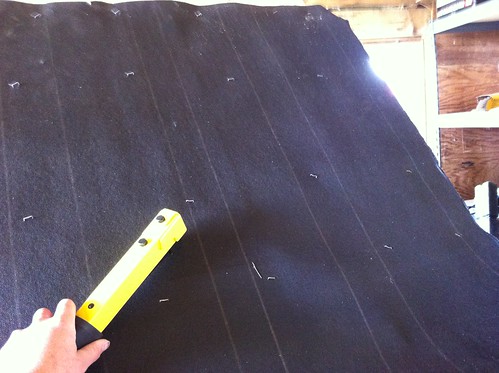
To attach it, I put 3/8″ plywood on to sheath the roof, then stapled on some roofing felt…
Then the pieces of metal roof were attached, overlapping, using some metal roofing screws that have a rubber gasket on them to seal the hole as the screw is driven.

For the cap, I used some aluminum flashing and a makeshift brake (ie a 2×4 and my T-square) to bend an angle into it.
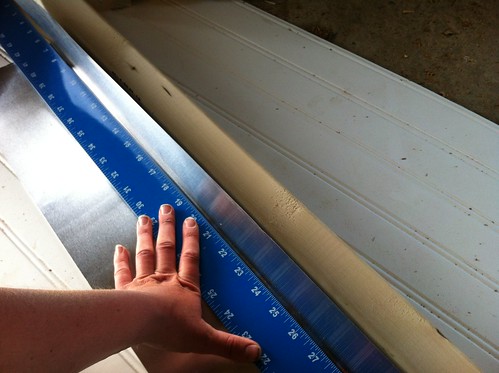
This works for now, but I need to find some thicker metal for the final cap.
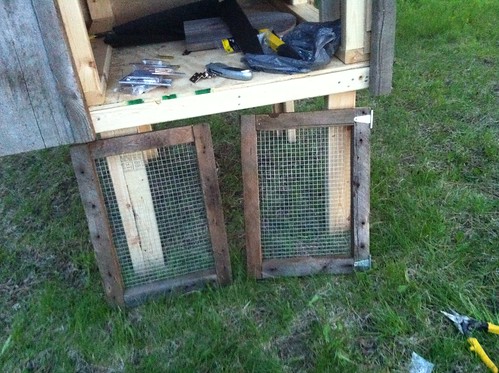
The last thing that needed to be done for this phase of coop building was to build the doors to the side of the cage and attach everything.
To build the doors I ripped down some old barn wood (similar to the trim) to make the frames.

Then I clamped them together, used my staple gun to attach the wire cloth, and screwed some metal brackets in over top to both hold the frame together and keep the mesh in place.

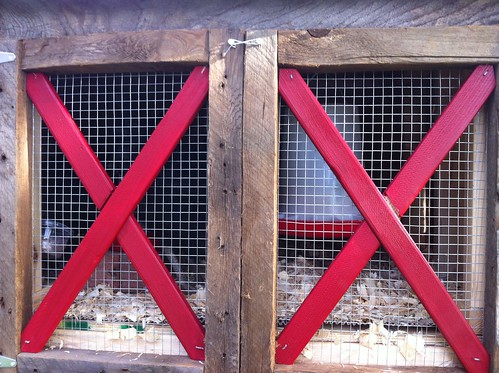
Once I held them up to the coop though, I knew they needed a little something extra.
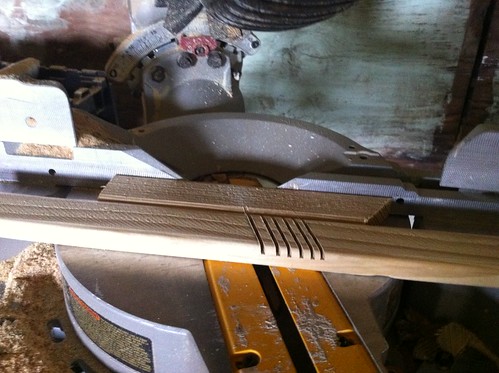
To make the cross braces, I used some pressure-treated 1×2 (technically scraps from building the frames for the run, which I’ll get into in another post). To get them to lay flat I used the same technique as I did when I built the legs for this picnic table— cut notches into the wood then chiseled them out.

Plus a little paint…
The very last thing was to build the ramp so that the nugs could actually get in and out of the coop on their own.
This is a 1×6 with the treads spaced every 4-5 inches, evenly across the board.
I glued the treads in place and then tested it out with the actual end-users before finishing it off…

Ehhhhhh…. what is this strange thing that is ergonimically designed for my little chicken feet so that I can easily make my way up and down from the penthouse?

Who needs wings?
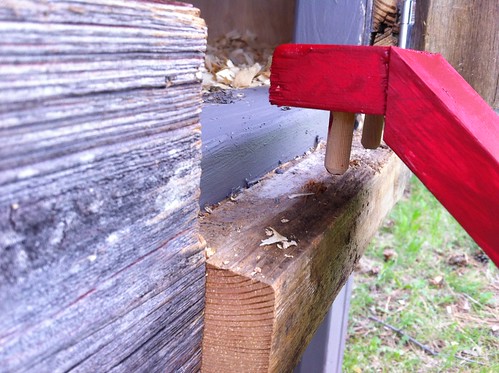
To finish the ramp off, I added some dowels to the top and then drilled holes into the platform on the coop to hold it in place.
The hinges and locks were the last thing to go on (and I’m still figuring out double-locking mechanisms for each of them, to keep any smart-ass racoons out.)

And then, of course, I had to but in the bed and kitchen.
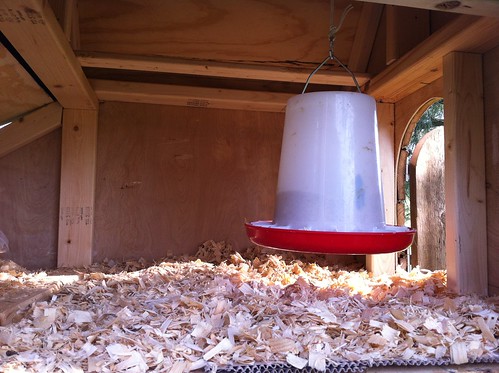
You’ll see I put a little roost in up by the roof (which is why the roof on my coop is taller than in the inspiration pic) and they totally love it.
Before they moved in, I also installed braces on the legs and painted any exposed “new” wood so that it didn’t stand out so much. I don’t 100% love it, so I’m deciding if I’ll clad the legs with barn-wood or just see if it grows on me.
The chickens have been living in the coop (and free-ranging when I’m home) for over a week now, and they seem to love it. You know, because I’m a chicken psychic now and totally know what they’re thinking.
However, the Nugget Barn is not quite complete yet. To finish it off I need to:
1.) Build a brace to hold the roof of the nesting box up to make it easy to collect eggs.
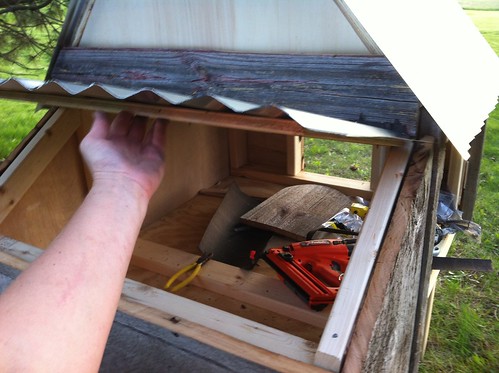
2.) Divide this space into 3 nesting boxes using some 3/8″ plywood and brackets.

3.) Build the attached run so they can be safely outside when I’m not there.
4.) Attach the wheels/handles to make the coop portable.
And that, my friends, is how the Nugget Barn came into existence. It was a really fun project, and there are so many different ways you could finish these things off with new and re-claimed materials. (Which may or may not be proportional to the number of ways you can find yourself in a little padded room for hoarding farm animals…)
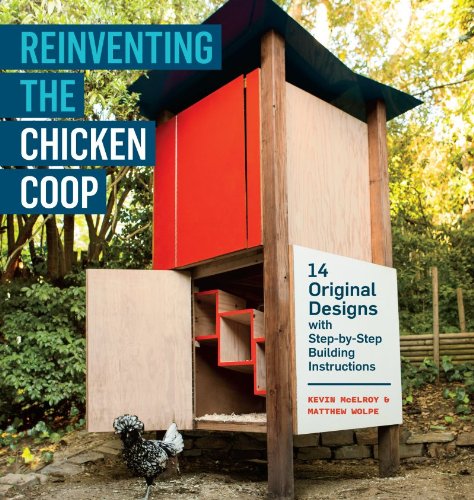
If you’re looking to build your own coop from scratch, here are a few books that were extremely helpful when it came to inspiration and building techniques:


37 Responses
Great project. It looks like a lot of fun with a lot of tools and materials. I love the use of barnwood.
It’s too easy to get carried away with building homes for chickens. Ours is still not finished, but feels like it’s approaching nicer than our actual house. I’ve had a blast building it though!
This looks awesome! Congratulations, and (not that you won’t, but) make sure you research raccoon-safe locks/securing devices – you wouldn’t believe how determined those guys are, and smart as whips (studies say they remember the “solution” to a puzzle tasks for up to 3 years).
What happened to the chicken you splinted? Any improvement on the toe, even if it didn’t bother her?
I love it. Perhaps a different color for the legs would be easier on the eye. Repainting would be easier too!
Awesome. Love the look of the reclaimed wood. I for one, don’t like working from plans either. It’s easier to build for personal taste and functionality.
I would love to get some chickens around here, but I think my development by-laws frown upon that sort of thing. I’ve never had farm fresh eggs though and I’ve heard they are unbelievable.
Seriously incredible. Worth the missing fingertip, I’d say, but then, it’s not my fingertip we’re talking about here.
I think it looks awesome, and over time I bet the legs with weather and start to blend in on their own. The red is a really nice touch 🙂
We use carbiners (sp?) for locks on our coops. We’ve had the girls for almost 6 yrs. and no varmit invasion yet.
As for the nesting boxes, you’ll find that they will all try to get in the same box at the same time to lay their eggs. We just left the dividers out and left it as a “community” nesting box. They still all try to pile into one corner though!
Love the barn wood siding! Great job.
I’ll second the vote for caribiners. We use standard hasps with a smallish caribiner through the eye. Works great so far.
You’re such a badass inspiration. That is all…
Being a city boy I don’t know nothin’ about Chickens, but your “McNugget Mansion” looks pretty cool. How about using a piece of the corrugated metal (with the corrugations running paralel to the ridge) for the ridge cap?
I have a cabin and I am thinking of building one as well. The last chicken coop I saw is in my grandpa’s house. This is really a good design. I hope mine will look as good as this as well.
I’ve wanted chickens for years now and this has given me the kick up the butt I needed! Am no DIY pro but your blog has really inspired me, thanks =)
Hey love your blog. I came across these free kindle books and thought of you. I hope you’ll find them useful.
http://www.amazon.com/Chicken-Raising-Caring-Beginners-ebook/dp/B00BQI5FTG/ref=zg_bs_156699011_f_23
http://www.amazon.com/Permaculture-Chicken-Pasture-Basics-ebook/dp/B00BFE60Y0/ref=zg_bs_156699011_f_64
it looks great one thing though you should put cage wire on it over the hardware cloth cyotes and racoons tear right through hard ware cloth on our farm.
How many chickens does your coop comfortably hold? btw, it looks great!!!
Honestly, it holds 6 right now, but it’s a little tight. They only go in at night, and I would not leave them cooped up in there during the day. I’d say 3-4 would be ideal. (I’m in the process of building a bigger coop now.)
One of the most unique calls I ever received for roofing work was a chicken coop. We ended up making the whole thing for them, but it was one hell of a surprise whenever I got called up with this question! Maybe I need to add chicken coop roofing services to the services provided over at http://www.bestboulderroofers.com hahah!
Hi – I hope this isn’t too dumb of a question, but how do you get them to go into the coop at night?
You have to put them IN there! After dark, when they go to sleep (wherever!), pick them up and put them in the coop … where they wake up in the morning. In the evenings, as the sun is going down, herd them into the coop, using two brooms (or whatever) stretched out in your arms to direct them. If you are consistent, in less than a week, they will be going in on their own.
Great job! LOVED the way you wrote it up! (Well, maybe not the use of that one “F” word!) but you have a great “manner of speaking” that is just really “real.” Enjoyed reading your “Adventure in Coop Building” very much! Pictures were great too! Well done!
Hello, i believe that i saw you visited my web site so i got here to
return the desire?.I am trying to find things to enhance my web site!I guess
its adequate to make use of some of your ideas!!
thanks for sharing great project.i will follow it to make my own coop.
Hey what kinda brackets did you use on the 2x4s on the top of the roof
Pretty sure I just nailed those directly in to the roof ridge!
I’m currently planning my own coop but am interested in how you would winter proof this? Is is warm and secure enough during winter?
Thanks!
I ended up building a larger coop in one of my barns so I didn’t use this through the winter, although I know many people do. I don’t necessarily think a heat lamp is a good idea in a coop this size, but perhaps a heated floor pad. Some places that build similar coops will use rigid foam board to insulate inside the coop as well (you definitely still need some ventilation though.
This is a beautiful chicken coop I found a good plan here.
This looks very nice if not what you are looking for I found my plans here. https://goo.gl/wBgWw1
Very first time visiting your site (this link showed up on my pinterest feed). I’m digging it already! Love the fact you explained everything as you went, mistakes and all.
BTW, your one use of the ‘F’ bomb is exactly WHY I will continue to visit your site. You keep it real and I appreciate that. 😉
Keep the posts coming!
I love your writing style, not to mention your building! I will be following your words….tks for the entertainment!
Directed to ur site this AM. I am so into ur divashness! You are doing what I’ve always wanted to do. I’m 64 now and am starting out. Bought a small 3.3 acres and will be raising farm animals,at some point. Tools are my GOTO. I love to build and this is my turn. You have inspired my GO get em.
Thanks for ur posts, inventiveness and giving me the opportunity to live vicariously until I can get my feet on the ground and DO for me!
I love your style! And your McMansion too! I have my first 3 hens now and am loving them. Had to buy a ready-made coop until I could decide my building plan..your inspiration will help me take action.
Comments are closed.