Here is one of the truths we hold to be self-evident about home renovation… that shit is going to get worse before it gets better.
I don’t know how many times I’ve said that in the last decade of writing on this website, but I imagine it’s a lot. And yet I still sometimes enter projects with a wide-eyed optimism, and the belief that “this is just swapping out the tub and a little tile, guys, it seriously won’t take that long.”
Ha. Yeeeah. That “quick, little” project started four months ago. Four. That’s fun.
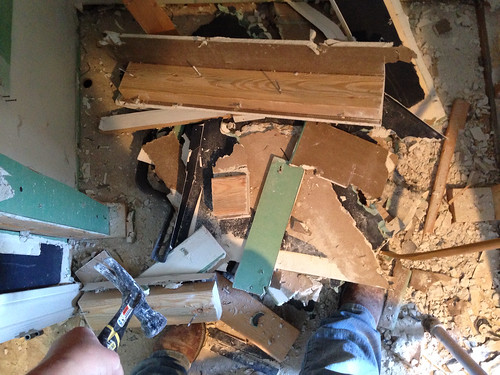
And shit definitely got worse…
In all kinds of ways.
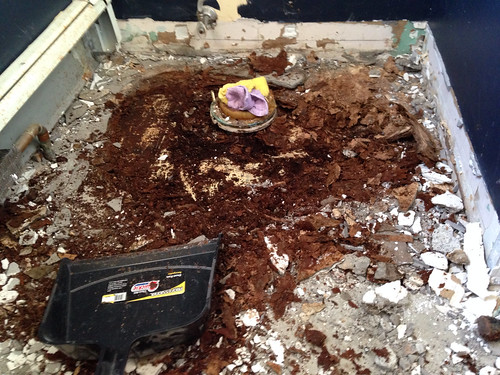
But even when you have to tear part of a wall down and find out that toilet water has been leaking in to the subfloor and spend an inordinate amount of time with drywall dust in your eyes, the thing to remember is that even though it always gets worse before it gets better…it does, in fact, get better.
And I’ve basically been doing one long happy-dance for the last 24 hours, because, guys? It is now getting better.
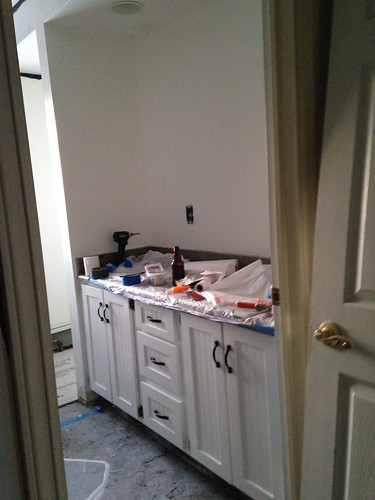
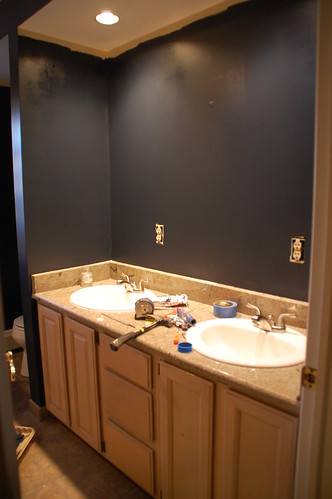
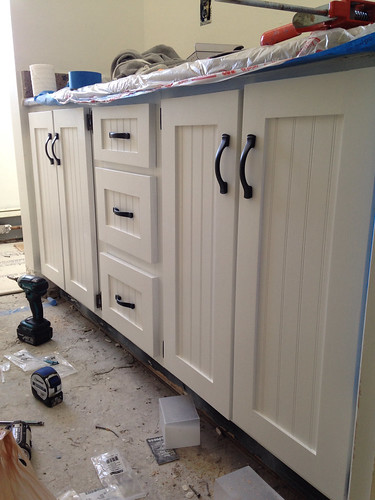
Goodbye mismatched, dated cabinet doors. You will not be missed.
Because there’s a pretty nice granite counter on top of those old-ass cabs, and because I already replaced the sinks a couple of years ago, I decided to just update the vanity by buying new doors and drawer fronts from Cabinet Door World a few months ago.
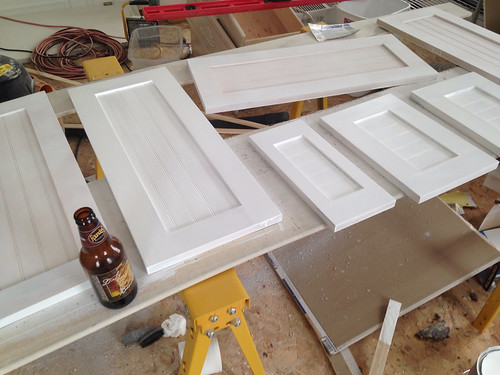
I spray-primed the raw wood doors with Kils primer-in-a-spray-can, and, honestly, was not real thrilled with the coverage. Then I brushed on the color (Moonlight White OC-125 at 25%… barely tinted). One coat on the back of the doors, three coats on the sides and front, with a light sanding between each… and more than one beer.
The doors turned out pretty good actually, but this still reaffirmed my desire to actually spray the kitchen cabinet doors instead of brushing when I do those.
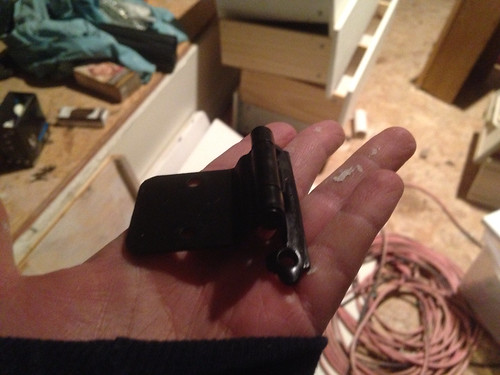
I just re-purposed the hinges from the old doors and spray-painted them flat black.
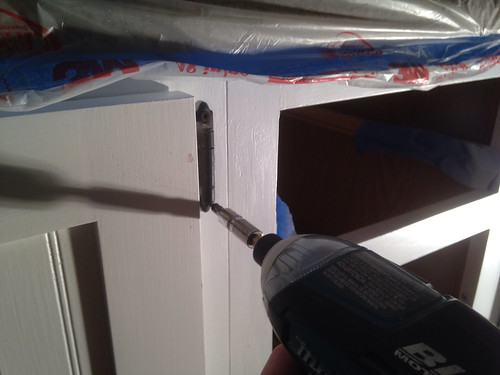
I know, there are a million different types of cabinet hinges. This particular kind attaches with two screws on the back of the doors, and two screws on the front of the cabinet frame. And the holes were already there from the previous doors, so that made it pretty easy. (Easy enough that in a moment of insomnia I decided to install these things at midnight on a Saturday.)
Now, I’ve been going back and forth on whether or not my decision to just re-face this vanity was the right one. Having the doors on was definitely a check in the “good idea” column, but then I looked at the existing drawers…
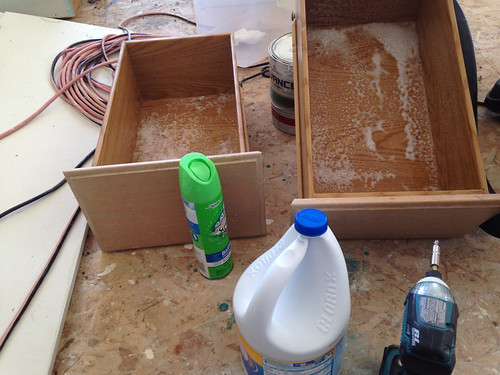
I can’t even look at a picture of these things without my gag reflex kicking in. I’m a person who shovels animal shit on a fairly regular basis, so I’d like to think I’m not too squeamish about things, but for some reason these drawers with other peoples hair and what I think were toothpaste stains all over them? Yeah, I feel sick just typing that.
I briefly considered just scrapping the entire vanity right then and there. Then I thought about just pitching the drawers and bolting the drawer fronts on to the cabinet. Then I thought about building my own drawer boxes.
What I decided was to bleach the hell out of the existing drawers and “use” them for the time being. I mean I don’t intend to actually put anything in them because I’m so skeeved by the whole thing, and if I decide I really need the storage I’ll rebuild the boxes sometime in the future.
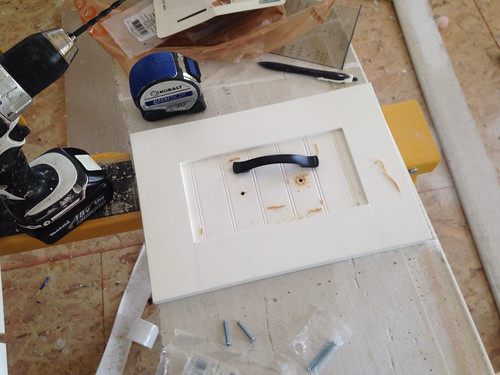
In the meantime, I picked up some cheap-ish hardware and couldn’t resist installing it…
The standard-length screws that come with cabinet hardware don’t love it when you try to install a handle in the middle of a drawer with a 1/4″ recessed panel, so I had to do some rigging for that as well… another thing I’ll take care of if/when I rebuild the drawers.
But really, the important part here is this…
When the floor tile is in, I’m also going to fashion some “feet” to make the vanity look more like a piece of furniture, but I think it’s still looking pretty good either way.
And the crazy thing is… this isn’t even the exciting part of my progress.
The exciting part is that I mostly held up my commitment to working an hour a day on the bathroom over the last week, and I made some decent progress on the tile board. Which seems like it should have been easy (ha) but this house keeps reminding me in new and exciting ways that work in an existing and old-ass house is a whole different ballgame than work in new construction.
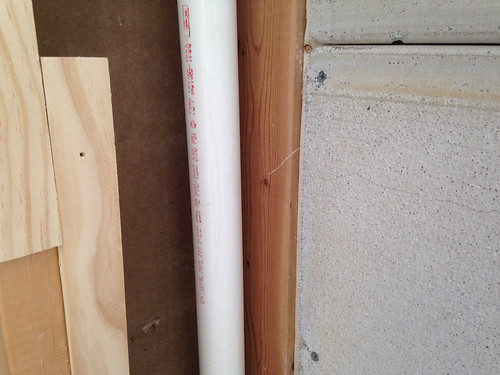
This, for example, created a small delay…
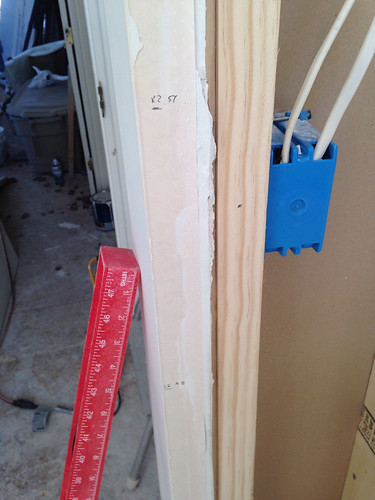
If you’re wondering what that is… it’s a picture of some poor planning on my part. See the stud? Well there’s only a half-inch of it exposed to install the tile board on to, but because I put the back boards on first it covered my “nailing area”… and since there’s a vent pipe rightthehellnexttoit I had to get creative on figuring out how to create a nailing surface.
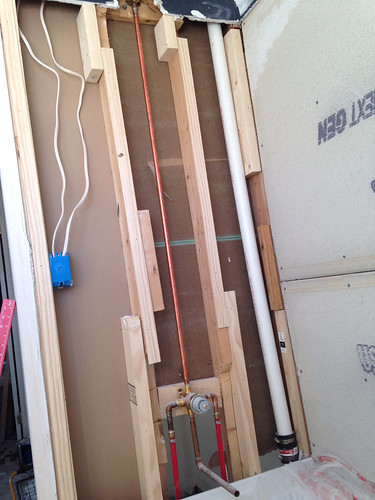
There were also a number of different parts of this wall cut out when the old tub was removed. In retrospect, I should have just taken the whole thing down and rebuilt it, but here we are…
Ha. Structurally she’s perfectly sound, but I actually had to devise a mapping system so I new how to screw the last piece of tile board to the “studs”.
The good news is…
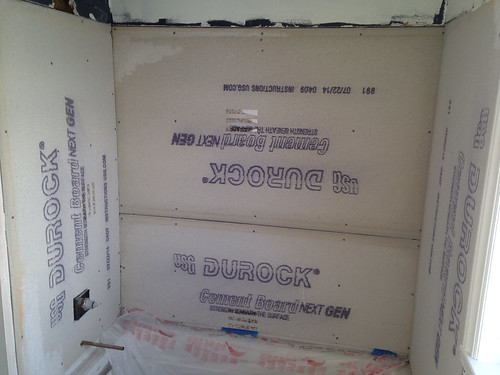
THE TILE BOARD IS DONE.
Well, in the tub at least. Getting those four boards up should not have been such a large ass-pain, but between furring out the walls, and dealing with the studs, and all of the other fun little challenges and old house brings, this took approximately seventeen times longer than it should have.
But still. Done. It’s finally getting better.
I’ve still got to mud the seams and do some other prep, but I expect to have tile going up by the weekend. And that’s definitely worth some celebration!


25 Responses
I converted a dresser into a vanity, and I was dealing with some rather gross drawers, and because they were older drawers, they also had some splits in the thin wood on the bottom. What I did was take some old sheet music (from an old music book I got at a garage sale) and glued the sheets over the entire interior of the drawers. I like this so much better, and if it gets dirty looking, I can just glue another layer on it.
http://3.bp.blogspot.com/-50ZKpT2-_74/T4RxeWM-xpI/AAAAAAAAAgA/x8rK-TlERT8/s640/IMG_2113.jpg
I’m totally skeeved out by other people’s hair touch me in any way. When I moved into my last cubicle at work, there was lots of hair in the drawers. GROSS! What about contact paper in your drawers or just spraying them down with kilz and then a paint coat? I think that might get the skeevey hair germs.
GRATS!! Glad to see you got it knocked out!!
I’d have been tempted to take a big sheet of paper from my 36″ wide roll, tack it up there with some location points on adjacent surfaces and trace out the stud/nailer locations…then use that as a template.
Likes the scrubbing and Kilzing the drawer interiors idea.
Congrats on the positive progress! Love the look of the cabinet doors and drawers
I feel like you need a “Don’t Drink and DIY” sign in your house…with the “Don’t” crossed out of course 🙂
Congrats on the progress! Are you sticking with your hour a day plan this week too? It’s amazing how much you can get done in just an hour.
I know what you mean about the drawers. I’ve decided to trust in the power of bleach and my cleaning skills and have been using mine, but it occurred to me the other week how much I’m looking forward to putting things in fresh, new, clean kitchen and bathroom cabinets. No idea when it’s going to happen, but it’s going to be a great day.
Drawer boxes are just that, boxes. They’re not hard to make. I join mine with locking rabbet joints which I make on a router table, but before I got the skills for that I made a simple box that was joined with nothing more than butt joints that I held together with finish nails and glue. Those were the first drawers I did for our house in 1992. My wife is in them every day of her life (they were in her closet), and all these years later, they still work perfectly. You already have the drawer fronts and can remove them from the existing drawers and plant them on to the drawer boxes after you’ve hung them. If you’ve not done this work before, you may find it a bit daunting but that’s just because it’s new. It’s not difficult. With your skills I really do not believe you’ll have a problem with it.
Not sure what you did with the screws to make them work, I’m guessing washers. Just take a grinder and cut them down to size.
Nice job! Way to repurpose cabinets!!
First, I love the way the cabinet look. It’s like a whole new cabinet and gives the room a whole new feel. It’s pretty awesome and inspiring. I would think re-building the boxes would be such a waste of your effort (for something you’ll never see or really have to use yourself since it’s a secondary/guest bath). I have always just used plastic drawer organizers (kind of like you’d use for kitchen/dining utensils). Anytime the organizers get dirty, you can just toss them in the dishwasher. Looking forward to the next progress post!
Hooray!!! That’s awesome progress! I love your mapping system for screwing in the tile board at the head of the tub.
I too, am super disgusted by old drawers. Kitchen drawers/cupboards as well as any bathroom shelves or drawers. In a cost saving measure when we bought our current house, I used lots of neutral contact paper.
Paint those drawer interiors!
What’s the brown dust type stuff in those drawers?
They look like they have liners – I would take out the liners, wash the heck out of the drawers, let them dry completely and then put new liners in.
I think unless the cabinet and counter give you an eye twitch for any other reasons, I say just keep them, I think they look very nice now. While I know it is not going to be your primary bathroom, it would drive me crazy every time I had to pull out a draw and it was not the same color as the fronts. While I am easily grossed out, for me cleaning, sanding, priming and painting the draws to match would be enough for me to feel that they were clean enough to use. If the draws work well I would only make new ones if it would be easier and less time consuming to start new to get a nice clean finish. Though making new ones just because you want to is a valid reason, but I think paint should make them clean enough to forget about all past grossness, (and then it is done and not another unfinished project. :p)
Ahhhh…progress and looking good too! I agree with the others. Why bother with the drawer boxes when it’s an easy paint job? I love fitting glass in the bottom of my frequently used drawers and than It’s an easy clean with Windex.
Margaret
Luan sheets maybe… Line the drawers with it. It’s cheap and thin, easy to cut. And it looks like a new drawer. Totally seals out all the gross parts, at least on the bottom of the drawers. At least I wouldn’t be afraid to touch it any more. 🙂
I just wanted to say thanks and my respect for you (which was already pretty high, being the badass carpenter/artist you are) has doubled. Thanks for keeping the granite and working with it. I work in architectural salvage and we regularly rip out really nice kitchen cabinets where beautiful granite goes to waste (just because the new house owners didn’t like the color-though I can’t get on their back too much since they called a salvage team instead of just trashing them…). Granite (if installed correctly) rarely comes out in one piece, and it is such a shame to see such a beautiful resource reaped from the earth then discarded. So really, thank you.
Those cabinets are already coming along beautifully. Keep up the good work!
Drawer Boxes are way easy to make. I use my dado stack, and use a locking rabbet like Joseph above.
http://moiandmoney.com/2014/12/30/the-new-and-improved-25-drawer/
I just finished tiling a tub surround. And all I have to say is […] wedi board rocks!
I love this blog
The cabinet doors look very nice, as well as the handles. White always give an air of elegance and simplicity. Looking forward to seeing how the tile work will turn out.
That’s one hell of a stud scheme, but somehow when you’re working with studs and boards there’s always somewhere that you just have to be creative to get it done (at least that’s what my experience tells me anyway). Well done!
I am a plumber and I am forever telling customers that it will be worse before it gets better. I also spend a lot of time reassuring them that it will in fact look great when it’s all done.
Awesome post 🙂 Bathroom remodels are always the ones where we are excited to see the end results. It has to come out good
Comments are closed.