I officially started the kitchen renovation about a year ago, and between February and May I tore most of the kitchen apart, rearranging cabinets…
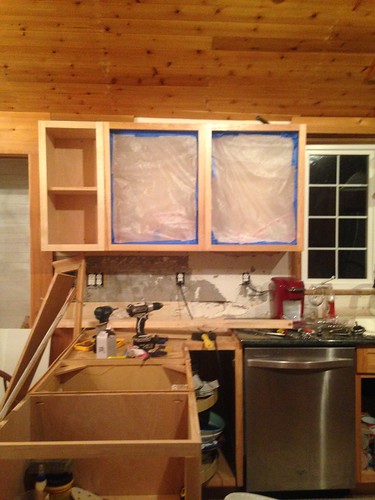
Taking the backsplash out (with the help of my mom and grandma)…
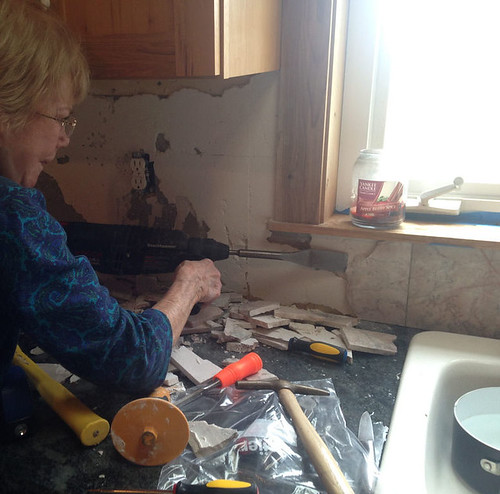
And taking out the granite counters and sink….
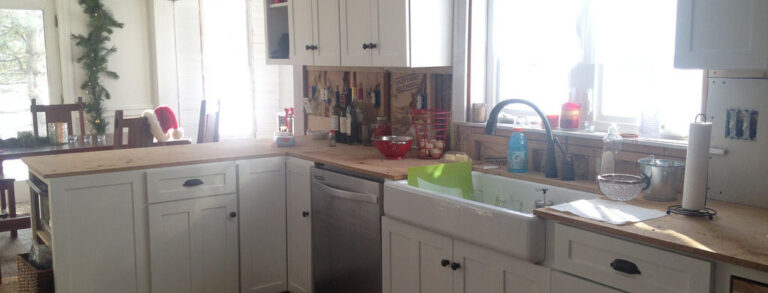
And then I started putting it all back together. I put new cabinets in (and built a few of my own to add to them)…
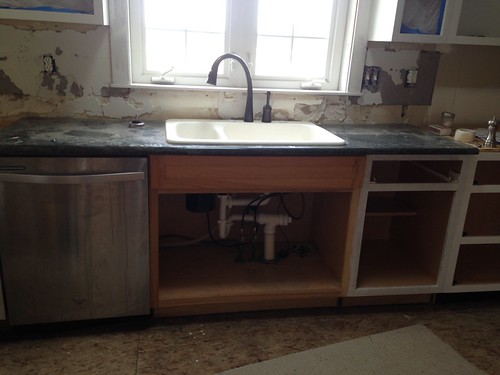
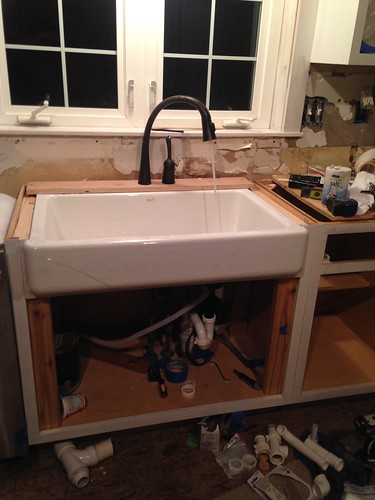
I installed a new farmhouse sink (which I freaking love, by the way, it’s amazing)…
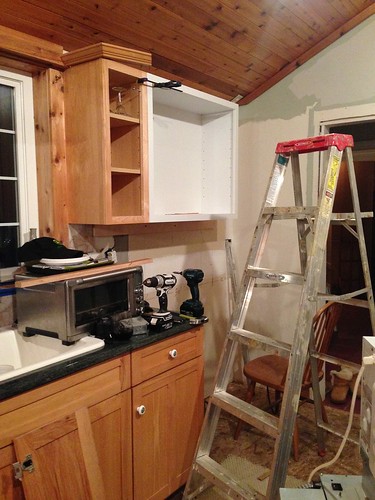
And I spent a lot of time sanding, patching, and priming a whole lot of wood on the walls, ceilings, and cabinets…
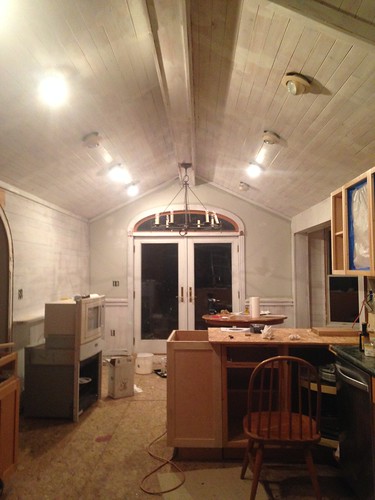
And then, mid-Spring, I put some MDF down for temporary counters, plugged the new range in, and called it good enough for now…
That’s just a part of the cycle on the farm. All of my indoor projects go on hold in April/May so I can go outside and garden, plant trees, maybe do something crazy like plant a bunch of grapevines, and I basically don’t come back in again until it snows.
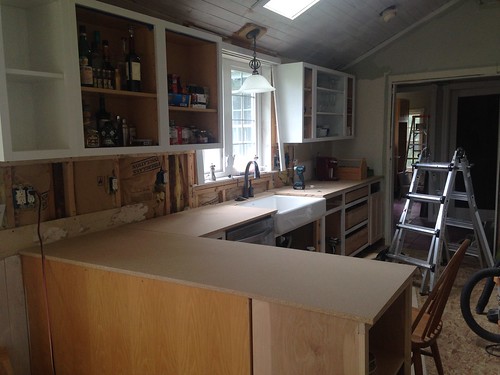
So, progress on the kitchen was stalled until mid-December when I decided I was absolutely not going through another year looking at all the junk inside my cabinets and spent 5 hours after work every night for a week painting cabinet doors.
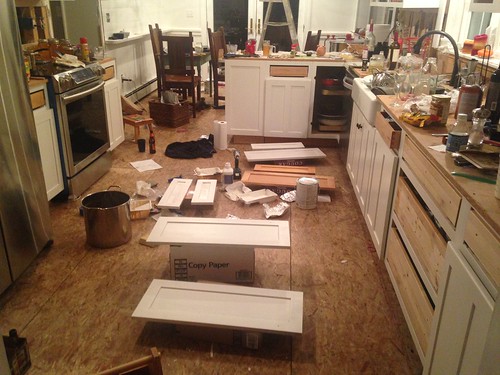
Yeah. That’s a pretty accurate description of the turn my life takes when I try to fit 30 additional hours of work into an already full week. Massive. Disaster.
However, once I got through it, it felt like the best 30 hours I’ve ever spent on a project in one week…
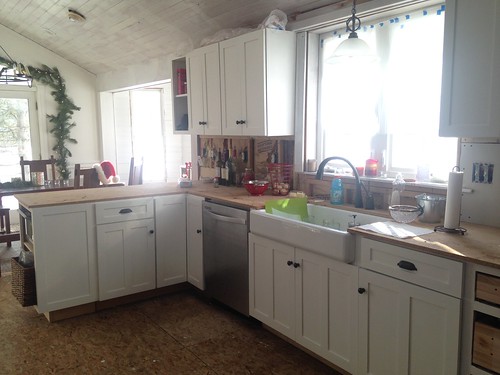
Hanging each door was like another weight off my chest (and brought a little bit of peace back into my life.)
It looks better, but it’s still not even really close to being finished. I don’t have any illusions that it will be done before the spring work sets in this year either, but here are the 3 things I’d like to be able to check off the kitchen list in the next couple of months.
1.) Finish the cabinets. Which means:
- Paint/hang the 4 doors and 4 drawer-fronts that haven’t been done yet
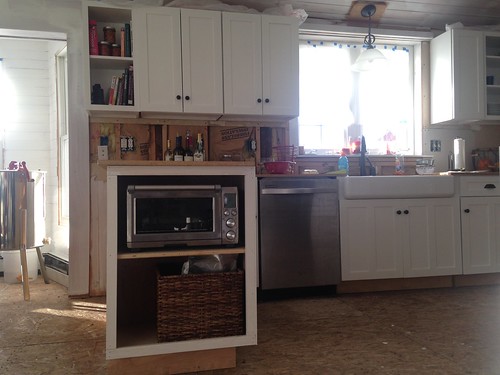
- Build and install box for range hood
- Build and install small filler cabinet for right side of new upper cabs
- Build drawer and sliding tray for new end cabinet
- Re-install crown and toekick
- Add trim and paint back side of “bar” area
2.) Install counters. I’d been on the fence about something like quartz vs. butcher block, and putting the cabinet doors back on made me realize how much I want the warm look of dark wood on the counters, so walnut butcher block it is. The big question is whether or not I’m going to buy the slabs and assemble/install them myself or hire that job out. We’ll see.
3.) Install backsplash. I’ve still got a few sections of drywall to replace, and then I plan to put up a tile membrane (like this one) and I’m leaning toward a traditional white subway tile backsplash (possibly hand-glazed like the tile I used in this bathroom) or, possibly a white hex tile? I’m undecided, but I’ll make the final call after the counters are in.
There will still be a fair amount of work to do on the walls, ceiling, and floors after that, but checking those 3 big items off my list will bring me a hell of a lot closer to a finished kitchen in 2017!

18 Responses
Looks nice Kit!!
Wow, already looks so much more finished with the cabinet doors on!
This kitchen is really coming together! Love white subway tile and hex tile … my mind sees the subway with dark counters. So which of the 100 ways to paint cabinet doors did you choose to do?
I’ll write a post on it, but basically:
1.) Wash with warm soapy water and dry.
2.) Apply 1 coat of sander/deglosser to both sides, and let dry.
3.) Apply 2 coats of shellac-based primer with foam roller (and brush for corners, etc.)
3.) Apply 2 coats of BMoore Advance Paint with foam roller.
Hi Kit,
I think the best thing you did for the kitchen was to paint the ceiling. You changed the space completely.
Re the butcher block. It suffers around the sink or water. Great on an island but needs regular wor,k to keep looking good.
Regards Janine
That was my big concern about butcher block… I know I’m not great with regular maintenance and my sink is under-mount on 3 sides which exposes the end-grain of the wood to water. But if I do it myself it will probably cost me 1/3 of what granite or quartz might, so I’m factoring that in as well.
P.S. There are products that will waterproof wood. I wrote about a lot of wood countertops made by professional companies. They all used undermount sinks in sink cabinets. I found a product in England that waterproofed wood. One guy wanted to test it out. He applied it to a small board on both sides and ends. Then he ran it through several cycles of a dishwasher! Worked fine. I have also come across people who make wood spas, although the latter may have depended on wood expansion to keep from leaking.
But if you Google wood countertops, you’ll see a number of sites that show their products being used with undermount sinks. There is no way they would be doing that if they could not waterproof their countertops. You’re the kind of person who doesn’t like taking “no” for an answer. If you research it, I know you’ll find a product and a method that would do just fine.
For what it’s worth on the countertops. I also gave some very serious thought to wood countertops. What changed my mind was the WEIGHT of them and the logistics of the job itself. You can’t put them together in a day or two. It takes considerably longer, and I work alone. I decided on plastic laminate, as I will be able to use the same substrate you have on your countertops now. It’s something I CAN do with a few days with help. Obviously, with a minimum of help, you can install tile countertops.
IF you can arrange with some friends to help you with the schlepping back and forth that is needed with wood countertops, they would be absolutely glorious. Part of me still wishes I was going to do that, but I’ve made my peace with plastic laminate. Plus you have lots of space in which to work with that big barn and such. If you can bribe enough people with wine and beer, it might make a wonderful blog and superb countertop! I did make a large oak countertop which I was able to sand fairly flat with hand-held sanders, as it was too big to go through my thickness sander. The finished job looks flat, which is all you need for the end job. Just my two cents. I’ll shut up now and wait to see what you do.
You’re right about the logistics, I put them in my last house and it was definitely a 3 person job, plus we had to have space to join them together where necessary, etc. I love the look of them though it may be worth the work, we’ll see!
I love the kitchen.
I am wondering if the microwave? toaster oven? that is in the open cabinet will be comfortable. I’d think you;d get a crick in your back bending over a lot to get stuff in and out.
Did you post about how you prepared the ceiling for painting? I must have missed that. I have to paint over “rec room paneling” on walls, so I would much appreciate any tips about surface preparation, primer, etc.
It’s not any lower than my actual oven, so I haven’t noticed any issue with it yet!
For the ceiling, I had a lot of help from my mom and grandma in patching all the nail holes with wood filler, and then I ran over the whole ceiling with a hand-held orbital sander. What you see in the pics is one coat of a shellac-based primer that I put on with a paint pad (much faster than brushing and doesn’t leave the stippling that rolling would.) I’ve still got another coat of primer and probably two coats of paint that will need to be hand-brushed to go!
You have already accomplished so much. Painting your ceiling had to have been a pain in the neck. I have Ikea butcher block which I love. It is sealed with nothing more than J&J baby oil! It would be perfect in your place. As always, I enjoy getting to vicariously “ride along” with you and your projects.Good luck to you.
Margaret
The worst part is, that’s just one coat of primer on the ceiling… I have to do 1 more and at least 2 coats of paint!
Looks great Kit ~ you’re getting there. 🙂
loving all the white. so much brighter and more zen. great job! looking forward to seeing what you do for the floor.
You’re a beast! looking good. Love that sink. I’ve been debating adding a very similar one to my own kitchen when we get there.
Fantastic before and after renovation project. This is a particularly inspiring DIY project because it’s not a gazillion dollar renovations, and a normal person can imagine doing it. Thanks for posting this.
I would paint it a color in the blue family, turquoise or even a cobalt blue. Great job!!!
Comments are closed.