The good news about spending 20 hours in my garage last weekend with a couple bottles of wine, approximately 700 lbs of butcher block, and almost all of my saws is this: I still have all my fingers.
The bad news is that I won’t have a functional kitchen sink again for another week because I did not get all of the counters in.
I got some of them in though, and that’s the important part.
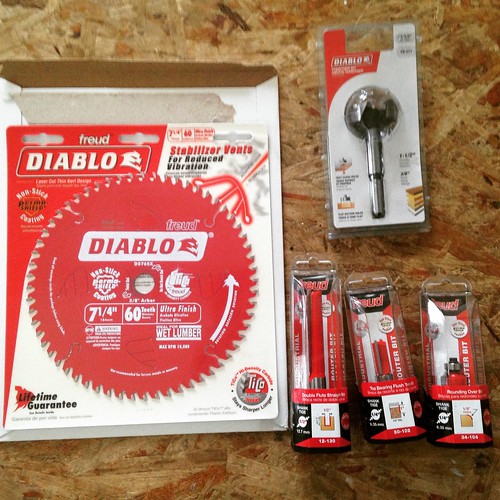
I’d been obsessing about cutting the butcher block for a solid two weeks, so come Saturday morning I was good and ready to get this shit over with. I bought a handful of new blades and router bits that showed up late last week…
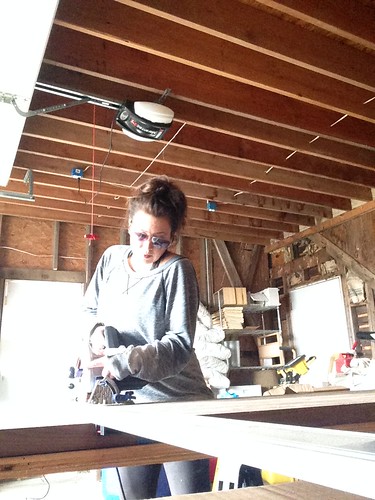
And I was super excited to make my kitchen non-functional for the millionth time, obv.

That’s my is-it-too-early-to-start-drinking face. (Spoiler alert: It was not too early to start drinking.)
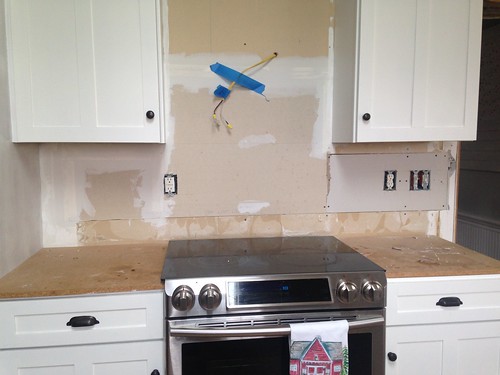
Before I could even start with the counters I needed to patch the missing sections of drywall from back when the old backsplash was removed (that was one of the most fun days of this kitchen project by the way, love working with my mom and grandma and all the big tools.)
There’s really no reason I couldn’t have done this drywall months ago, but it was actually a nice warm-up to all of the measuring and precise cutting I was going to have to do later in the day with the counters…
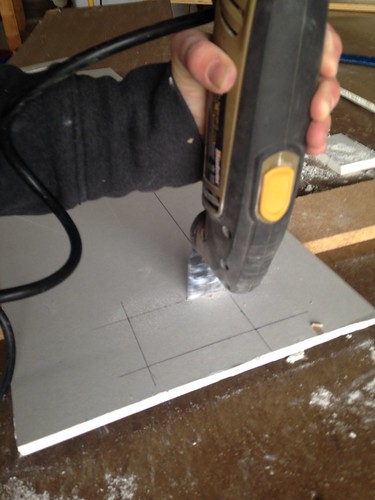
I almost never cut these holes exactly right the first time, but I was on-point Saturday.
It was a couple of hours well spent.
I also managed to tape all the seams, and my plan is to smooth out the walls and then use a tile membrane over them before installing the backsplash.
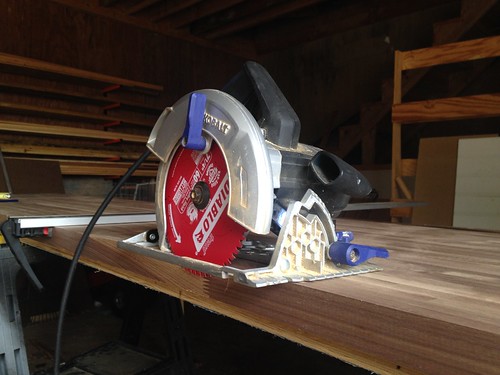
Once that was done it was on to the butcher block. I’ll do a full post on how I tackled cutting the counters (and why I did what I did) when it’s all done, but the short version goes like this:
1.) New blade on the circular saw. (It’s a 60-tooth Diablo blade.)
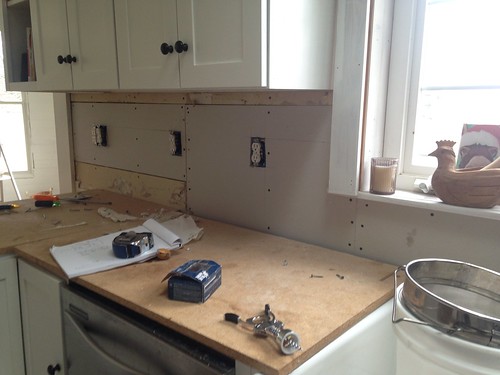
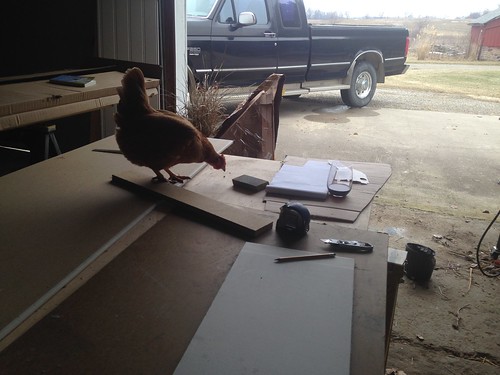
2.) Straight-edge clamped to the wood. (Which I don’t have a picture of, but here’s a picture of a chicken helping instead.)
3.) Painters tape over the top of the cut and the sizes.
4.) Set the blade depth to half the depth of the wood. Cut. Reset the blade to the full depth of the wood, cut again.
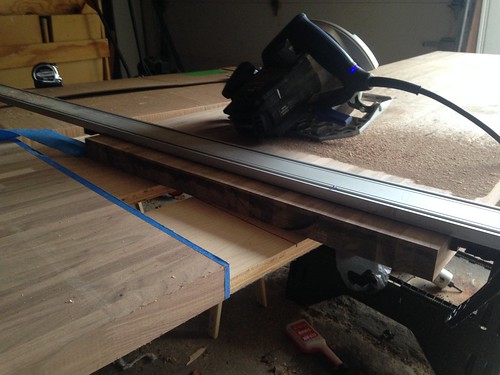
5.) Breathe a huge sigh of relief.
There was just the tiniest bit of stair-stepping on some of the cuts doing it that way, but nothing that hitting it with a little 120 grit on the orbital sander couldn’t take care of. There was absolute no tearout on the cuts.
I also tried “cleaning up the edge” with a 2″ straight bit on my router, and I was not thrilled with how that worked on my straight cuts at all.
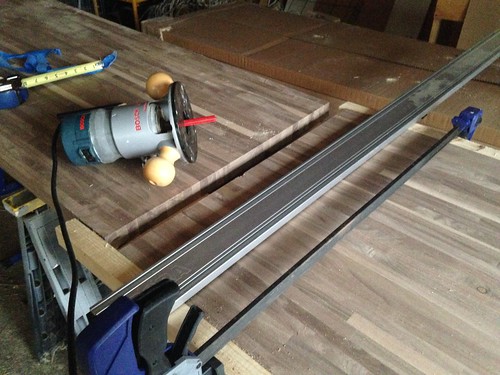
However, when it came time to cut the hole for the stove, the router worked perfectly. I used the plunge base on my full-sized router (with that same 2″ bit) and cut through about 1/3 of the depth of the counter at a time. (Maybe 3/8″ depth each pass.)
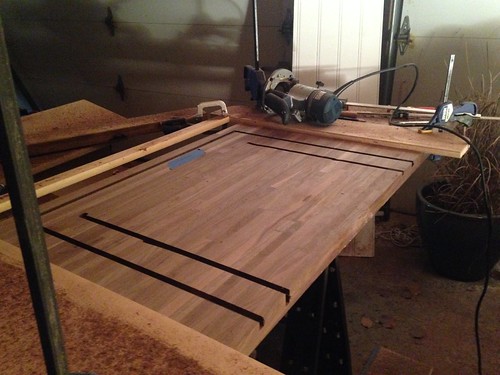
Three passes and I had a great cut. There was minor tear-out on the “exit” of the cut which I was also able to solve with the sander.
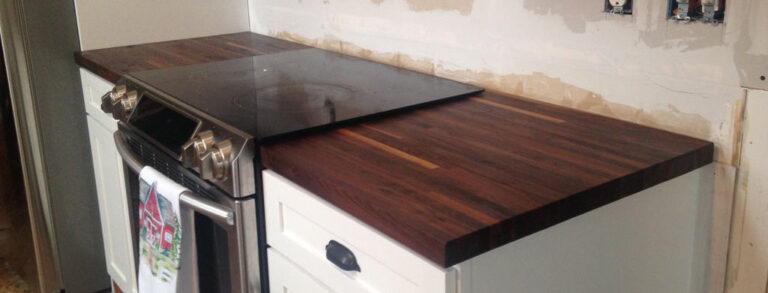
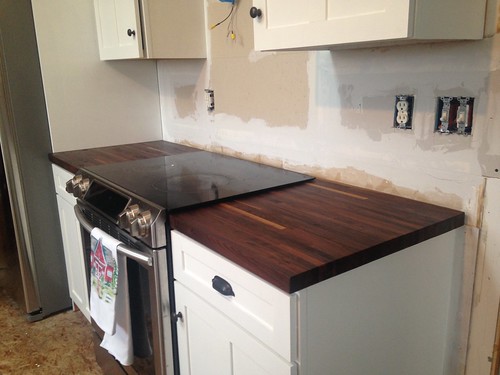
This was by far the easiest piece of counter to finish. After cutting it to size and cutting the hole for the stove (it’s a slide-in stove, if you’re wondering why there’s a strip of counter behind it), I used a very small round-over bit (1/8″) on my smaller palm router to soften the corners…

And yes, I do have a matching set of routers.
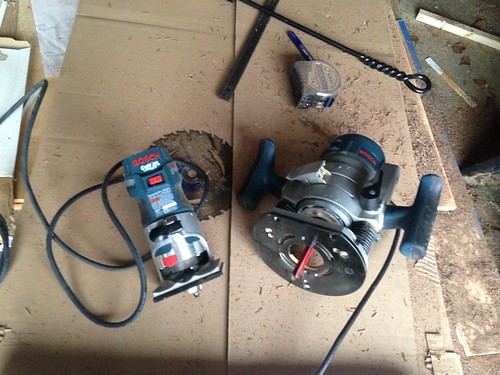
Just what every girl needs.
By Sunday night, this piece of counter got it’s first coat of finish and man, it’s nice to finally see what it will look like when it’s all done.
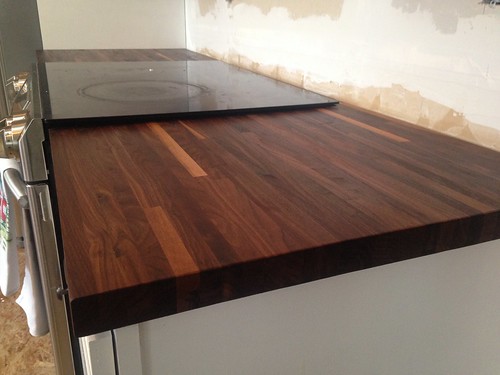
(I’m using Howard’s Butcher Block Conditioner with wax and oil, which is what both Sarah from Ugly Duckling House, and Alex and Wendy from Old Town Home used on their counters.)
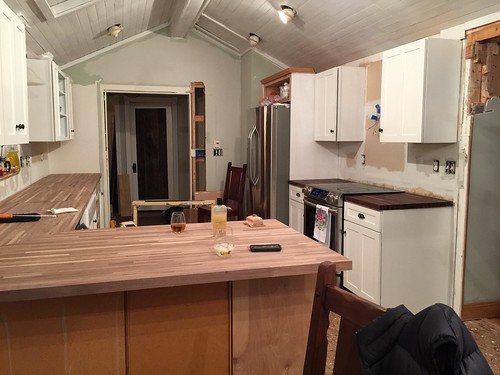
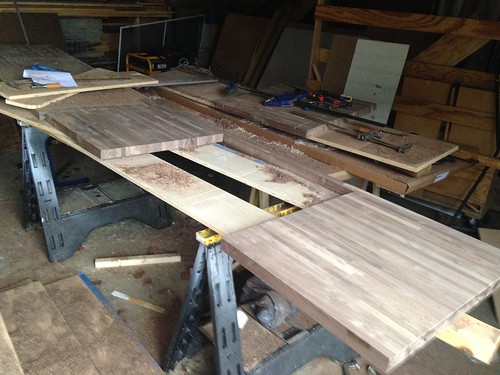
As for the bigger, more complicated section of counter, well, the pieces are cut.
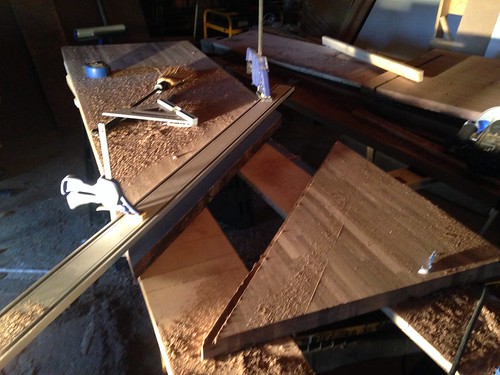
And everything fits… ish.
The trick is that I’m at a stage where it’s really difficult for me to do the next steps without another set of hands (or more). I need to join the 3 sections of counter together and then cut the sink hole and move that mammoth section of counter back in place all at once.
I’ve called in some reinforcements for this weekend and, fingers crossed, I could have actual finished counters in the next week.

23 Responses
Looking great so far, keep it up.
I really like the way it looks once you put the conditioner on it.
Woot Woot!! You did it. I had no doubt. It’s looking great. I’m seeing light at the end of the tunnel. 🙂
Looks Awesome! I can only imagine how good the wood smells as you were cutting it. That is almost the main reason I love carpentry!
Question off topic!! Do you still love your greenhouse and did you put it together all by yourself? Did you look at metal ones and what helped you to decide on the one you decided one?
I was thinking of getting one?
Thanks,
Stacy
I do love my greenhouse, but this will be the first spring I actually get to use it. I put it together 90% by myself, but there were a couple of pieces that it was handy to have another set of hands to hold in place while I put the screws in. I tend to like wood structures because I know I can repair/replace myself as necessary but honestly I didn’t do a ton of research on metal, etc.
Thank you for responding! That is totally true, wood would be easier to repair! Thanks
These are stunning! I will have to price to replace my laminate. Also need to know best finish for frequent wipe downs in food prep area as we cook a lot!
Gorgeous! I love how rich they look.
Long time reader and first time commenter . . .
Love the site, the stories and everything you do. Thanks for always bringing the knowledge and laughs.
So you are thinking of applying a backsplash to a membrane of some kind. I’m guessing you are thinking of a sticky matt that gets adhered to the wall and then tiles/grout?
I’m considering that too – do you have a brand in mind already?
Yes, you’re exactly right. I’ve used the Durock tile membrane on a floor before (you can see how it worked for me here.)
Whoa!
How did you move that stove piece from shop to kitchen?!
Maybe it’s not as fragile as it looks?
I actually clamped a board on the hole to keep it stable while we moved it. Forgot to include that pic!
It looks like you cut the butcher block corner pieces at 45 degree angles in the top photo. Thank you SO MUCH! Almost every other butcher block kitchen counter I see just smashes two boards together and it gives me major eye-twitch.
Holy eff, me too! I get that it costs more (and there’s more waste, but a butt-joint on something where the grain shows like this is just… eye-twitch-inducing.
(I tried explaining this to my bf and he seriously just looks at me like I’m crazy.)
Is that an induction top stove and if so, how are you liking it?
I’m 98% sure it’s just a regular electric glass-top stove… although I just realized I’m not entirely sure what the difference is. 😉
About a thousand bucks 🙂
Induction tops are neat – nothing gets stuck on it because it’s the pot that is the source of heat. There is an electromagnetic coil underneath that reacts with the pot (as long as it’s steel).
Induction boils faster than gas and simmers with more precision. Doesn’t work so well with pans that aren’t flat like woks.
Whew, nope. I’m not that fancy! Super interesting though.
I’ll be damned. When you talked about the Diablo blade, I thought it was a new 10″ blade for your table saw. Sixty teeth for a 7 1/4″ blade surely comes out very close to the number of teeth per inch that you’d have with an 80-tooth 10″ blade. I still say one pass with the right blade will do the job just fine. If you cut anything more, use masking tape in every place you had tear-out.
The other thing you were worried about was cutting the hole for the sink because of tear-out. The last time I went to KBIS in Las Vegas, I also went to the construction side of the show and was able to get a free Starrett jigsaw blade. It’s supposed to cut without tear-out because the teeth go in both directions. I brought it home, tried it out, and ended up getting a few more blades. It is everything they said it would be.
You’re off to a great start, though, which I pretty much knew you would be. If you spend that much time with preparation and actually have the skills you’ll need, good results are pretty much guaranteed. And sleepless nights!
Here’s a link to the jigsaw blade, if you’re interested.
https://www.amazon.com/Starrett-BU3DC-2-Bi-Metal-0-060-Inch-Thickness/dp/B00DS7VY1G/ref=sr_1_1?ie=UTF8&qid=1487630033&sr=8-1&keywords=starrett+BU3DC-2
Bought butcher block last weekend and hoping to get started putting in this weekend. Definitely getting this saw blade on your recommendation. There are a couple things I’m coming across in my internet research and I’m wondering how you addressed them.
-Did you leave the counters to acclimate to your kitchen for a few days?
-How are you fastening to allow for expansion/contraction? I’ve read that the wall side should be tightly affixed (you don’t want to see a gap there when it contracts) but the outside edge should have more flexibility; I’ve seen a few different suggestions on how to do that. Thoughts?
I’ve seen neither of these things addressed on DIY sites thus far, only on woodworking forums and installation guides from butcher block manufacturers (mine are from IKEA, so no real instructions there). Just wondering what you’ve come across in your research.
There is a site called WoodWeb. It’s a place for professional woodworkers–cabinetmakers and such. These guys do this for a living, but anyone can access this site. I often go there for advice. Someone writes in with a question, and these guys start kicking it back and forth, giving whatever advice they may have. If you go there, you do not have to sign up for anything, give up your email address or anything else. You can go in and out, just as you on this site. I just now went there and entered “attaching wood countertops” in their search engine. They came up with 26 discussions on various aspects of it. Some of those will be better than others. Here is a link to that particular page, if you’re interested.
http://www.woodweb.com/cgi-bin/search/search.cgi?Realm=All&Terms=attaching+wood+countertops&submit.x=0&submit.y=0#reference
Hey Shannon – Hopefully I’m not too late to be helpful.
– I didn’t let the counters acclimate before I cut them (they were in the garage) but I did let them acclimate before I attached them, for what it’s worth (that was mostly a space issue for me)
– I unintentionally ended up with a 3/16 gap on the wall-side, so I’m just going to caulk that and call it an expansion joint 😉 But here’s how I decided to fasten: I drilled with a bit larger than my screws through the wood brace on the cabinet, then pilot drilled a smaller hole through that one and into the counter. Then I used a large washer between the brace and the screw, and fastened it down snugly. I don’t know how this is going to work, but my thought was that it will allow some shifting while still keeping the counter snug to the top of the cabinets.
Edit: I drew a picture if it helps: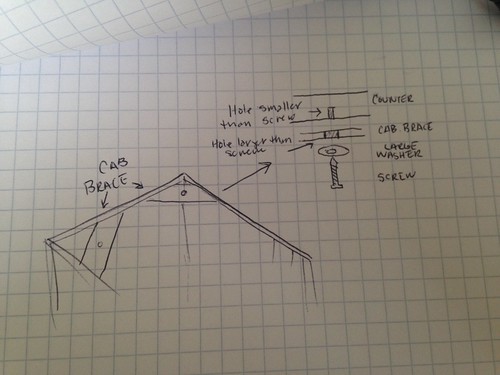
Thanks! Definitely not too late to be helpful (kitchen drama going on here). That is the way I was thinking of attaching too.
Your kitchen looks great. I’m definitely going to spring for walnut in my next house.
The output is so awesome, your kitchen now looks more stunning now.
Comments are closed.