
Let me just say that not much could top the finish and luxury of the half-inch plywood that has been standing in place of counters in the kitchen for, oh, four months.

And as it turns out, I know from experience that plywood counters are perfectly acceptable when getting your house appraised for a loan, but the lack of a kitchen sink is not.
Since the house is being appraised on Tuesday it meant those fabulous plywood counters needed to be replaced by something slightly sturdier. Lucky for me there was 24 lineal feet of butcher block hanging out in the living room.
The kitchen layout required one long stretch of counter on the left side, two smaller sections of counter on either side of the range, and a bigass square piece on that corner cabinet that was so fun to install.
While the straight runs were pretty easy (just cut to length) the corner piece required joining two sections of counter together which was an excellent use of the portable Kreg jig setup that came in my kit. (For a step-by-step look at using the jig, check out this post.)
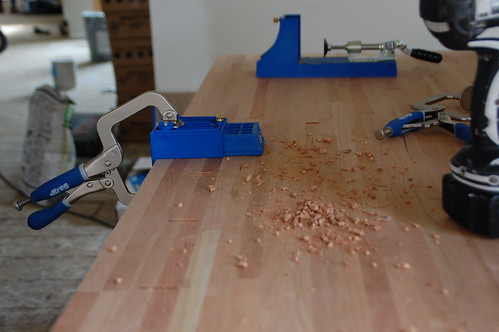
The pieces were joined together first, then cut to size for the corner piece.
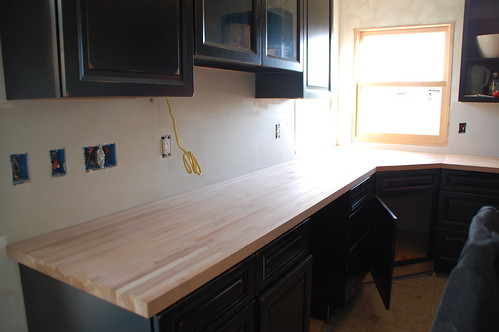
Looks beautiful, but seems to be missing someth… oh yeah, there needs to be a hole for the sink there, right?
Now, normally I don’t take the easy way out of projects, but given the circumstances I might have gone with a drop-in style sink, but for the first and only time while building this house I was not the one that had a crazy moment and said, “Oh, you know what would be awesome? Undermount sink!” But someone else totally did.
If anyone else is considering an undermount sink in butcherblock, I’ll give you the same recommendation I gave MysteryMan just after the have you lost your mind look.
Use a jigsaw to cut the “rough” opening for the sink, 1/4-1/2″ smaller than the final hole. Then cut a template out of 1/4″ plywood the exact size and shape of the sink hole, and use the router with a 1-1/2″ straight bit and flush bearing to trim out the rest.
He actually did a fantastic job at this (something I probably wouldn’t have attempted… that’s role-reversal for you) and the hole for the sink looks awesome.

As you can see, attaching all of the pieces together was a little tricky, but almost anything can be accomplished if you twist yourself into a pretzel inside a cabinet, apparently.
The counter was attached to the cabinets by drilling 1/2″ holes through the blocking under the cabinets, and then using a 1″ deck screw with a 3/4″ washer on it to pull the counter snug to the cabinets.
In the midst of all this counter craziness I was also dragging my step ladder around the room touching up the paint job.
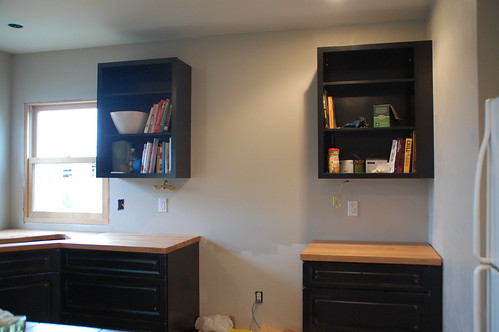
There will eventually be a backsplash between the counter and wall cabs, but that’s be a project for MysteryMan to finish later… so for now I painted everything with Revere Pewter to make it feel more finished.
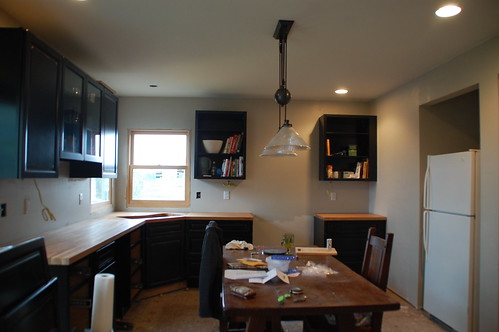
The kitchen is clearly not done yet, but it looks like I may be able to wash dishes somewhere other than the laundry sink in the near future. It’s not as exiting as washing dishes with a garden hose, but a girl has got to get her kicks in where she can, right?

5 Responses
Well washing dishes with a hose does sound pretty awesome. Kitchen is looking great.
I actually really like the butcher block with the black cabinets, and dark kitchens aren’t usually my thing! The white refrigerator kinds of stands out though, are you planning to go black or stainless?
I assume that the counters are finished with mineral oil – is that all the inner edge of the sink cut-out gets in the way of finishing also? Or is there some super duper way of protecting that edge that I’m not thinking of.
Wow! Lots of progress in there. Looks great!
Looks amazing! Beautiful!
Comments are closed.